Last Updated: June 24, 2026
In this article:
Overview
Create meaningful personal and professional goals step-by-step within Quantum Workplace.
This article will guide you step-by-step through the goal-creation process.
Learn more about all things Goals.
Access the Goal Creator
To access the goal creator and create a goal:
- Click Goals in the left-hand navigation menu
- Click Create a New Goal in the top-right to navigate to the goal-creator
Create a Goal
A step-by-step guide for each goal creation step.
Your progress is automatically saved as you create your goal. Return to the goal, indicated as a Draft Goal, to resume progress.
Name & Type
In the initial goal creation step, specify the name and settings for the goal.
To complete the Name & Type step:

- A. Name: Enter the goal's name, typically the desired goal outcome
- B. Goal Type: Select the goal type:
- Development: a goal for growth in a skill or competency
- Personal: a goal driving the efforts of an individual or group of individuals
- Team: a goal reflecting the collaborative effort of an entire team, learn more about Team Goals
- Organizational: a goal driving the direction of an entire organization, learn more about Organizational Goals
- C. Privacy: Specify the goal's privacy settings
- Public: All users have visibility into the goal's progress and details
- Restricted: Goal visibility is restricted to goal members, learn more about managing goal visibility
- Note: Once launched, privacy settings cannot be changed for Organizational goals and may be predetermined based on setup by your admin
- D: Performance Goal: Toggle if the goal should be created as a Performance Goal for inclusion in Performance Reviews via a Conversation Booster, learn more about Performance Goals
- E. Under More Options, you will find additional ways to enhance your goal:
- Alignment: Align your goal with other existing Team, Manager, Organizational Goals, and even your other goals, learn more about aligning goals
- Description: Add details about your goal and why it matters
- Tags: Searchable terms to help you organize your goals, learn more about Goal Tags & Categories
- F. Goal Assistant: Enter all or some of the fields to streamline the goal creation process with intelligent, relevant recommendations, learn more about the Goal Assistant
Click Next to proceed to the Key Results step.
Key Results
In the Key Results step, configure the Key Results and specify how your goal will be measured.
To complete the Key Results, KR, step:

- A. KR Name: Enter the name of the Key Result, typically the metric being measured
- B. KR Metrics: Specify the Start & Target values and the Unit of measurement
- Units of measurement include: Percentage, Numerical, Complete/Incomplete, and Currency
- Use the Tracking description to preview and confirm the Key Result setup
- If your goal involves decreasing a value, enter a larger Start value and a lower Target value- use the Tracking description to confirm the Key Result setup
- C. New KR: Click to add a new Key Result to the goal
- D. KR Options: Additional options for the corresponding Key Result, in order from left to right:
- Assign To: Assign and delegate the Key Result to a specific user
- Duplicate: Clone the Key Result's settings as a new Key Result
- Delete: Delete a Key Result
- E. Delete Goal: Click to delete the goal, this cannot be undone
- F. Goal Assistant: Click the recommended KR's + icon to automatically update the Key Result Name field, learn more about the Goal Assistant
- The KR Name and metrics can be updated once added
Click Next to proceed to the Goal Dates step.
Goal Dates
In the Goal Dates step, specify the start and end dates for the goal.
To complete the Goal Dates step:

- Click the date window to expand a menu of pre-set date options
- Select a pre-set date option, i.e. Q1, Annual, etc., or click Custom Range to specify a custom start/end date
- Click Next to proceed to the Users step
Users
In the Users step, specify the Goal Owner and if any, Contributor(s).
The Goal Owner is responsible for the goal's progress and completion. Contributors are users added to the goal who can view and update the progress of the goal. Goal Followers have visibility into the goal but cannot make any updates. Learn more about Goal Members and Visibility.
Managers and full admin users only receive goal notifications if they are assigned to the goal as an Owner, Contributor, or Follower.
To complete the Users step:

- A. Owner: Enter and select the Goal Owner
- By default, the goal creator is the initial Goal Owner, click your name's corresponding x to remove yourself and add a new Goal Owner
- There can only be one Goal Owner at any time
- B. Contributors: Enter and select the Goal Contributor(s)
- C. Post-Launch Members: Toggle if Goal Contributors and Followers can be added to the goal once it's launched
- Goal Followers can follow and view the goal but will not have the goal displayed in their Employee Snapshot, learn more.
Click Next to proceed to the Review step.
Review
In the final Review step, review the goal details and launch the goal.
To review and launch a goal:

- Review the goal details and settings
- Optionally, click Create in Draft Mode (Figure A) to launch the goal as a draft- allowing you to make further edits from the Goal Details page before finally launching the goal
- Use the timeline nodes in the header to navigate to a different step to make necessary edits
- Click Create Goal (Figure B) to publish the goal
Resume a Draft Goal
As you create your goal, your progress is saved and can be resumed at any time. This includes automatically saved progress as you configured the goal or goals that were published in Draft mode. Learn more about Draft goals.
To resume a draft goal:
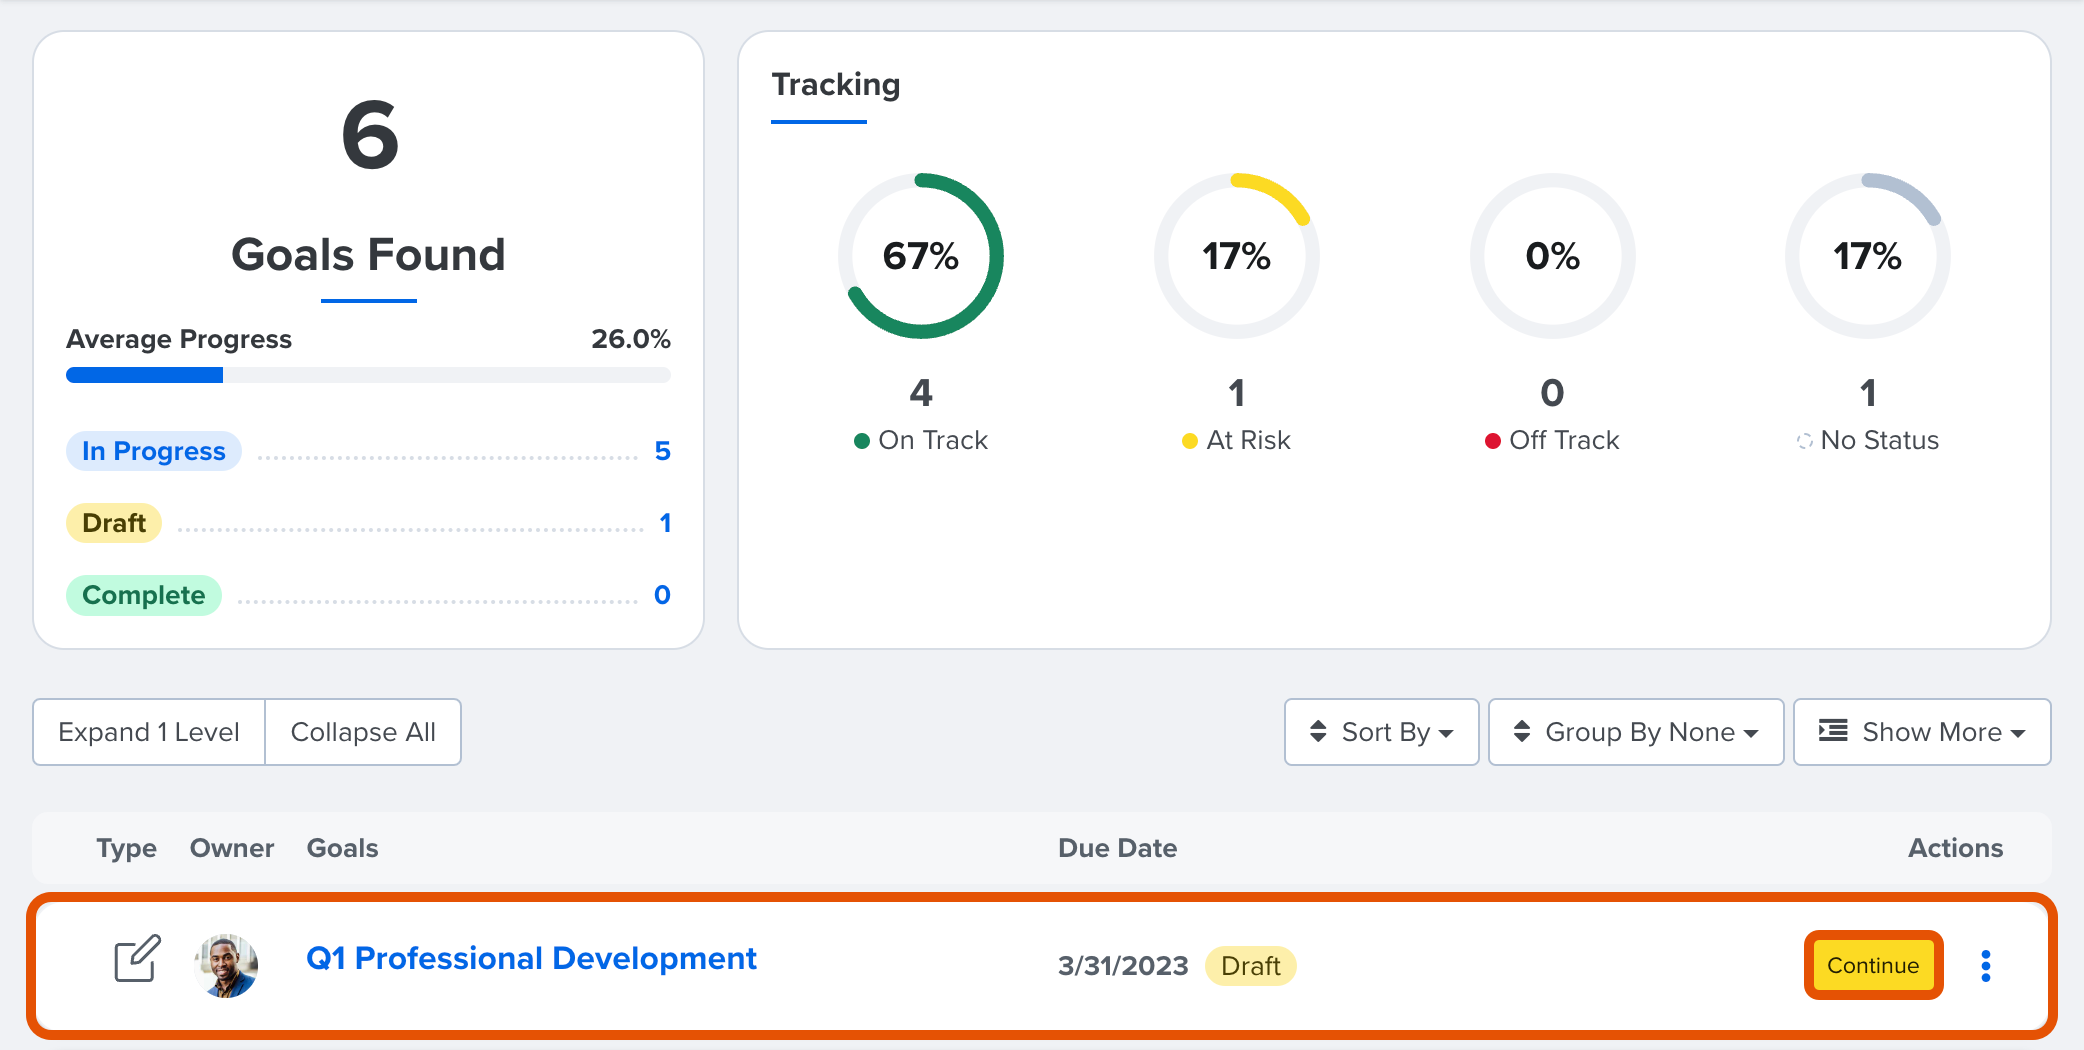
- Click Goals in the left-hand navigation menu
- Identify the unpublished goal, indicated with a Draft tag
- Click the draft goal's corresponding Continue to resume progress in the goal creator
One HR platform for connected talent insights. See how Quantum Workplace brings your data together across 1-on-1s, talent reviews, performance reviews, and more—so you can spot trends, act fast, and make more informed people decisions. Explore the interactive product tour or request a personalized demo with your Customer Success Manager.