Before you begin your set up, find your contest here and read through the FAQs. These FAQs include critical information about your contest that you need to know before you begin your set up, including which employees are eligible to take the survey.
1. Review the questions you'll answer for your survey set up.
To the right under the header Downloadable Resources, you'll see two links: Preview Setup Questions and Preview Survey. Click Preview Setup Questions to see the questions you are expected to fill out as part of your Survey Setup (before you can launch your survey). Click Preview Survey to see the complete survey that will be sent to your employees. 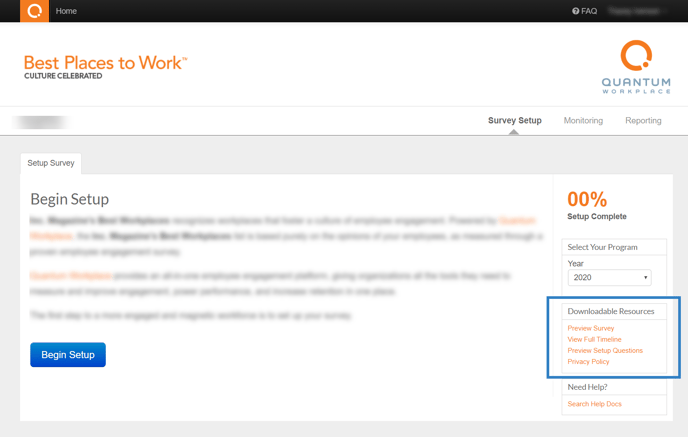
2. Begin your set up.
Click Begin Setup and complete all questions.You do not need to complete all of the questions in one sitting. Once you complete a page, click Next to progress to the next page. You must move to the next page in order for the page you have just completed to be saved.
Note on Reporting Upgrades: You can choose to upgrade to the advanced reporting tools after the set-up process. Choose the free option and continue if you do not want to upgrade or if you want the opportunity to upgrade later. The custom upgrade is only available during the survey set up.
3. Upload your Employee Information
Once you have answered all of the questions required for survey set up, you will progress to the section of the where you will upload the names, email addresses, and optionally, additional demographics for all of your employees who are eligible to take the survey. In order to upload your employee's information, you must download the Excel Template in your account. You will add your employee's information to the spreadsheet and upload it. 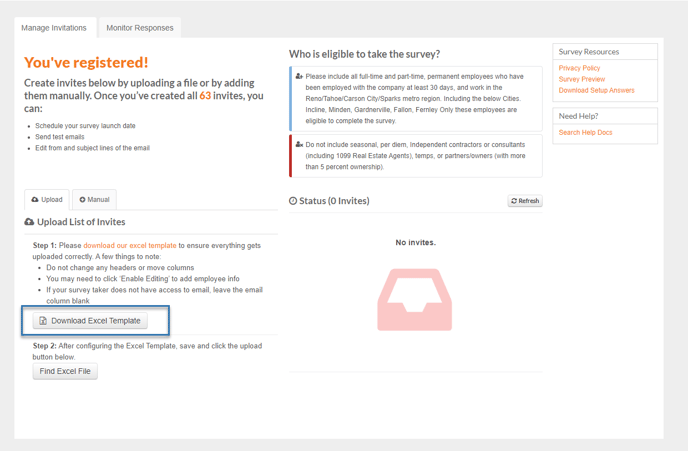
Within the spreadsheet, DO NOT delete any columns or headers. The only thing you will need to delete are the example values in Row 2: example@email.com, First, Last, and OPTIONAL.
Additionally, including demographics is completely optional. You only need to upload employee name and email address; you can leave the remaining columns blank if you prefer. The primary reason to include demographics is to provide you with more robust data if you choose to purchase your reports by upgrading to the Insight package.
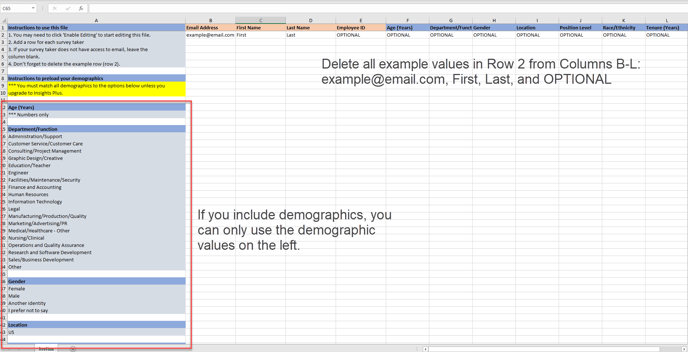
If you do include demographics, all demographic values must match exactly with the values provided in Column A. For example, the only value you can include for Location is "US" per column A, and you can only choose from the Department/Function values listed in Column A. For tenure, you can only enter whole numbers, so for employees who have been with your company for less than one year, you will either round down and enter 0 for 0 years or round up and enter 1 for 1 year. Remember, you can choose which demographics (if any) to include.
If you do not include demographics, your employees will have the option to self-identify with all of the demographics on the survey. Answering the demographic questions is entirely optional for your employees.
Once you have added your employee information, save the excel file and select it to upload. If you receive an error message, the import did not go through successfully. Download the error report and fix your errors on the spreadsheet accordingly. Then, save the file again and re-upload your file.
4. Prepare to Launch
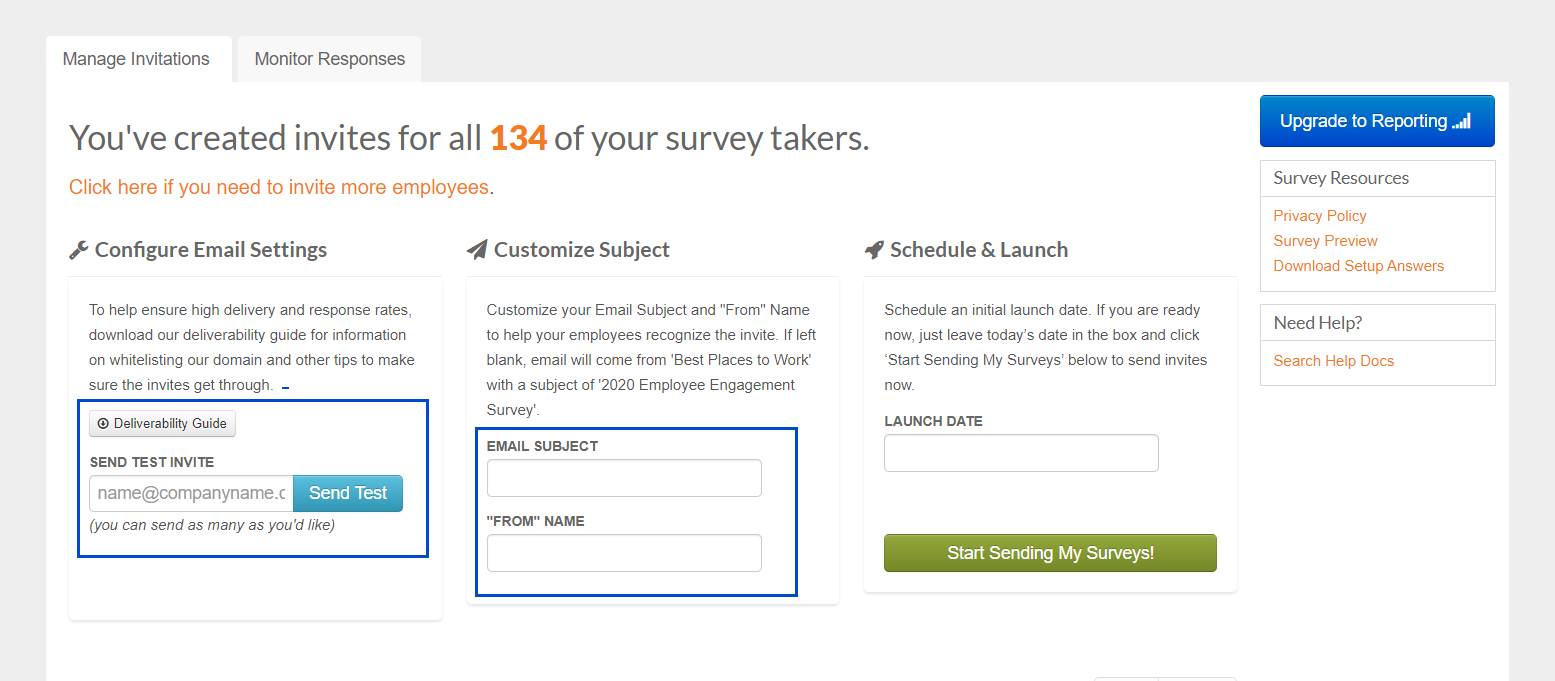
Once you have successfully uploaded your employee information, you will progress to the section of the site where you can launch your survey. On this page, you can download our Email Deliverability Guide to share with your IT team; this guide will help your IT team ensure that the email invitations we send to your employees are successfully delivered. Under the Customize Subject section, you can customize both the From name and the Subject line of the email invitation.
You can also send yourself (and any colleagues) a test email to see what the email will look like.
5. Schedule or Launch your Survey
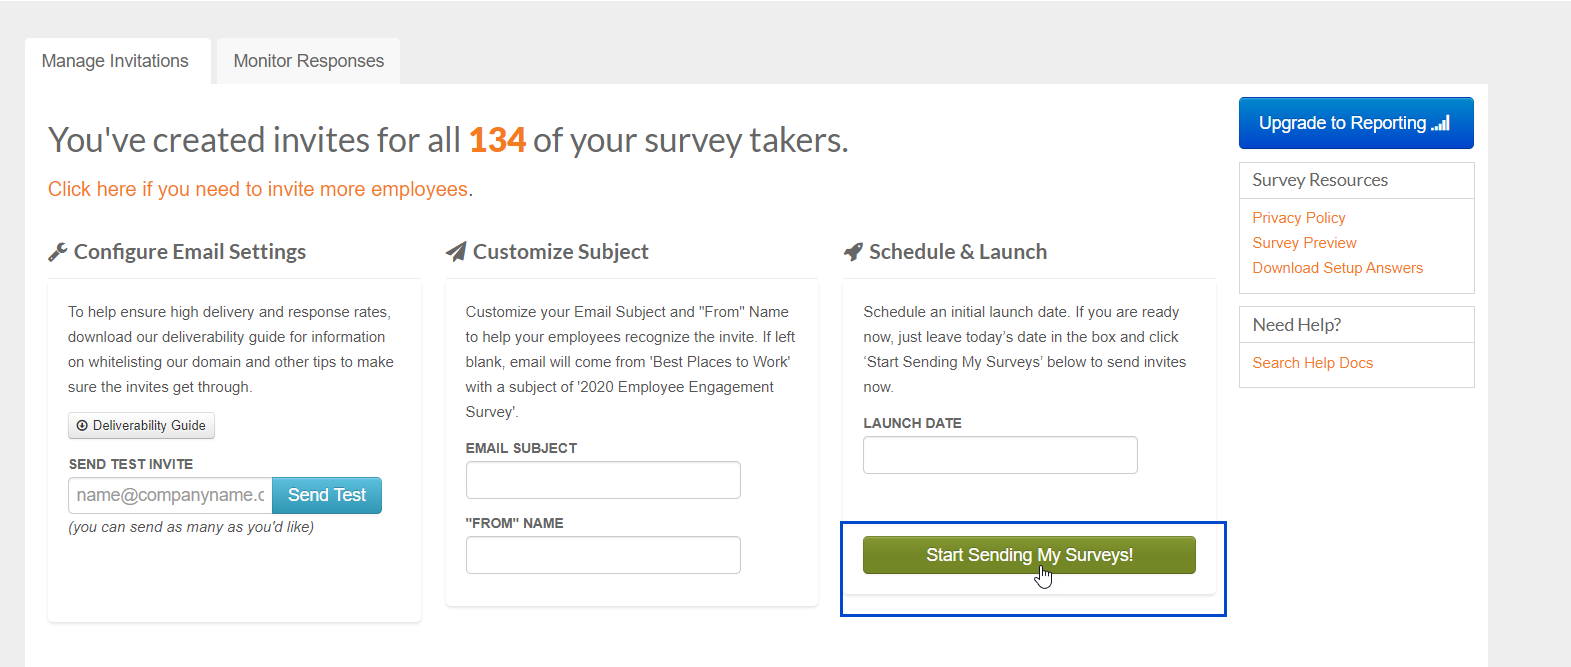
You can launch your survey immediately by clicking the Start Sending Surveys button, which will cause email invitations to send to your employees immediately (they will receive them within 10-15 minutes depending on how many employees you have). Alternatively, you can schedule your survey to launch on a later date by entering that date under Launch Date. If you choose to schedule a date for your survey to launch, the survey will launch at 7:00 AM Central Time on that date.
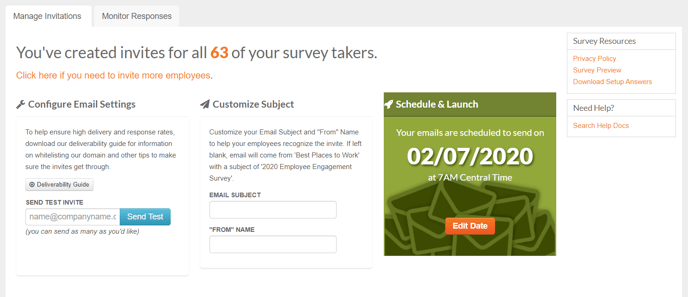
Note: You can still customize your subject line after you schedule your survey launch by clicking Edit Date. Then, update your Email Subject and "From" Name and click Save and Continue.
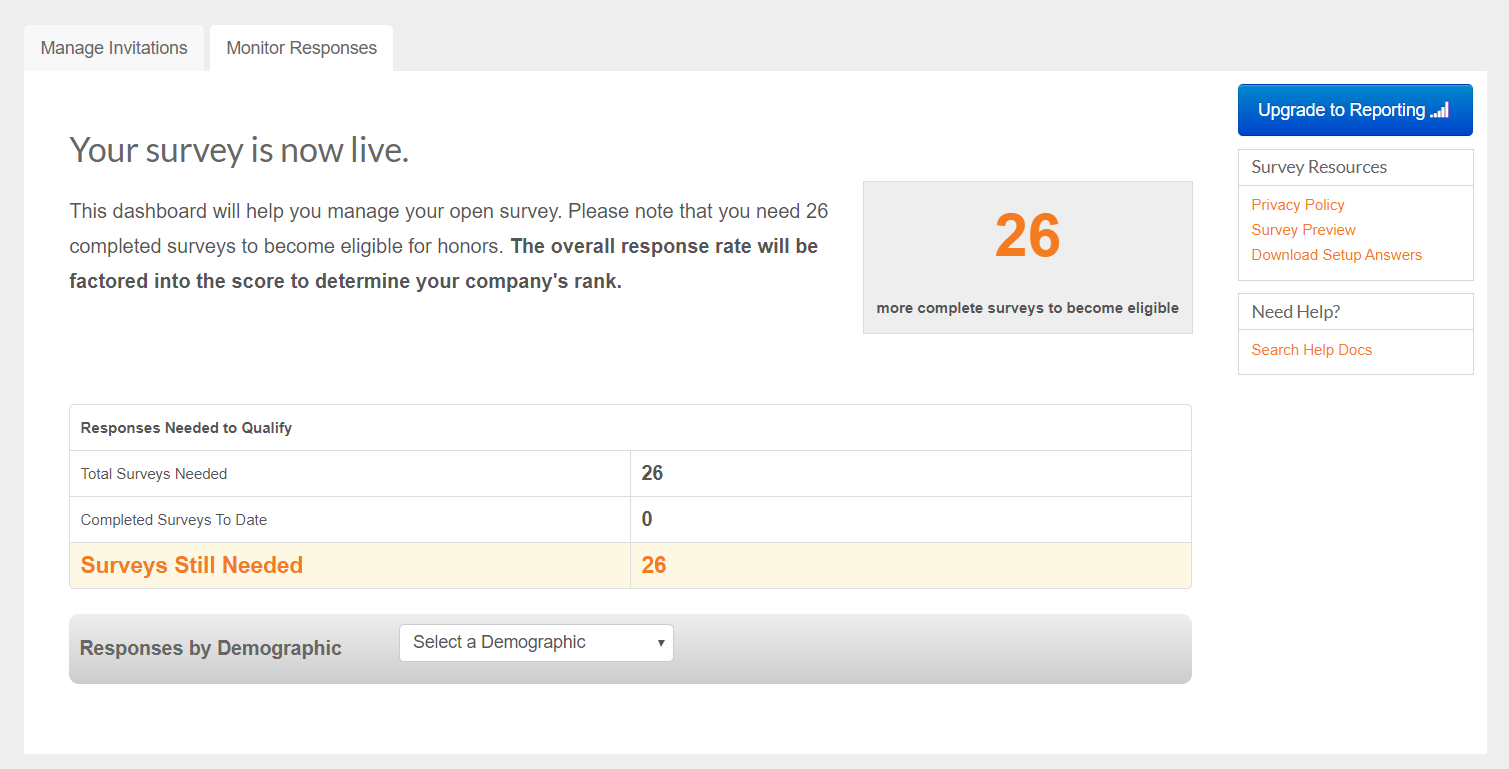
6. Monitor your Survey
Once your survey launches, you will be able to double check that the invitation emails have been successfully delivered and update the email address for any employees who did not receive their survey as needed.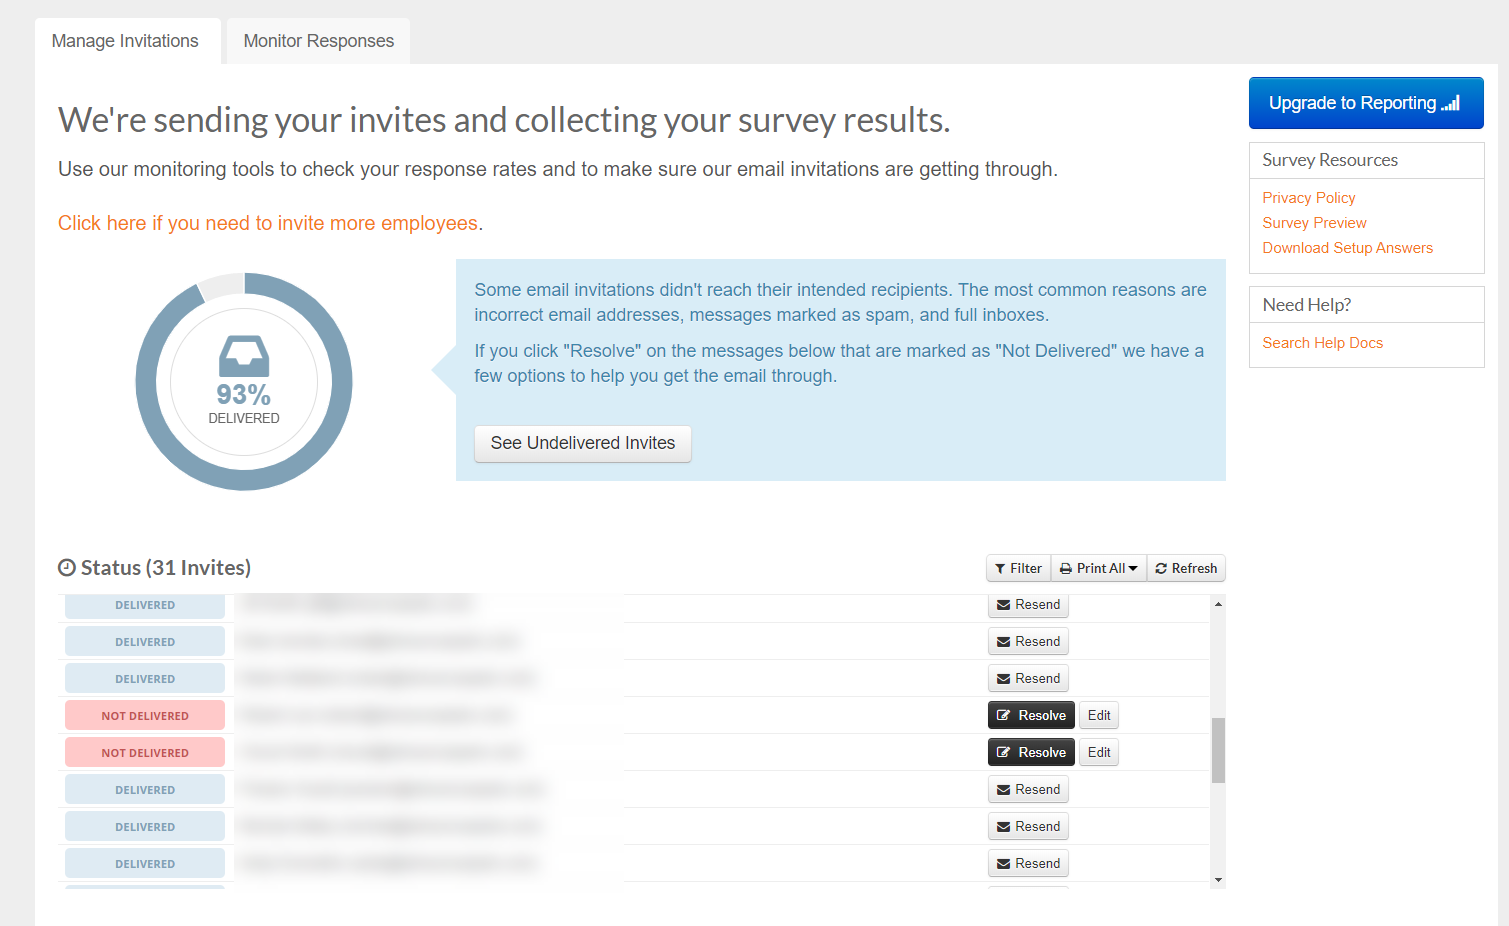
You will also be able to monitor how many surveys your employees need to complete for your organization to be eligible to become a finalist under the Monitor Responses tab.