In this article:
Welcome Email
New users of Quantum Workplace receive a welcome email from Quantum Workplace. First-time users can click Activate your account to set up their login credentials.
Sender: Performance by Quantum Workplace (noreply@quantumworkplace.com)
Subject: Welcome

Create a Password
If you click Activate your account, you are taken to the Reset Password screen.
- Verify your username appears correctly
- In the Password field, enter your password
- In the Confirm Password field, enter your password again
- Click Set Password to finalize your new password
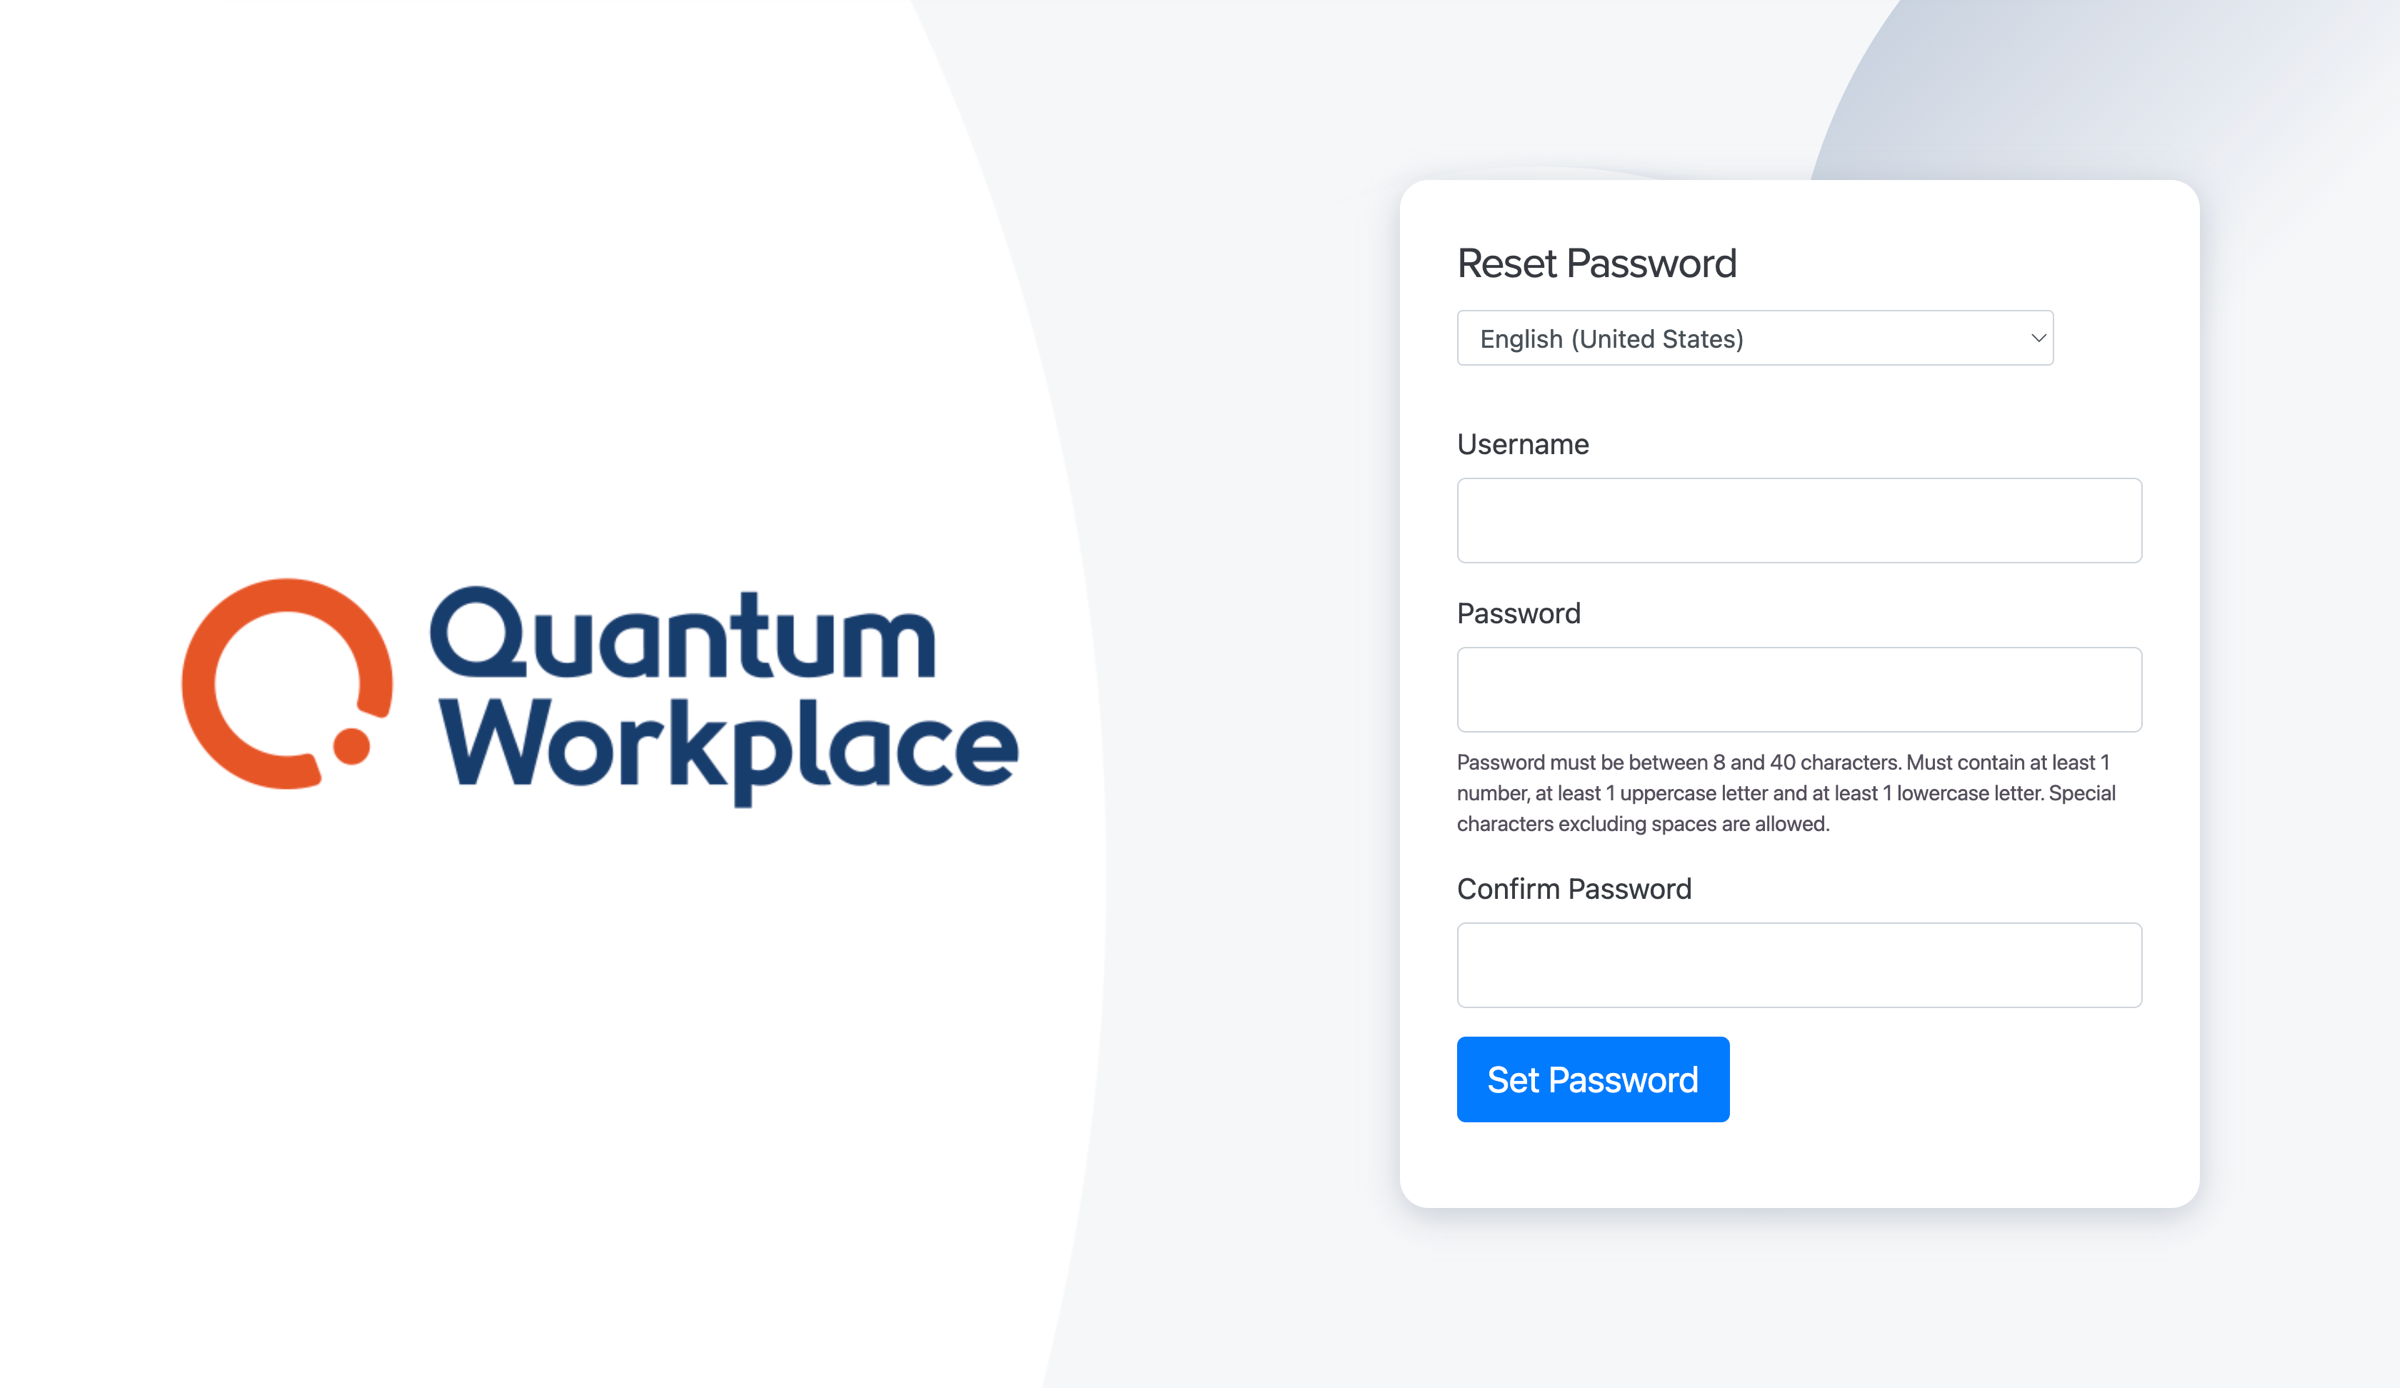
Password Requirements
- Between 8 - 40 characters
- Must include at least one number, at least one uppercase letter, and at least one lowercase letter
- Special characters are allowed
- Spaces are not allowed
Account Settings
In Account Settings, update your profile picture, select a preferred language, update email notifications, and more.
To access Account Settings:
- Click your profile icon in the top right
- From the drop-down menu, click Account Settings
There are three tabs in Account Settings:
- General: update personal and contact information, and create new passwords
- Profile Photo: upload a profile photo
- Notifications: manage your notification preferences
After making any changes in the General or Notifications tab, click Save to confirm your changes.
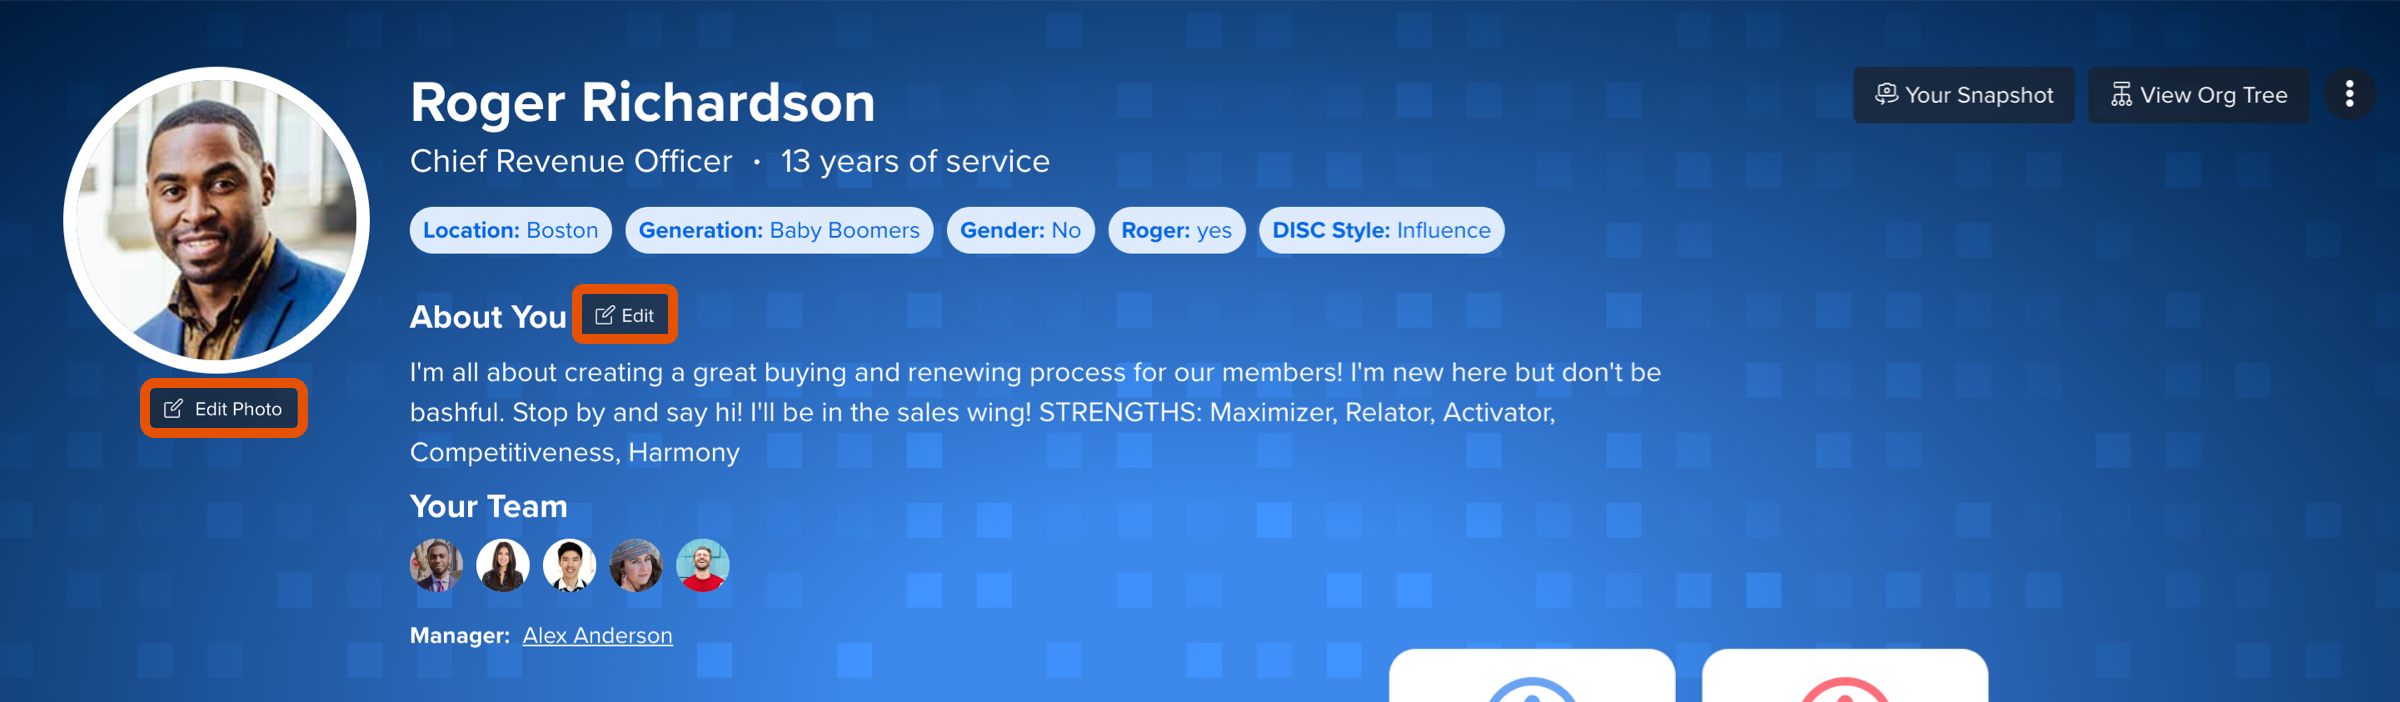
Your Profile
Your Profile Page displays information about you and your activity in Quantum Workplace and is visible to both you and your colleagues.
To access Your Profile:
- Click your profile icon in the top right
- From the drop-down menu, click Your Profile
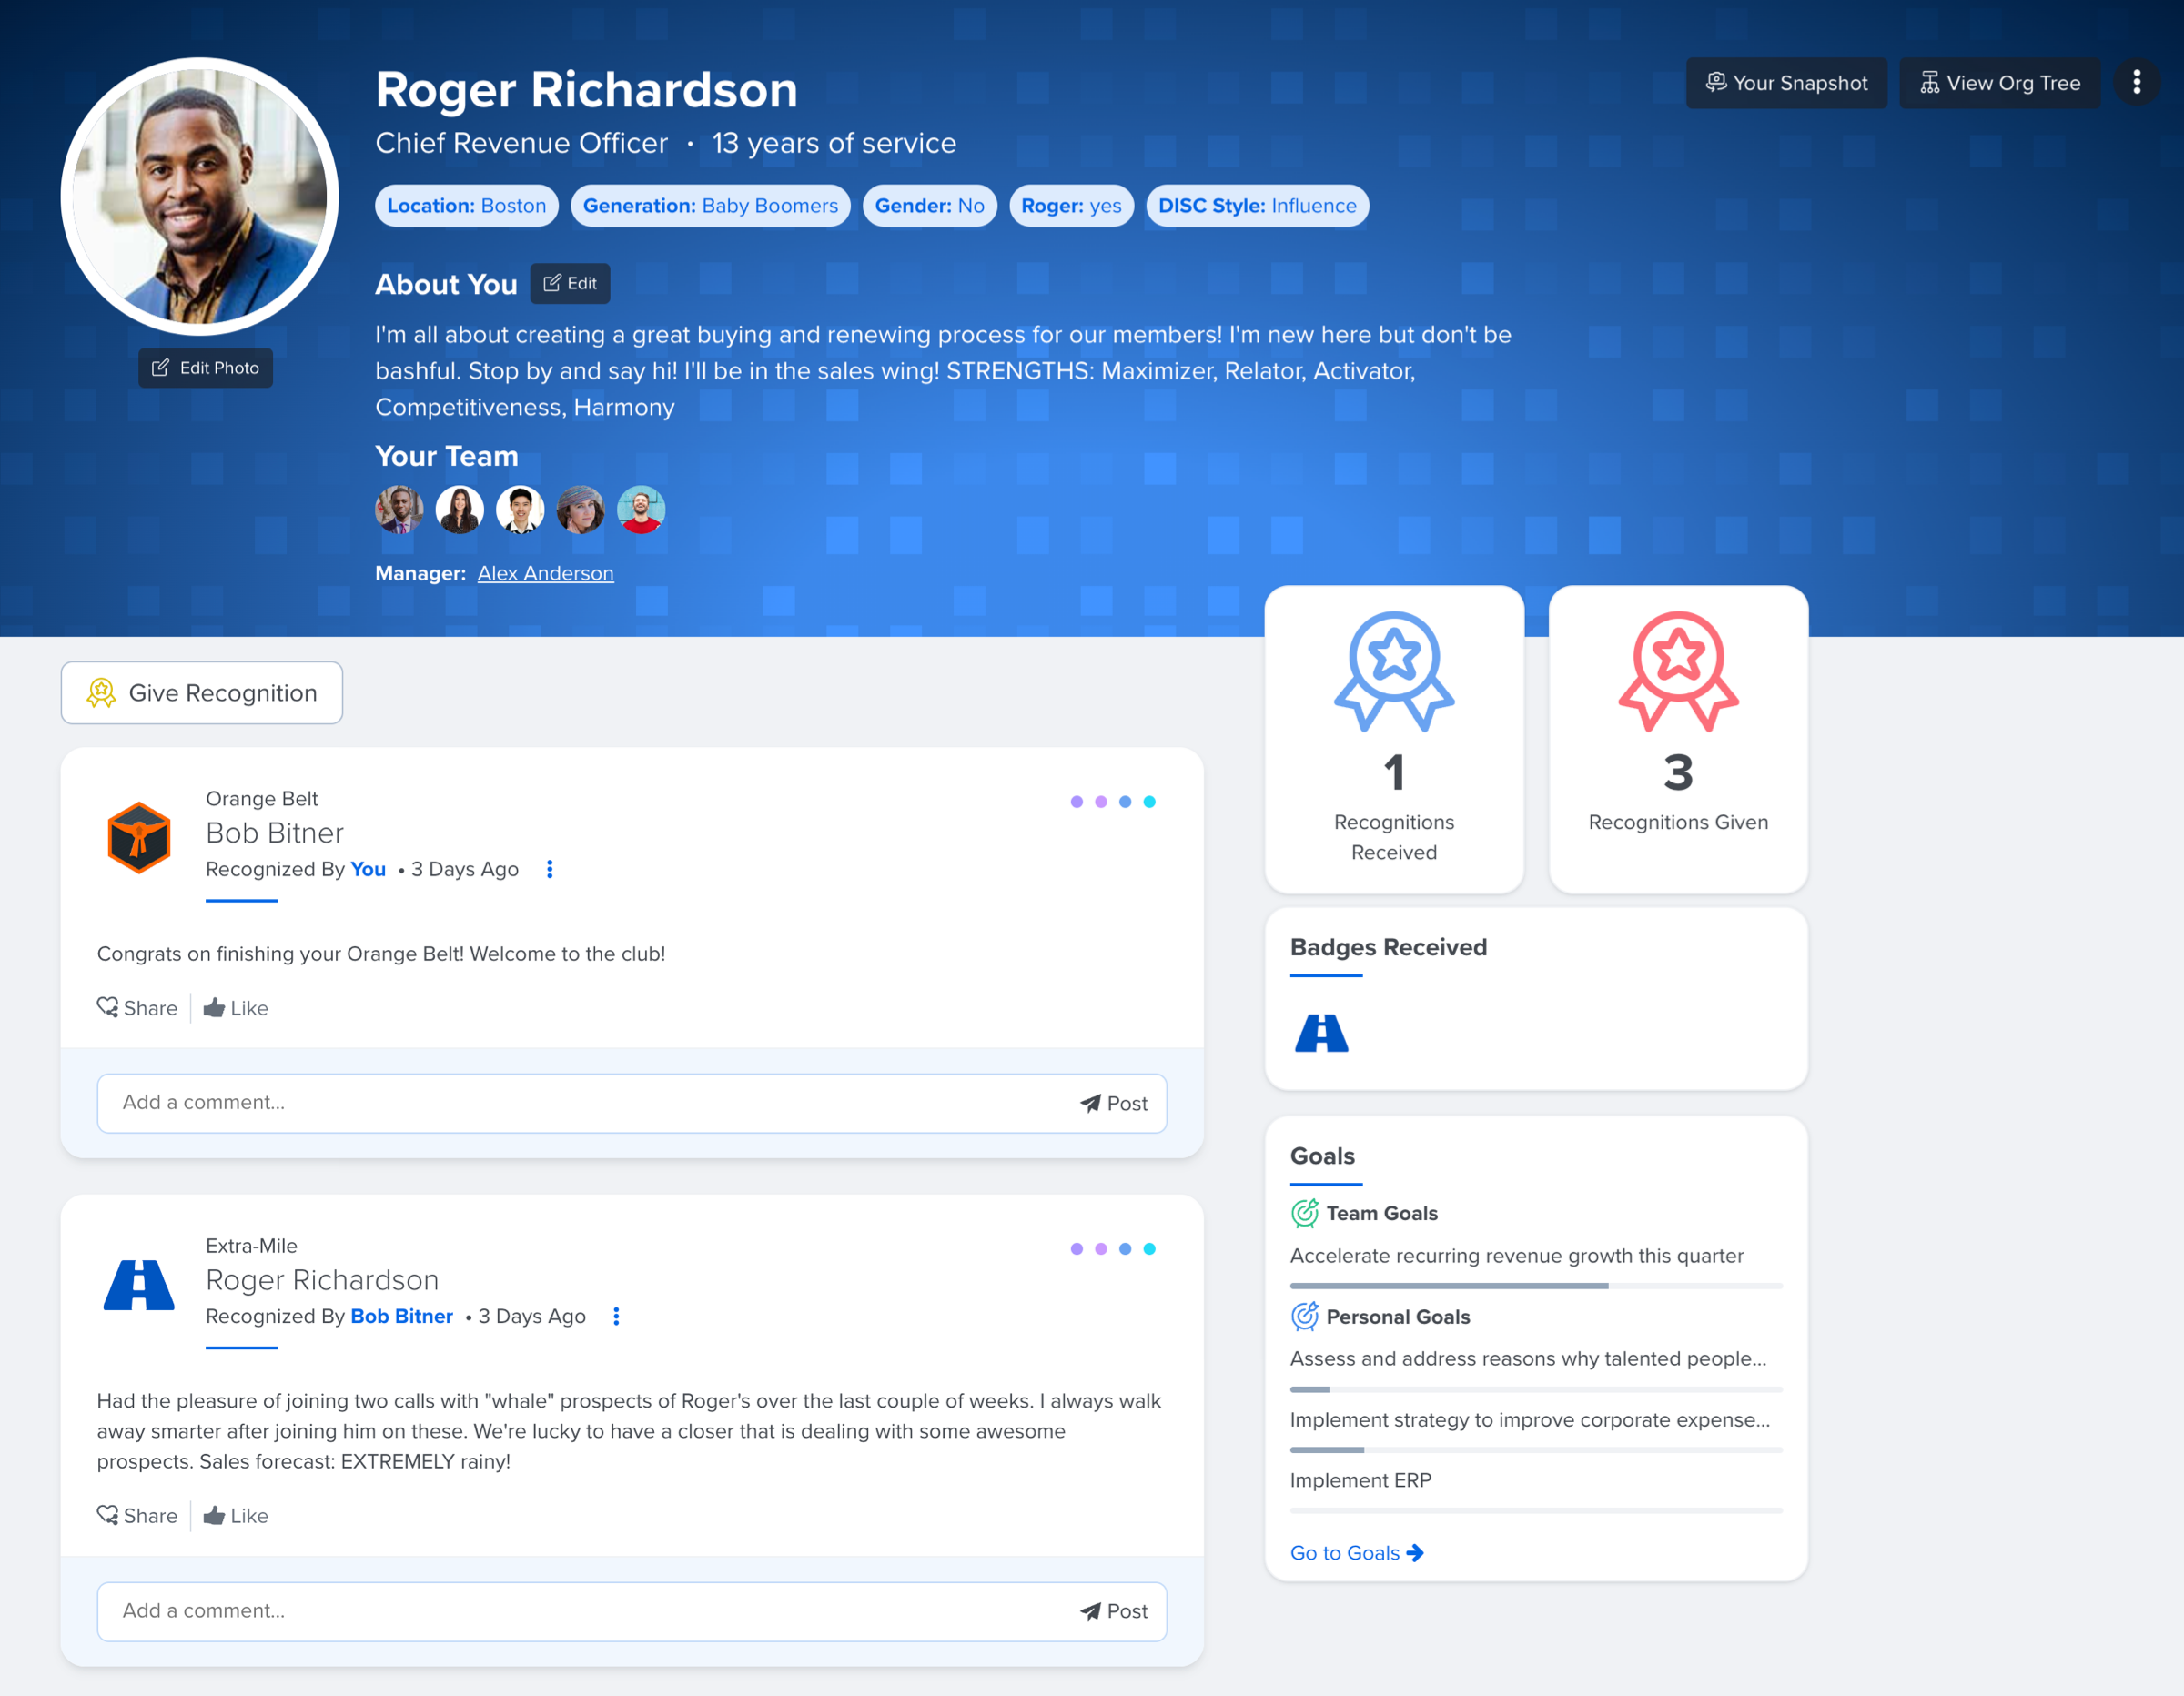
The banner of Your Profile displays information about yourself, including your role, demographics, your team, and an About You section.
The rest of the page displays all recognition and goals you're associated with.
To edit your profile photo or About You bio, click Edit Photo or Edit respectively.
When editing the About You section, click Save to confirm your changes.