Last Updated: June 24, 2026
In this article:
- Overview
- Access & Navigate Succession Planning
- Create & Manage a Succession Plan via a Talent File
- Create & Manage a Succession Plan via the Dashboard
- Candidate Nominations
- Presentation Mode
Overview
Succession Planning helps organizations identify and develop future leaders by tracking critical roles and potential candidates.
Use this article to learn how to build a structured, data-driven Succession Plan that aligns with your organization's long-term goals.
Additional Resources:
Access & Navigate Succession Planning
Access Succession Planning
To access the Succession Planning dashboard, click Succession Planning in the left-hand navigation menu.
Note: Users with Succession Feature Permissions can assign Plan Owners to individual plans. Learn more here.
Navigate Succession Planning Dashboard
To navigate the Succession Planning dashboard:

- A. Overview: Visualize all Succession Plans plus several key data points on the overview page
- B. Plan Selector: View all plan selections in a dropdown menu
- Note: All Succession Planning information is located within a Default Plan until Succession Planning Assignments are created
- C. Presentation Mode: An organized method to view critical roles and the state of the candidates
- D. Manage: Click here to create plans, adjust readiness levels, and import or export data
- E. Critical Roles: Indicates the number of critical roles identified in your organization
- F. Candidate Readiness: Visualizes the number of candidates in each readiness state
- G. Create Plan: Click here to create a Succession Plan, add roles, and assign Plan Owners
- H. Plan Menu: Select from available Succession Plans to view details, quickly identify owners, assigned roles, and edit the plan name under Actions
To navigate an individual Succession Plan:

- A. Plan Title: The name of the selected Succession Plan
- B. Presentation Mode: An organized method to view critical roles and the state of the candidates
- C. Manage: Click here to create plans, adjust readiness levels, and import or export data
- D. Critical Roles: Indicates the number of critical roles identified in your organization
- E. Candidate Readiness: Visualizes the number of candidates in each readiness state
- F. Candidate Demographics: Filter candidates by various demographics. More below
 A. Visualize each candidate color-coded by the selected demographic
- Toggle the visualization between a dot diagram and a pie graph (Figure A)
- Click the ⋮ icon (Figure B) to select the demographics reflected in the card and configure which demographics are available to be used when filtering
-
- Click the ⋮ icon to expand a list of selectable demographics to view candidates by
- Click the ⋮ icon to expand a list of selectable demographics to view candidates by
- H. Incumbents: Indicates the number of incumbents within the plan
- I. Empty Roles: Displays the number of critical roles in the plan and whether each has a designated incumbent
- J. Filter and Search: Create new critical roles and use the search field to narrow visible roles by role name or employee name
- K. Manage Roles: Manage nominations, import, and export data
- L. Role Details: View key information about the role. Use the dropdown to add or promote candidates, review a detailed role description, and see required skills or experience

Create & Manage a Succession Plan via a Talent File
Quantum Workplace uses a Talent File CSV file to communicate and update succession planning information. Click to download a template talent file.
Learn more about Succession Planning.
About the Talent File
The Role field is the only required field. The information for the other fields can be completed within Quantum Workplace after the talent file has been imported.
The file includes the following columns:
- Role: Title or role of the incumbent user
- This does not need to match the HRIS to account for roles that don't currently exist or roles that have a pool of candidates for different locations
- Incumbent Employee ID: Employee ID or Username for the user in the associated role
- Candidate Employee ID: Employee ID or Username of the candidate
- There is one row per candidate that correlates with their readiness level
- This field can be left blank if the Readiness Level field is left blank
- Readiness Level: Valid readiness levels or the associated import value:
-
- Ready Now (4)
- Ready in 12 months (3)
- Ready in 24 months (2)
- Ready in 36 months (1)
- On The Radar (0)
- Emergency Candidate*
- *To indicate a candidate as an Emergency Candidate, check the ☐ icon for Is an emergency candidate

- This field can be left blank if the Candidate Employee ID field is left blank
-
- Strengths: Candidate's strengths, optional
- Gaps: Areas of concern or growth, optional
- General Notes: General comments about the candidate, optional
Note: The Strengths, Gaps, and General Notes columns are optional, but if one of the three columns is included, all three must be included in the talent file.
Import a Talent File
To import a talent file:
![[Succession Planning] How to Import a Talent File GIF-1](https://help.quantumworkplace.com/hs-fs/hubfs/%5BSuccession%20Planning%5D%20How%20to%20Import%20a%20Talent%20File%20GIF-1.gif?width=670&height=381&name=%5BSuccession%20Planning%5D%20How%20to%20Import%20a%20Talent%20File%20GIF-1.gif)
- Click and expand the Manage drop-down menu in the top-right
- Click Import Talent File to open the import process
- On the Upload File step, click Browse and select the talent file
- Click Upload and Validate
- On the Validate step, if the validation is successful, click Import
- If the validation fails, review the validation error and make the necessary edits before saving the file and clicking Download Template File Again to validate the updated file
- On the Import step, click View Analytics to return to the Succession Planning page
Create & Manage a Succession Plan via the Dashboard
You can quickly create your succession plan within the dashboard with a few simple clicks. Begin by creating a new Succession Plan or selecting the existing plan. Then, assign roles to the plan and designate Plan Owners.
Learn more about Succession Planning.
Create a Succession Plan
To create a new Succession Plan:
Create a Critical Role
To add a new critical role to a Succession Plan:
Add a Candidate
To add a candidate for an existing role:
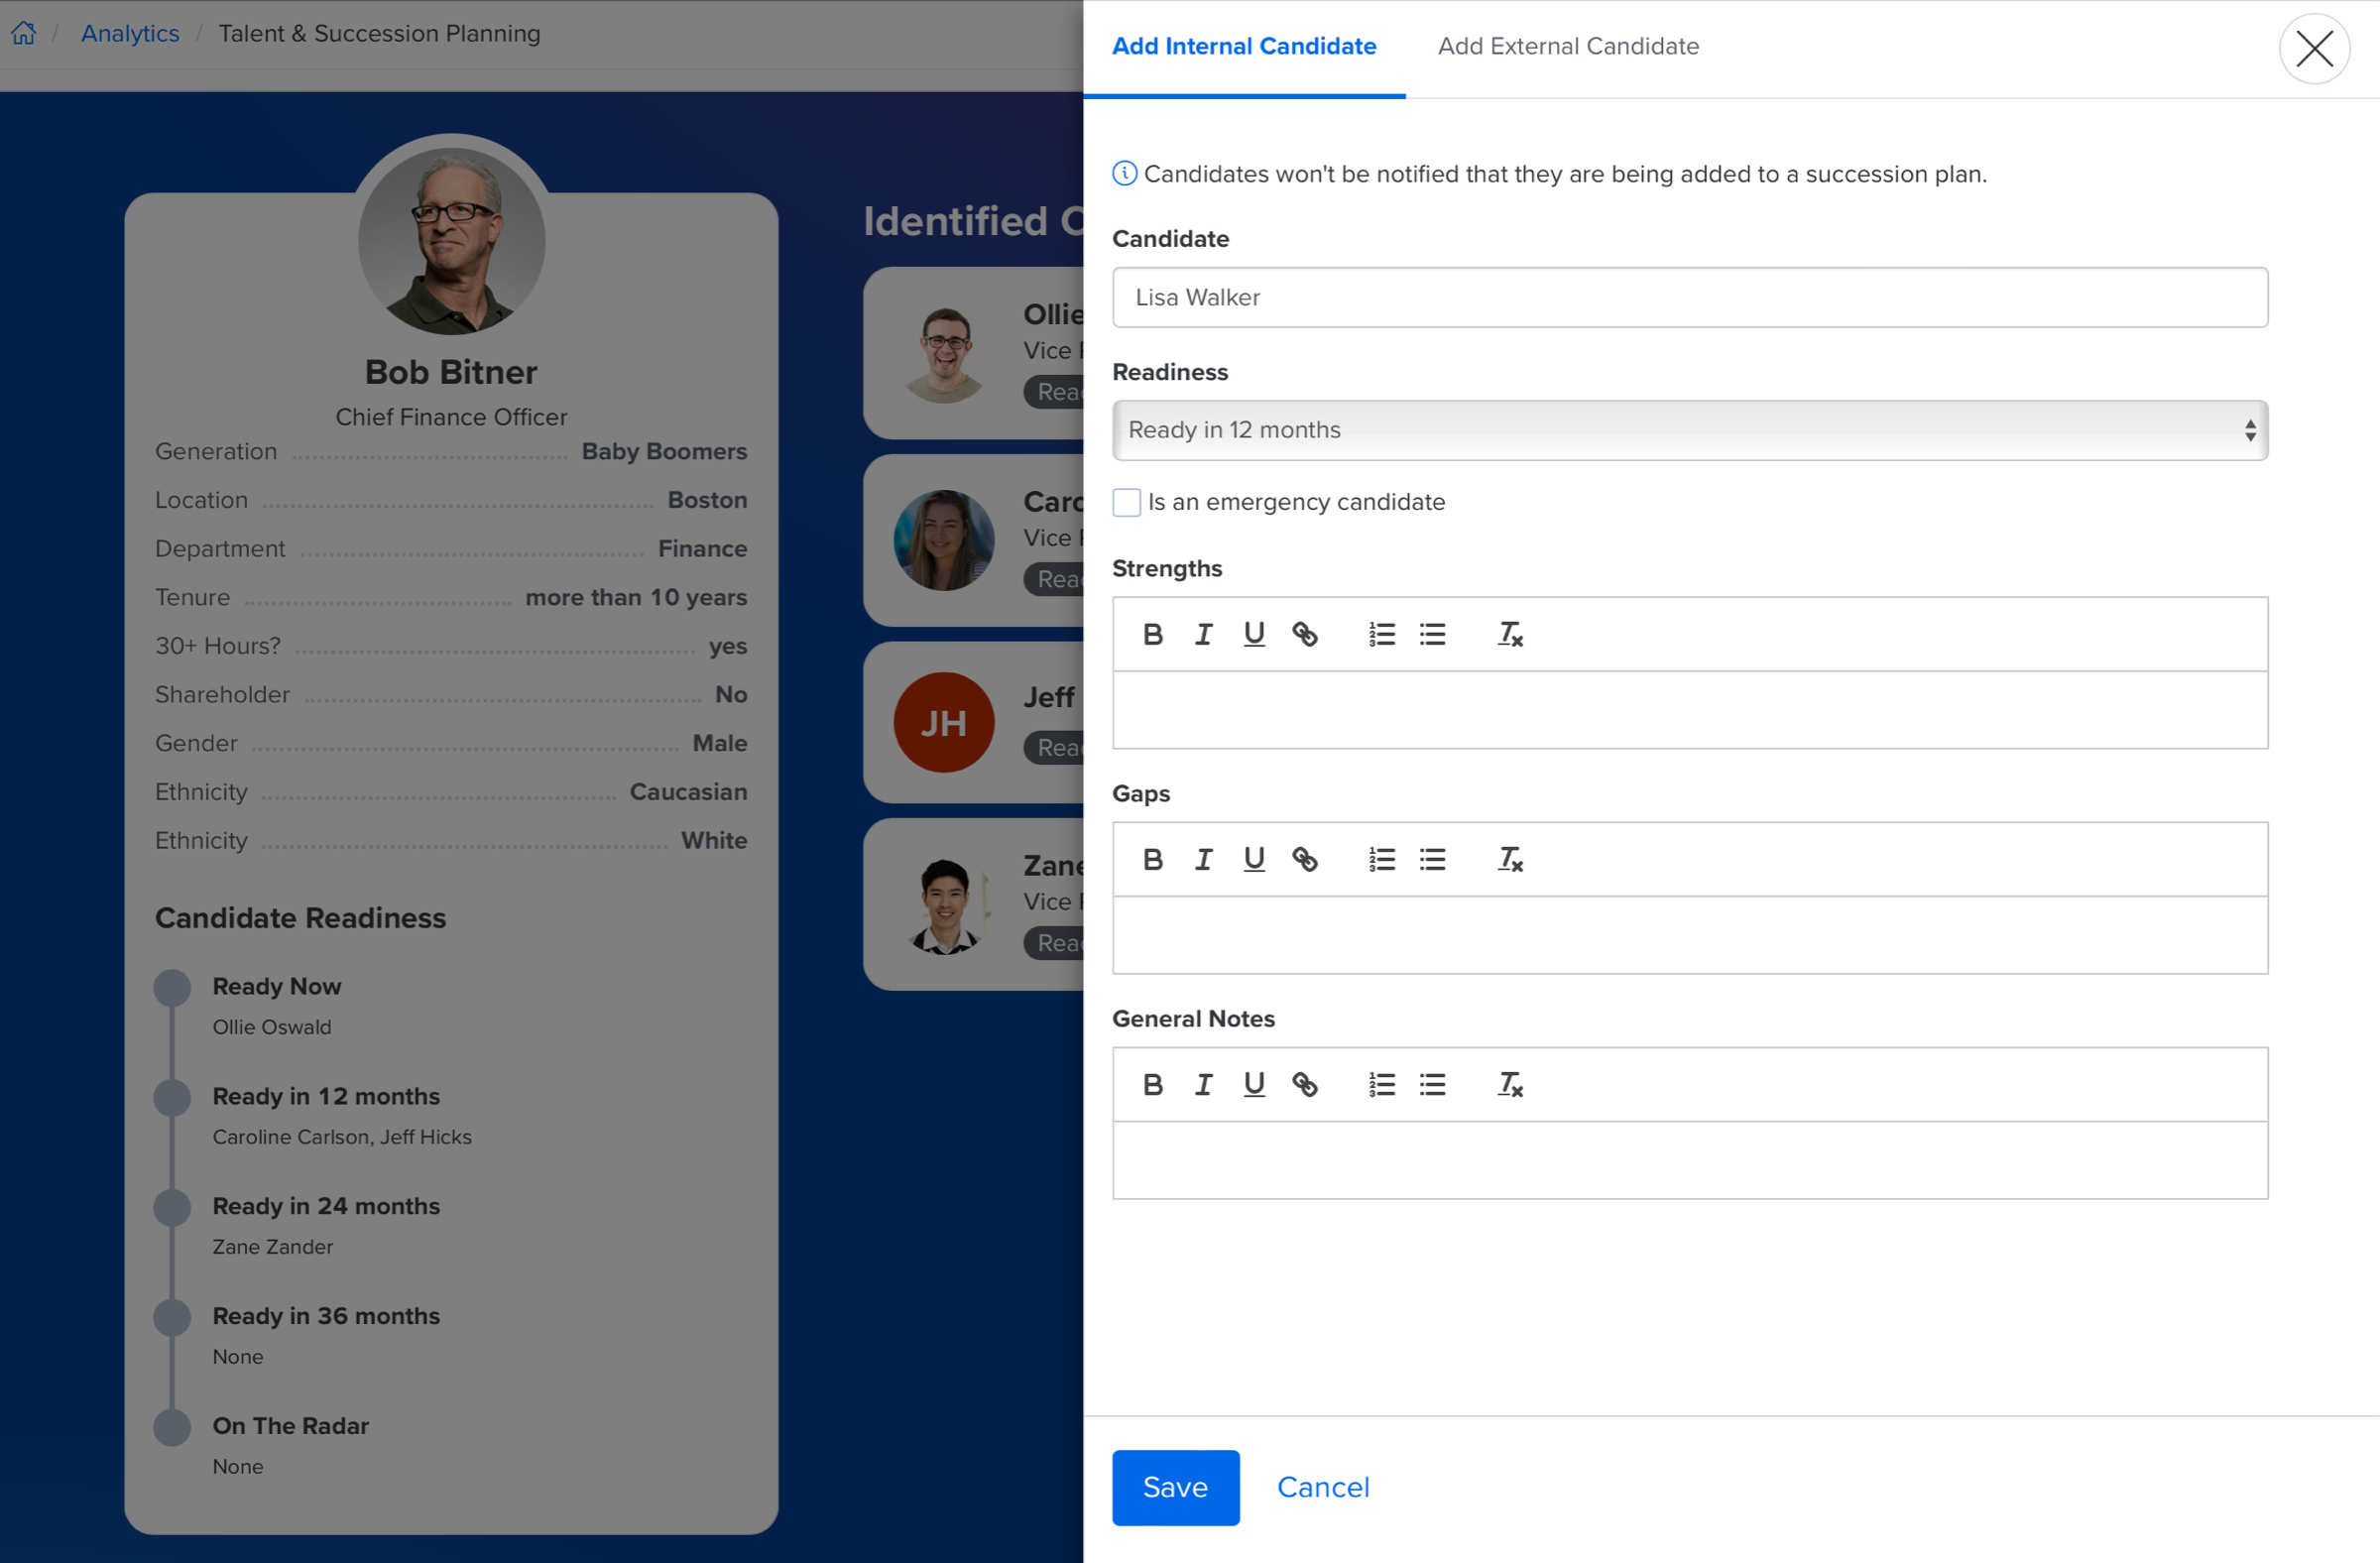
- Click an existing role to expand the detailed view
- Click Add Candidate to open the Add Candidate modal
- Enter an employee in the Candidate field and complete as many fields as necessary
- Click Save
You can return to the candidate's card to edit the details as needed.
If an existing candidate is added as a candidate for a different role, you can optionally import their strengths, gaps, and general notes to the new role they were added to.
To transfer a candidate from another existing role:
- Select Manage Roles
- Choose Transfer Roles from Other Plans
- Select the roles you'd like to transfer over
- Click Save

Add an External Candidate
To add an external candidate for an existing role:
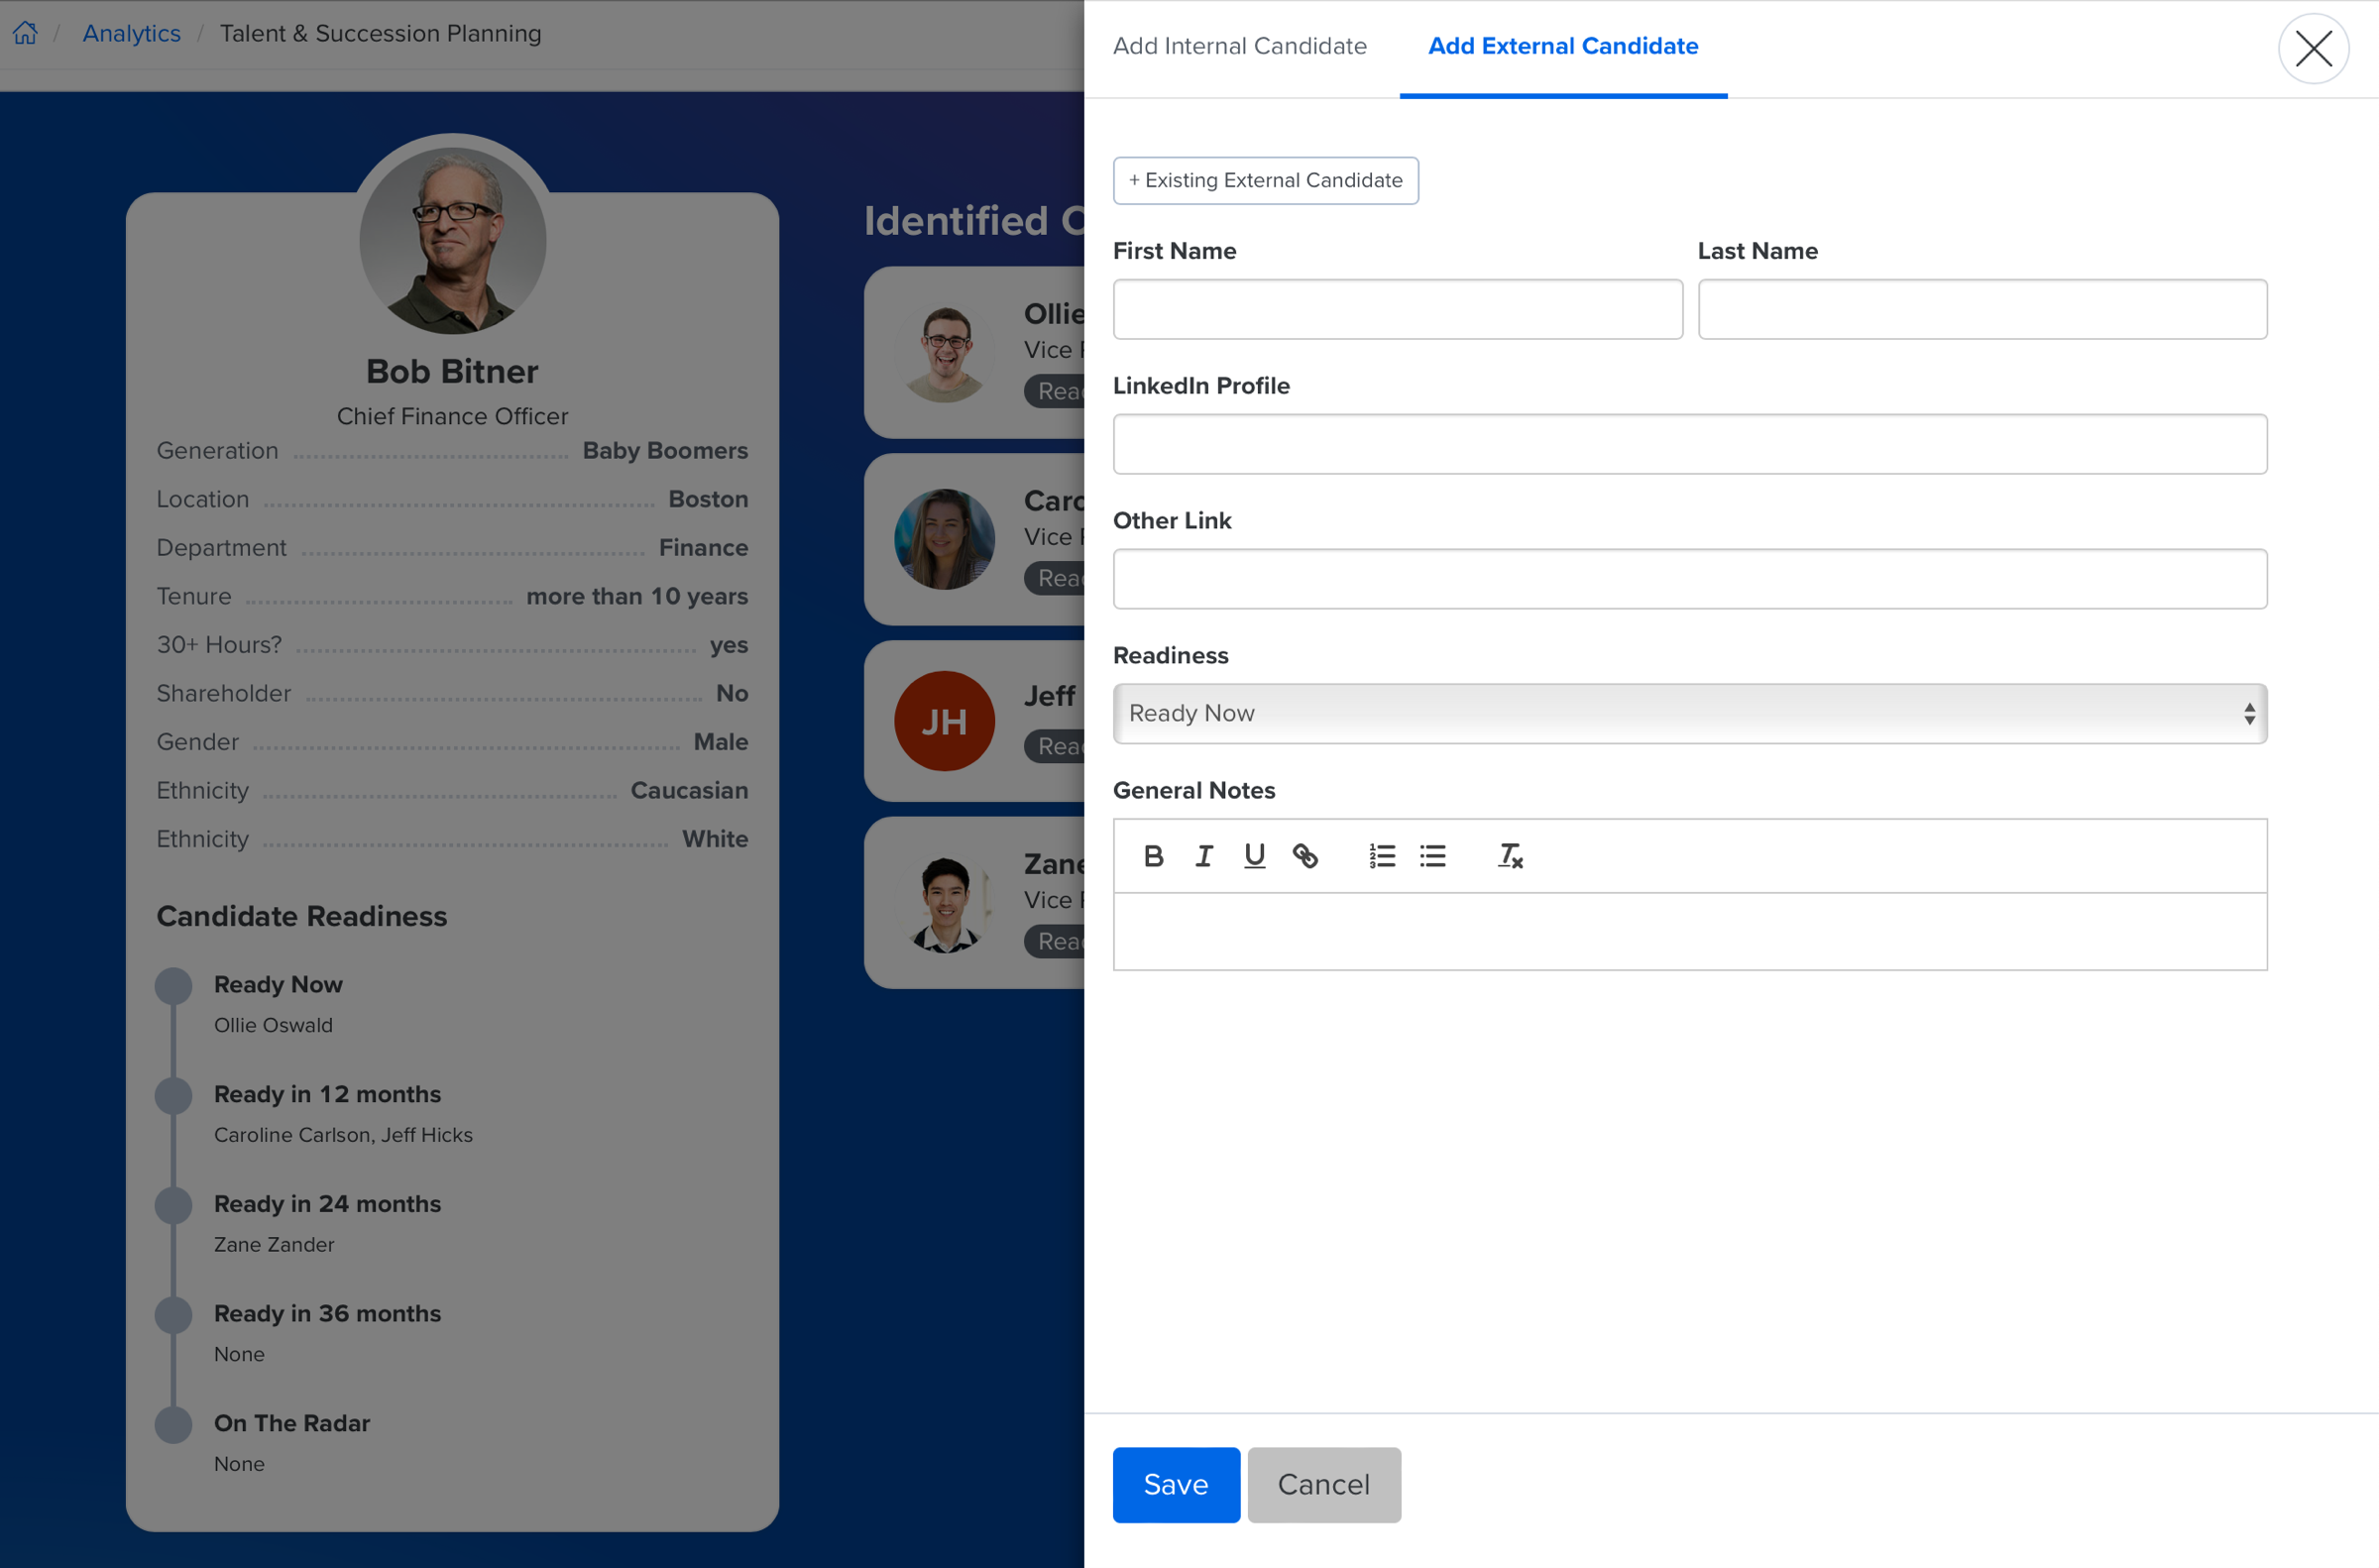
- Click an existing role to expand the detailed view
- Click Add Candidate to open the Add Candidate modal
- Click the Add External Candidate tab
- Enter an employee in the Candidate field and complete as many fields as necessary
- If an external candidate has been added as a candidate for a different role, click +Existing Eternal Candidate to quickly pull in their information
- Click Save
External candidates are always indicated with an External Candidate label.
Edit a Candidate
To edit a candidate's information:
- Click an existing role to expand the detailed view
- Find the candidate under the Identified Candidate's column and click the corresponding ⋮ icon
- Click Edit Candidate
- Make the necessary edits and click Save
Promote a Candidate
To promote an identified candidate to the critical role:
- Click an existing role to expand the detailed view
- Click Promote Candidate
- In the modal, select the candidate from either the Identified Candidates or Someone Else tab
- Click Promote
Add an Incumbent to an Existing Role
To add an incumbent to a previously created role:
- Click an existing role to expand the detailed view
- Click Actions next to the specific role within the succession plan
- Select Add Incumbent from the options
- Add the incumbent by searching for the user's name or employee ID
- Click Promote

Delete a Succession Plan
To delete a Plan completely:
- Navigate to the Succession Planning landing page
- Scroll down to the Plan menu shown below
- Click the Actions icon (⋮)
- Select Delete Plan

Candidate Nominations
Request Nominations
Users with Succession Feature Permissions can request candidate nominations for specific roles in your organization and add them to your Succession Plan.
Nomination requests are delivered to the managers of the specified role who can then nominate potential successors to step into the role.
To request candidate nominations in bulk:

- Click and expand the Manage drop-down menu
- Click Bulk Manage Nominations
- Request candidate nominations, either in bulk or individually:
- A. Assign Nominators: allows you to select manager or incumbents in bulk

- B. Send Invitations: Once nominators have been assigned, you can send invitations in bulk

- Each nominator's invitation status is visible once assigned, with a red warning icon indicating invitations need to be sent, and a blue envelope icon confirming the invitation was sent successfully

- A. Assign Nominators: allows you to select manager or incumbents in bulk
To request candidate nominations individually:
Individually: Click the ⋮ icon for a role, then Manage Nominations to expand a menu where you can enter a nominator (Figure A below) and manage requests, i.e. send/cancel nomination requests and remove nominators (Figure B below)
To request a candidate nomination, add the nominator and click Send Request in the Actions column

Nominate Candidates
![How to Nominate a Candidate in Succession Planning [GIF]](https://help.quantumworkplace.com/hs-fs/hubfs/How%20to%20Nominate%20a%20Candidate%20in%20Succession%20Planning%20%5BGIF%5D.gif?width=670&height=362&name=How%20to%20Nominate%20a%20Candidate%20in%20Succession%20Planning%20%5BGIF%5D.gif)
As a manager, you can nominate a potential successor for a downline role when requested to do so by a Succession Plan User with full access.
Access the Candidate Nomination Form
Once requested, the Candidate Nomination form can be accessed in two ways:
- Via the link in the Succession Planning Nomination email notification
- Users with Succession Feature Permissions can click Nominate from the Manage drop-down menu

Complete the Candidate Nomination Form
To nominate a candidate:

- Access the Candidate Nomination form under Manage > Nominations > Nominate

- Click Add Nomination for the corresponding critical role
- Click Select for a corresponding candidate to open the nomination modal
- Complete each of the fields, i.e. Strengths, Gaps, etc.
- Click the What is [Employee's] Readiness... drop-down and select the employee's readiness level
- Click Save to save the candidate selection along with any information you entered
- Optionally, repeat steps 3-6 for any other candidates
- Optionally, nominate a candidate not listed on the form by entering and selecting the employee in the Nominate Someone Else field
- Click Finalize Nominations to complete the Candidate Nomination form
Nominators can still respond to nomination requests while opting out of submitting a candidate when they have no specific candidate in mind. This allows for admins to have clear visibility in the status of nomination requests sent and increases a higher response rate from nominators.
Presentation Mode
Presentation Mode within the Succession Planning page provides an organized method to view critical roles and the state of the candidates.
Filters can be applied in Presentation Mode and saved for future use, learn more.
Access & Navigate Presentation Mode
To access Presentation Mode:
- Click Presentation Mode in the top-right corner of the page
- To return to the previous view of Succession Planning, click Back to Analytics
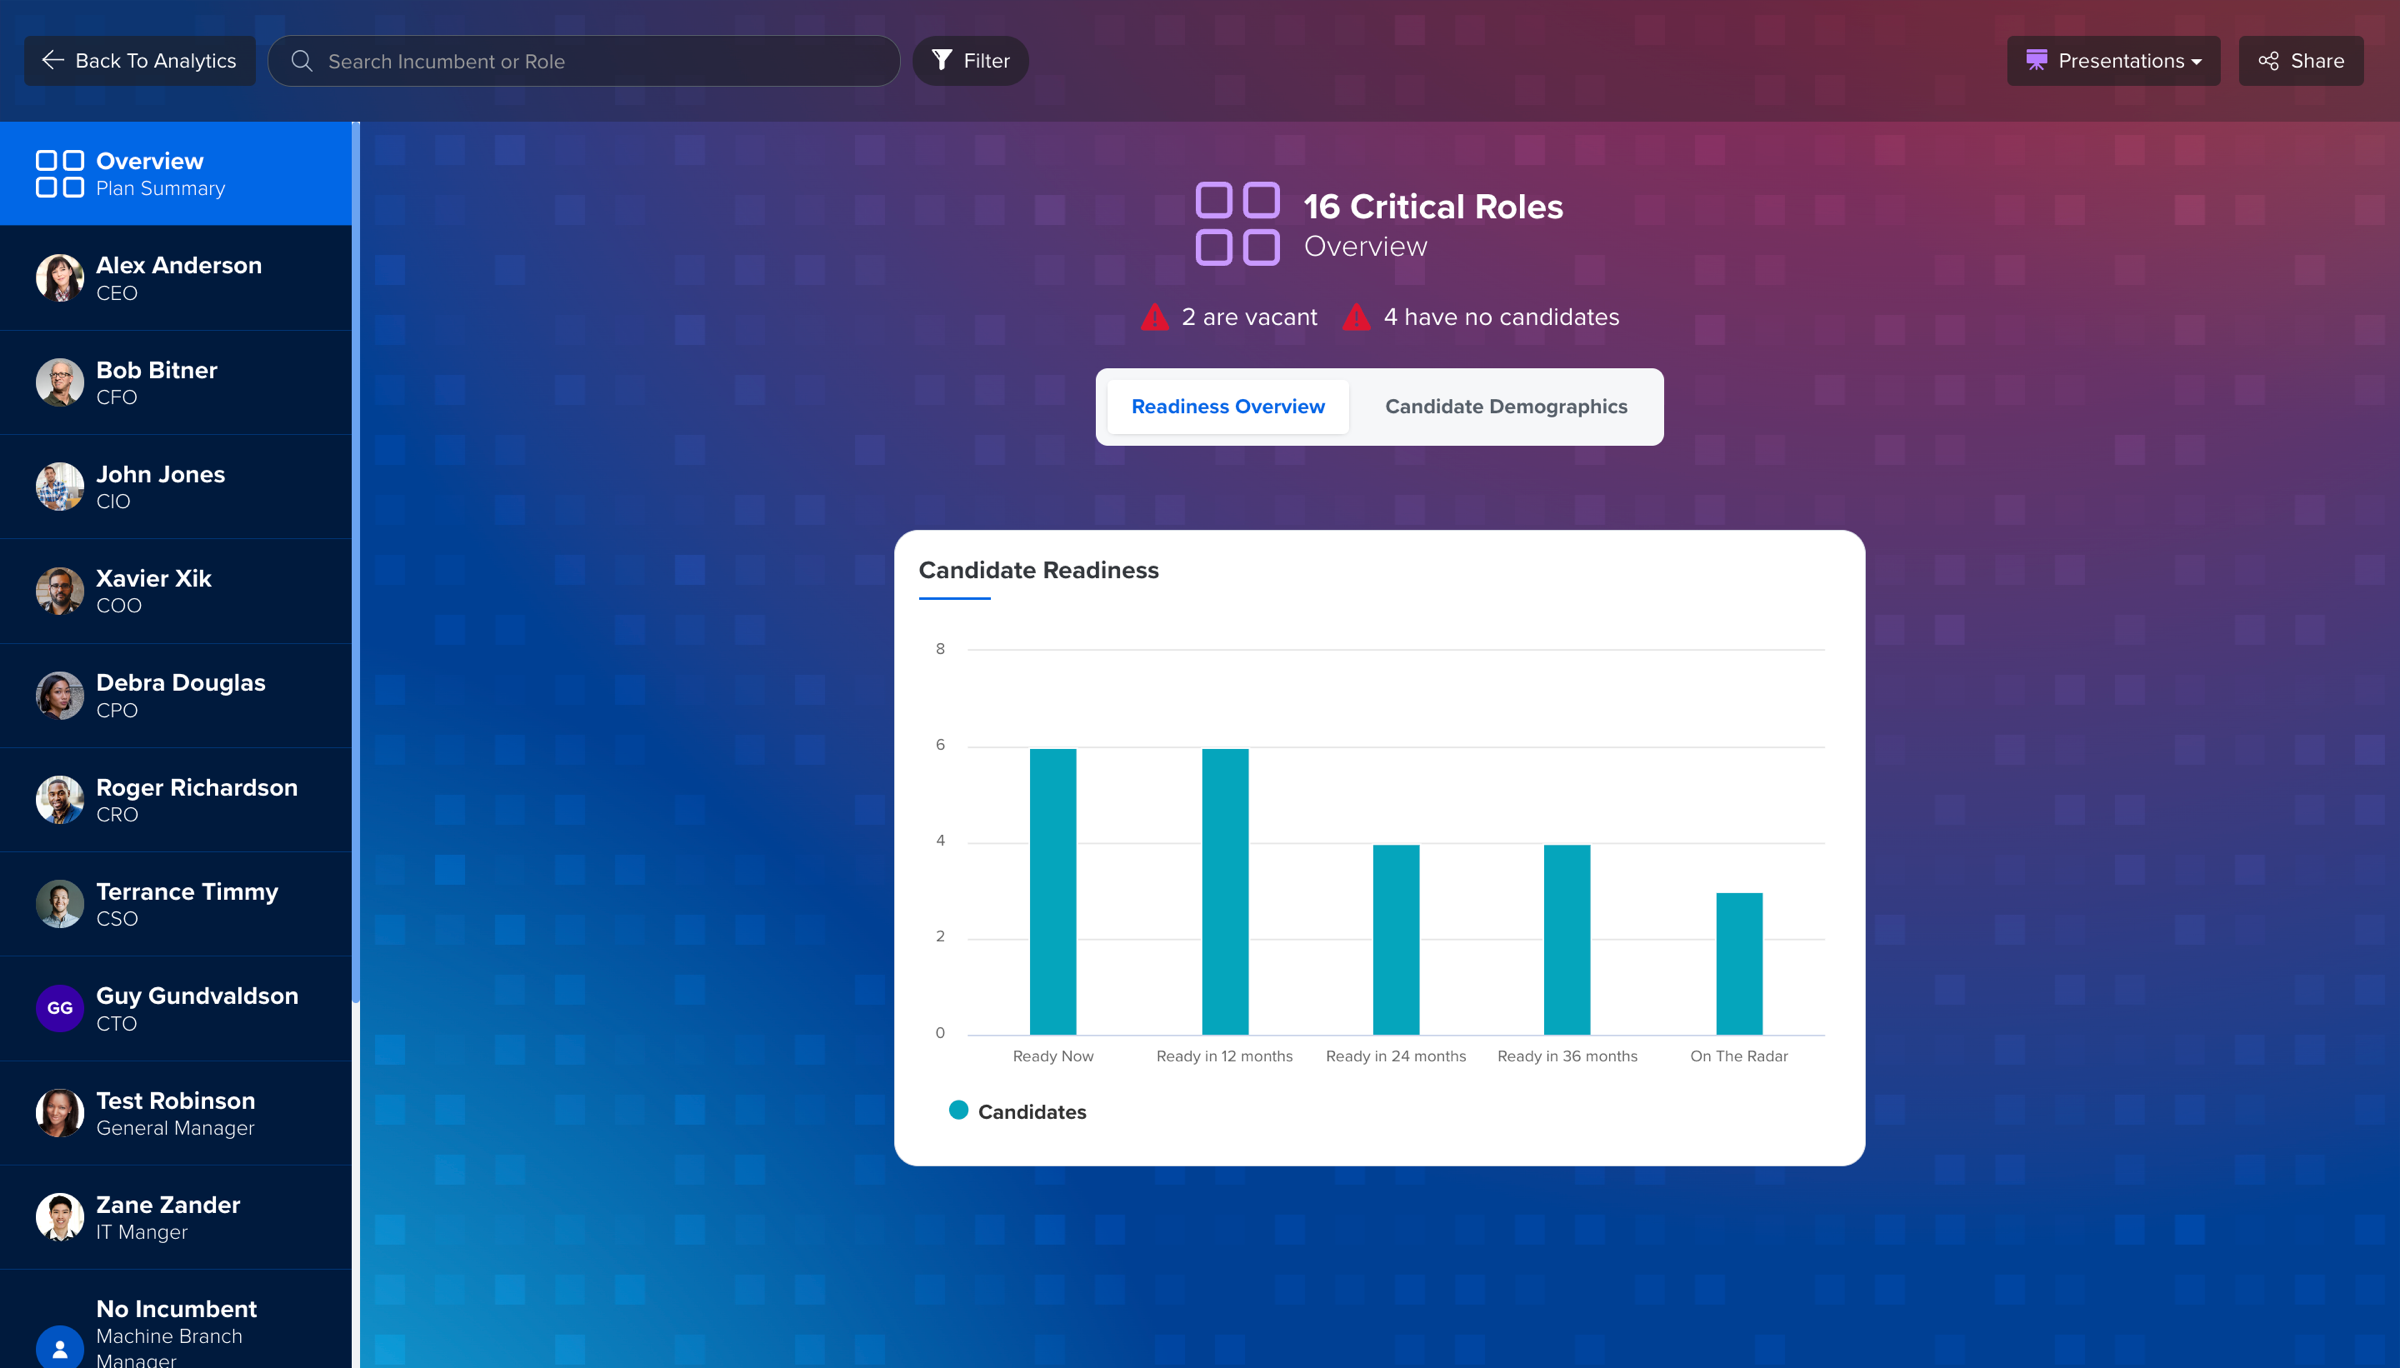
The Presentation Mode view begins with the Overview, displaying the number of critical roles and interactable views of the candidate by readiness or specified demographics.
To navigate through Presentation Mode:
- Use the search field in the top-left to search by a role or an employee
- Use the filter function in the top-left to search via demographic or pre-selected quick filters
- Roles and the incumbent are listed on the left-hand side of the screen
Save Presentation Filter Presets
In Presentation Mode, use the Filter feature to view only relevant roles and candidates. Use the Quick Filters to view vacant roles or roles without candidates, or apply a demographic filter, i.e. by department, generation, tenure, etc.
Saved presentation presets are organized in the Presentations drop-down menu in the top right and can be enabled on demand.
To save a presentation with a filter:
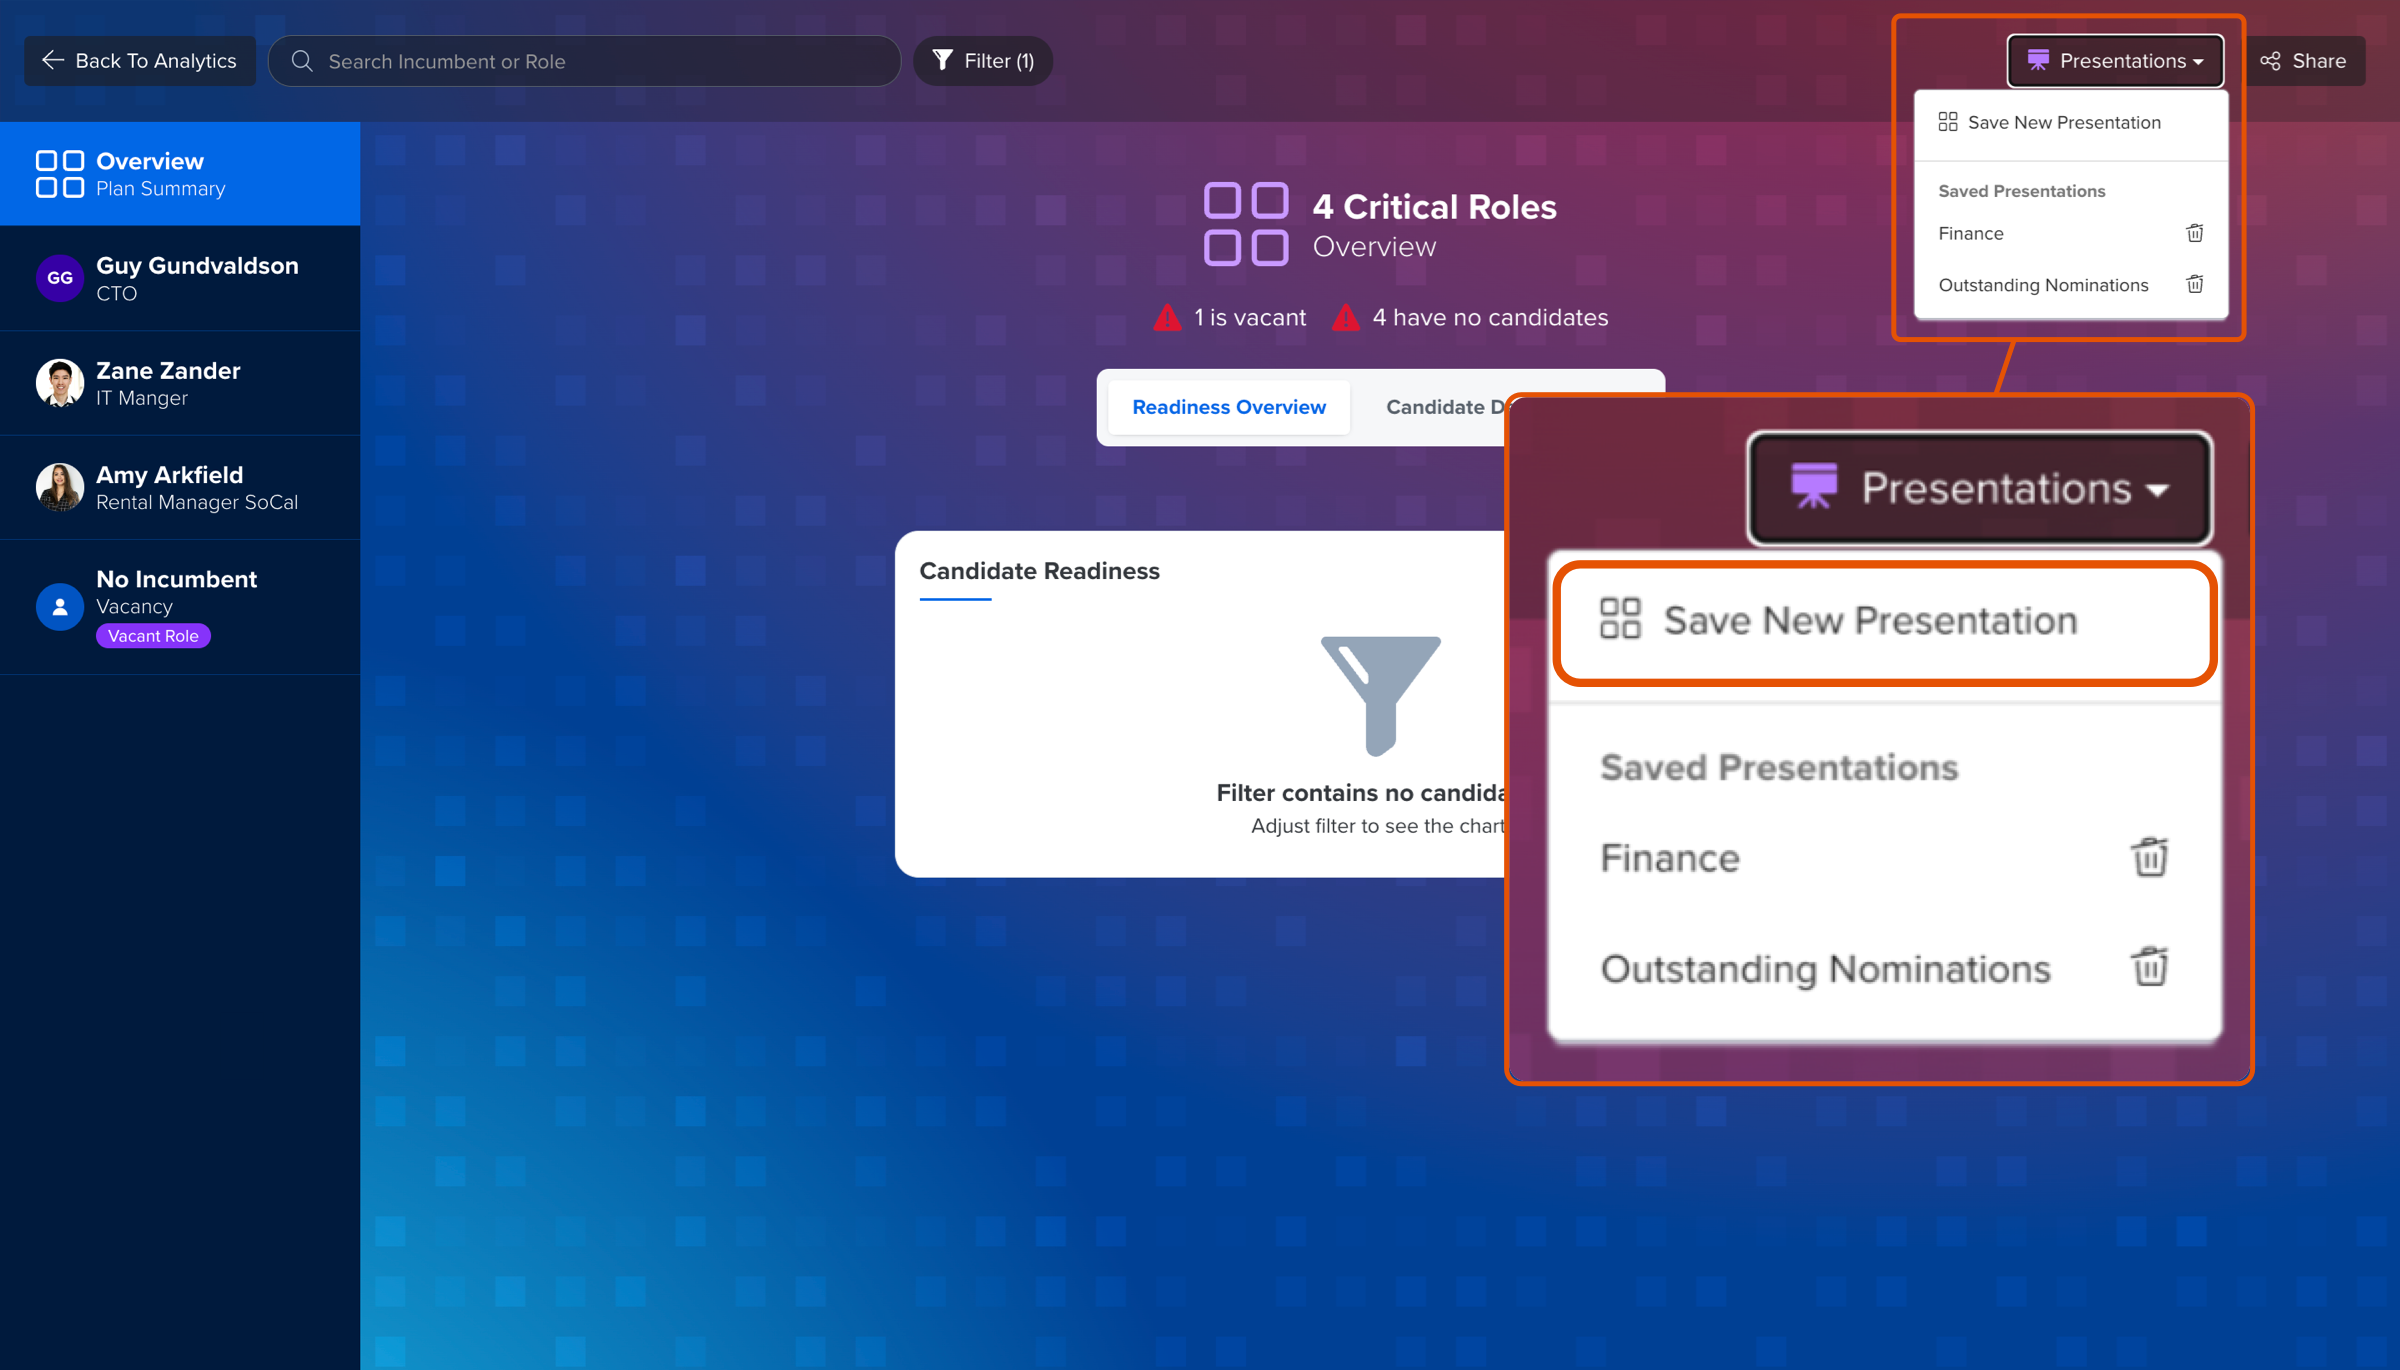
- From Presentation Mode, click Filter
- Specify the active filters, i.e. Quick Filters and/or demographic filters
- Click Apply
- With an active filter, click and expand the Presentations drop-down in the top right
- Click Save New Presentation
- Enter a name for the presentation
- Click Save
Saved presentations can be deleted via the Presentations drop-down menu by clicking the trash icon for the corresponding saved presentation.
Share Presentation via Shareable Link
When viewing a saved presentation, a view-only link can be shared. Users viewing a presentation using the link will be restricted to only the candidates and roles within the scope of the filter.
To ensure a shared link only shows the correct presentation with the specified filters, active filters must match the filters of a saved presentation. For example, if a presentation were saved with the Finance filter, the presentation would not be shareable if an additional filter was in place, or if the Finance filter was disabled.
To share a view-only filtered presentation:
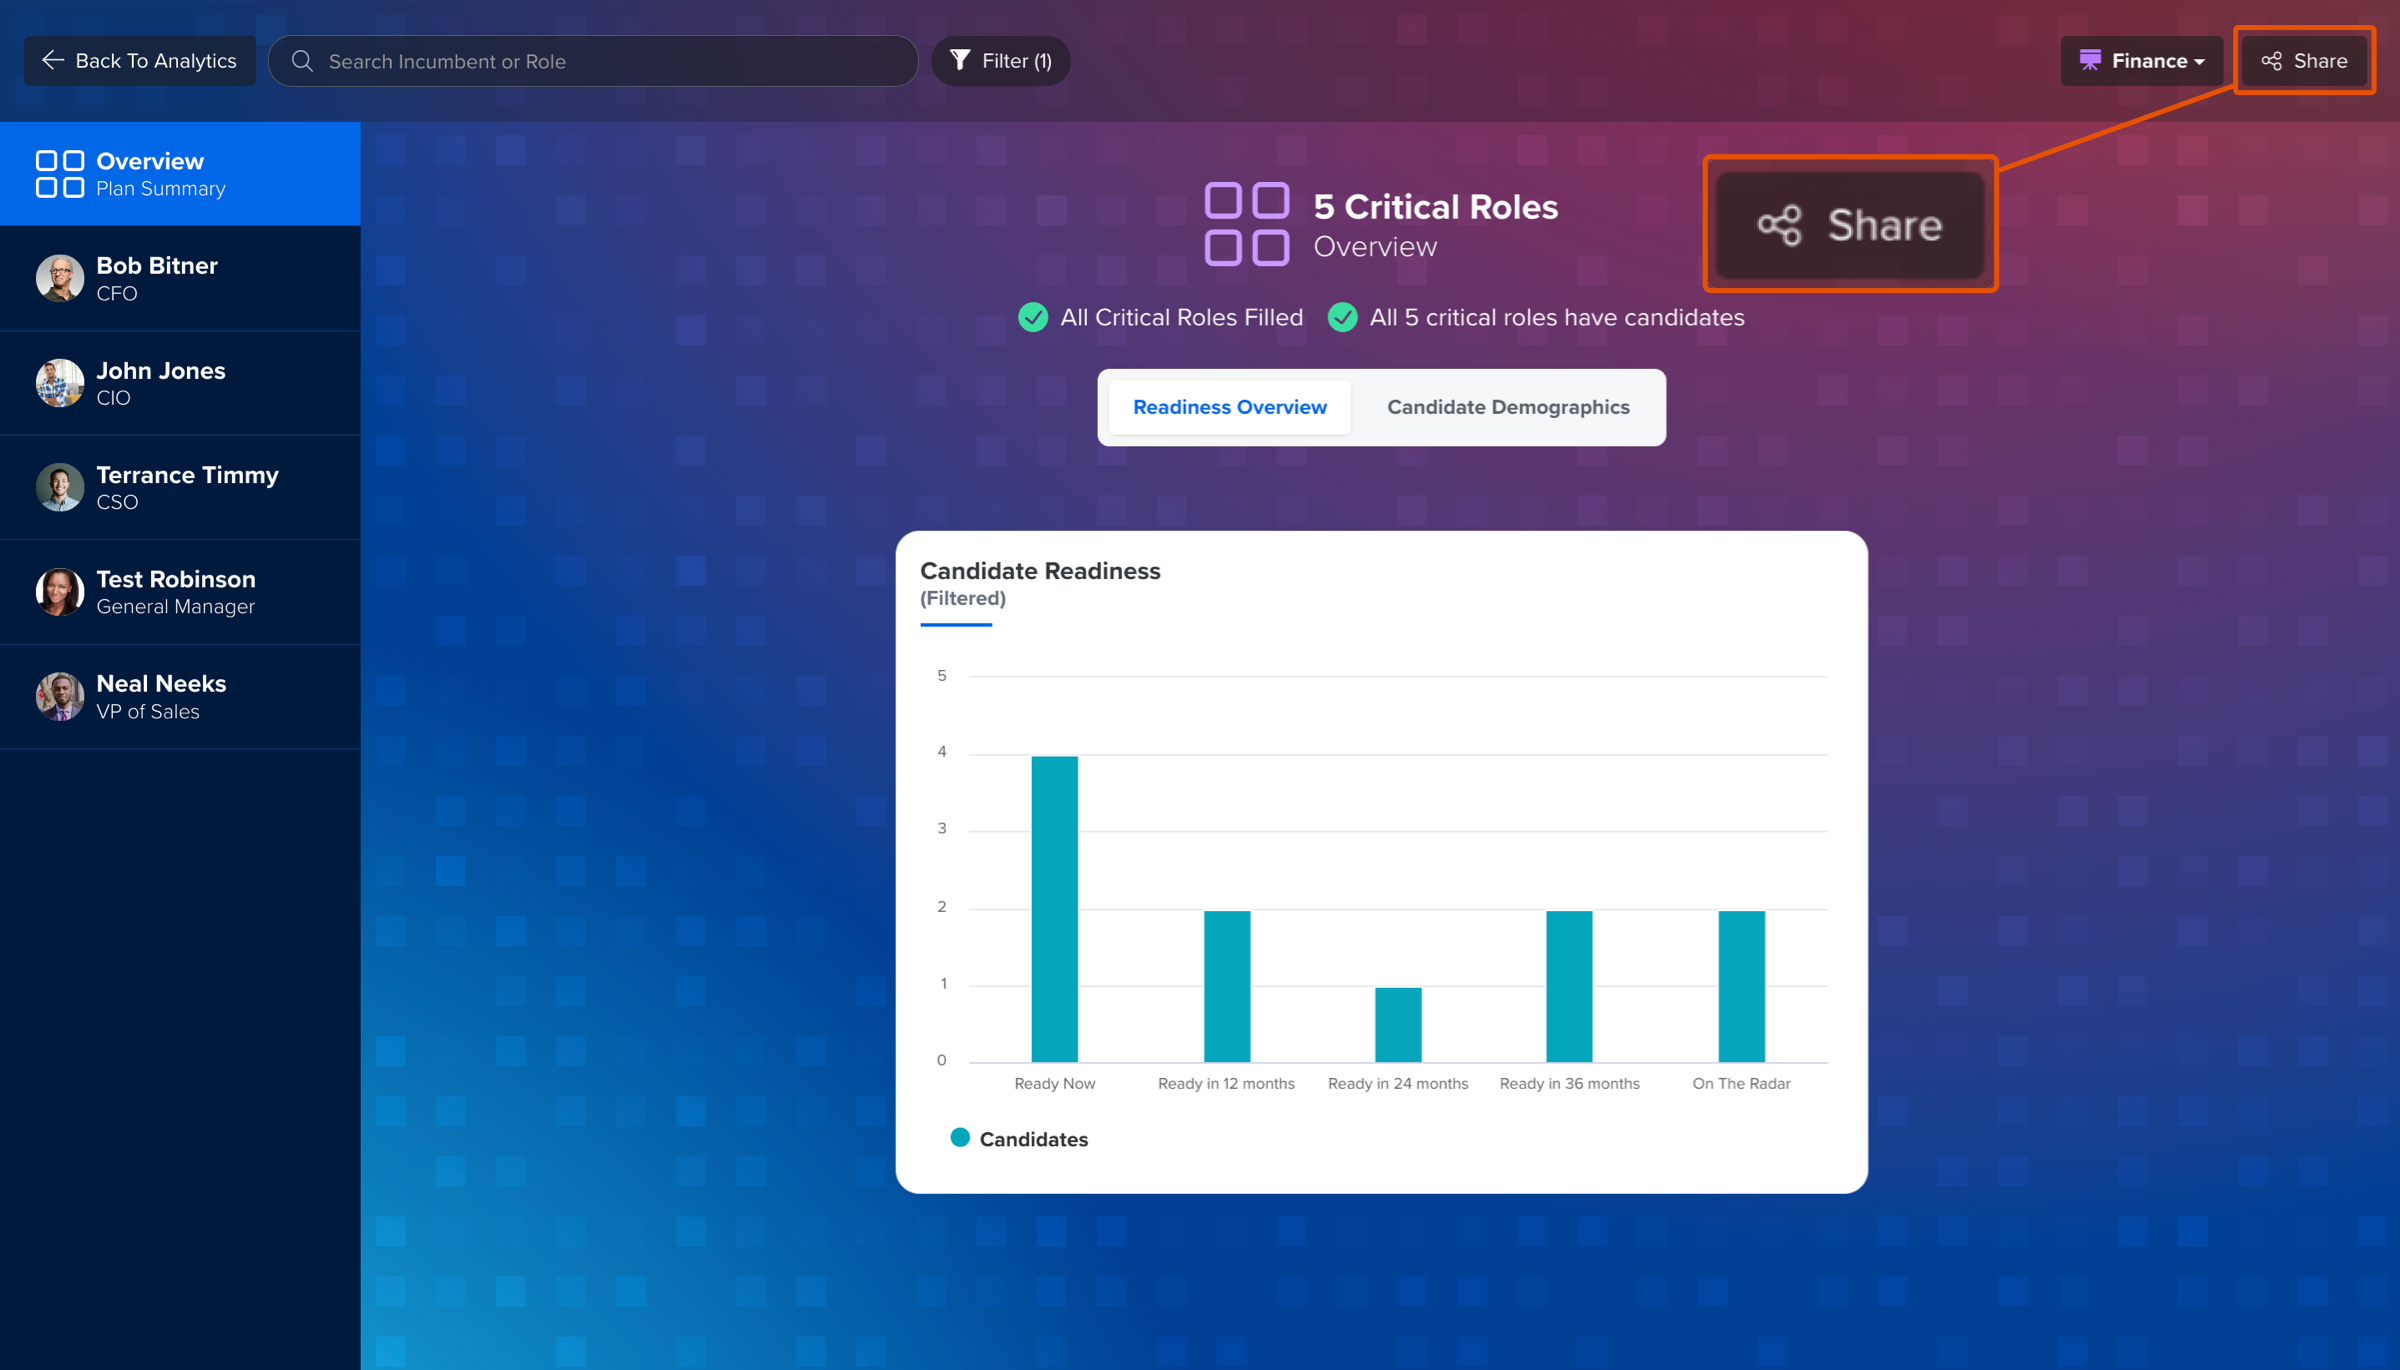
- Click and expand Presentations in the top right
- Click Save New Presentation
- Enter a name for the presentation and click Save
- Click Share
- Click Copy Link to copy the unique view-only link
- Share the unique link with the appropriate users
One HR platform for connected talent insights. See how Quantum Workplace brings your data together across 1-on-1s, talent reviews, performance reviews, and more—so you can spot trends, act fast, and make more informed people decisions. Explore the interactive product tour or request a personalized demo with your Customer Success Manager.