Launch a Talent Review Cycle
As an admin, launch a one-time or automatically recurring Talent Review cycle to prompt people-leaders to provide Talent Reviews for their employees.
Last Updated: January 7, 2026
In this article:
- Overview
- Requirements
- Getting Started
- Cycle Setup/ General Settings
- Schedules & Milestones (Automated Cycle)
- Select Employees
- Schedules & Milestones (Single Cycle)
- Launch Cycle
Overview
As an admin, launch a one-time or automatically recurring Talent Review cycle to prompt people-leaders to provide Talent Reviews for their employees.
Additional Resources:
Requirements
- Available to full admin users
Getting Started
To launch a Talent Review Cycle:
- Click and expand Talent Reviews in the left-hand navigation menu
- Click on Administration
- In the first card, titled Ask, click Launch Cycle to navigate to the Talent Review cycle setup
Cycle Setup/ General Settings
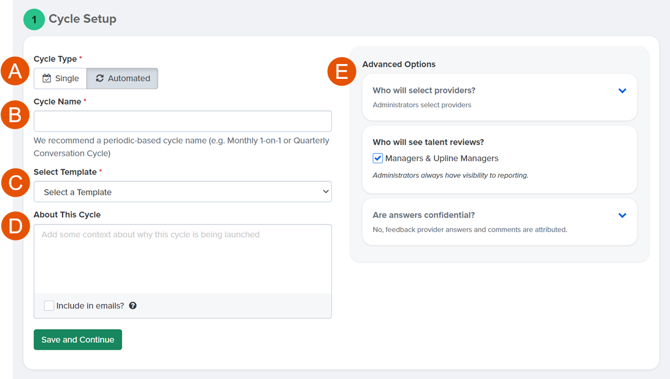
The first step is Cycle Setup/ General Settings:

- A. Cycle Type: Select between a Single or Automated cycle
- B. Cycle Name: Enter the name of the cycle
- C. Select Template: Click the drop-down and select the appropriate Talent Reviews template
- D. About: Optionally, include any context or background for providers invited to give feedback
- Enable the Include in emails? option to include the About in subsequent email notifications
- E. Advanced Options:
- Who will select providers?: Specify if managers or admins should select providers
- Who will see talent reviews?: Specify if managers and upline managers should have visibility into the reporting
- Note: Admins always have visibility into the reporting
- Are answers confidential? Feedback and any comments from providers is attributed
Click Save Changes to continue.
Schedule & Milestones (Automated Cycle)*
*This step is only available as the second step for Automated cycles. If the cycle is configured as a Single cycle, skip to the second step, Select Employees.
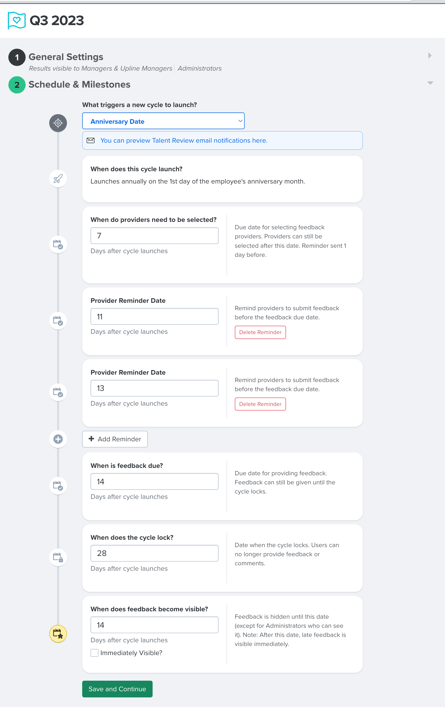
In this step, configure the triggers, milestone dates, and reminders.
To configure Schedules & Milestones:

- For, What triggers a new cycle to launch, select the cycle launch trigger
- Depending on the trigger selected, the Schedule & Milestones step may vary slightly
- Hire Date: Cycle launch dates are relative to an employee's hire date
- Exit Date: Cycle launch dates are relative to an employee's exit date
- Anniversary: Cycle launches on the first day of the employee's hire anniversary month
- Recurring: Cycle launches regularly, i.e. biweekly, monthly, quarterly, etc. relative to a specified date.
- Recurring Date Cycles also allow for additional customization in scheduling, as shown below.

- Configure when the cycle launches relative to the trigger event, e.g. [x] days before Hire Date, or [x] weeks after Exit Date
- Configure when providers need to be selected
- Configure Provider Reminders and when they're triggered
- Optionally, manage reminders with Add Reminder and Delete Reminder
- Configure when the feedback is due
- Configure when the cycle locks
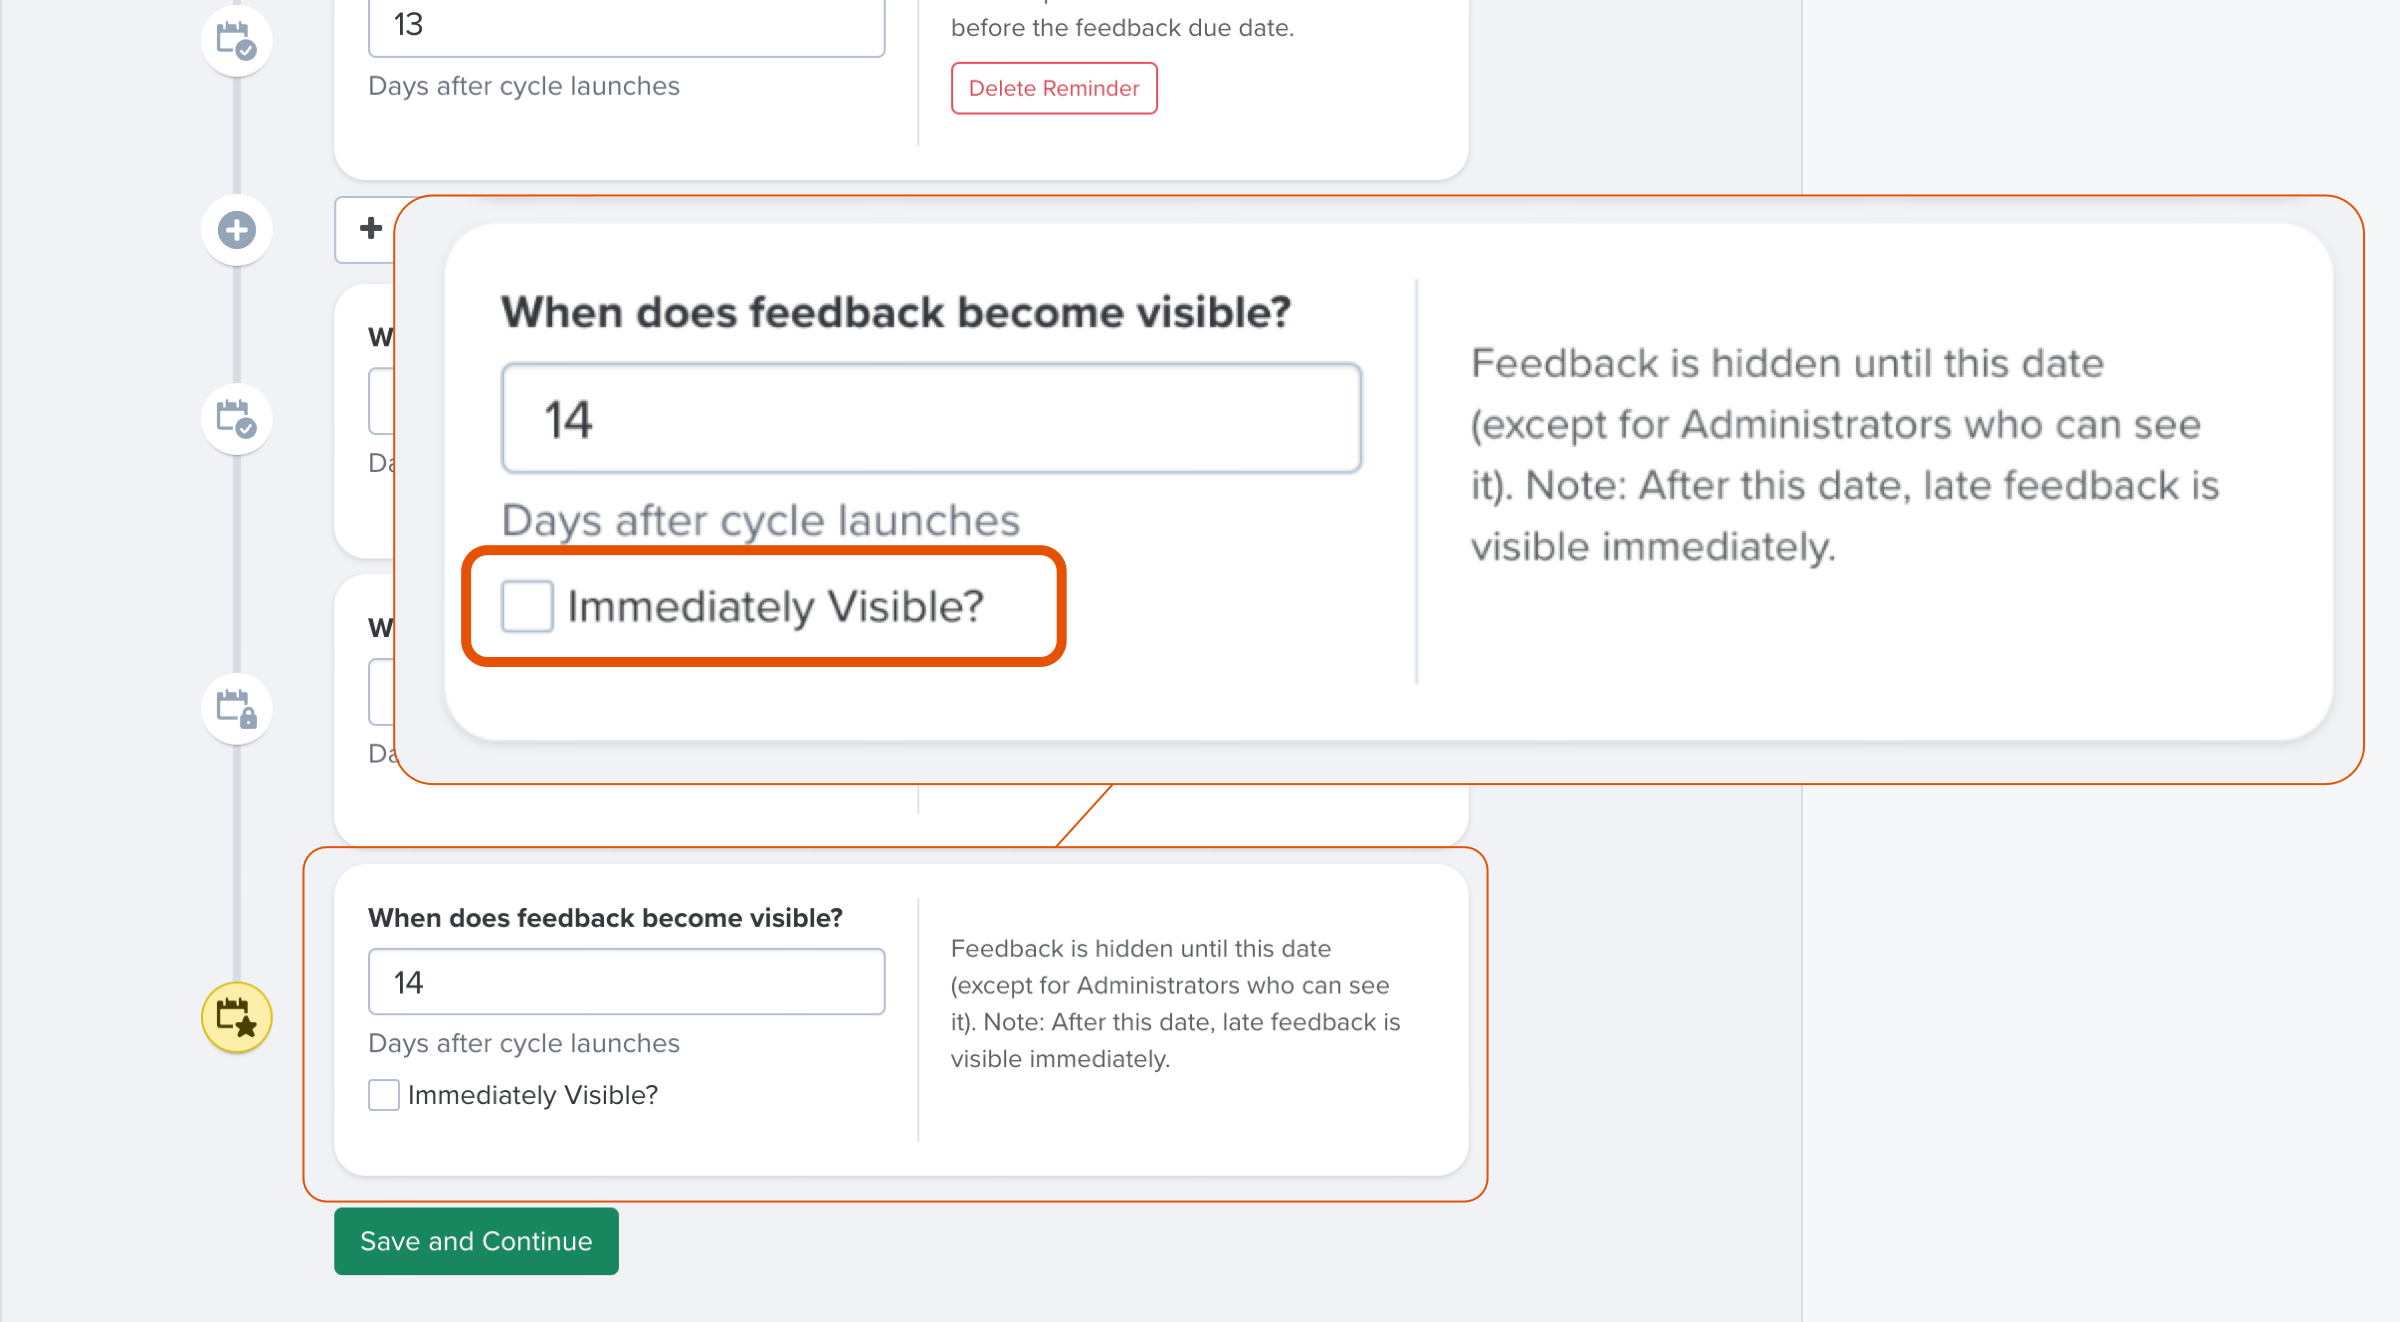
- Configure when feedback becomes visible
- Enable Immediately Visible? to view feedback as it comes in

- Enable Immediately Visible? to view feedback as it comes in
- Click Save & Continue to continue to the next step
Select Employees
In this step, select all of the employees who should receive talent reviews.
- Click Add Employees to open the invite modal

- Select the employees to invite, either manually, Quick Select (Figure A), or via a filter (Figure B)
- Once all of the appropriate employees are selected, click Select a Template to specify the Talent Review template for the cycle
- Click Add Person to confirm the selected employees and the template
- Optionally, repeat and add additional employees with a different template
- Click All Done
Once you have confirmed the employees included in the Talent Review cycle, click Save and Continue.
Schedule & Milestones (Single Cycle)
If you are setting up an automated cycle, skip to the final launch step.
In this step, configure the different dates and milestones for the cycle, i.e. launch date, reminder date, lock date, etc.

By default, the Talent Reviews Visible's date is when participants can view the collected submissions. If the Immediately? option is enabled, participants can view the submissions as they are collected.

Launch Cycle
Single Cycle
To launch a single Talent Review cycle:

- Click Save and Continue to open the launch confirmation modal
- Verify and confirm the cycle details
- Click Launch Now
Automated Cycle
To launch an automated Talent Review cycle:

- Click Enable Automation Now
- In the confirmation card that appears, click Yes, Enable Automation
Alternatively, click Schedule for Later to launch the cycle at a later time and date.
Use Talent Reviews and Surveys together to plan smarter and retain top talent. Learn how it works.
