In this article:
- Overview
- Requirements
- Getting Started
- Survey Details
- Confidentiality
- Questions
- Participants
- Schedule
- Languages
- Test & Review
Overview
Engagement surveys can be used to capture and measure employee engagement throughout your organization. Following the survey period, use Quantum Workplace's analytics to identify opportunity areas and strategize engagement improvement.
The rest of this article will guide you through the entire survey launch process for Engagement Surveys.
If you are a returning Engagement Survey user and would like to duplicate a previous Engagement Survey, either entirely or as a starting point for a new survey, learn how to clone a survey.
Requirements
- Available to admins and survey-admin users
Getting Started
To launch an Engagement survey:
- Click and expand Surveys in the left-hand navigation menu
- Click Administration from the drop-down menu
- Click New Survey in the top right
- Click the Annual Engagement template, then Use this template
Although not required, the Annual Engagement template is recommended as it contains important Engagement Outcome questions. These questions provide an accurate snapshot of employee engagement at the time of the survey. While the question set can be customized, avoid removing questions labeled as Engagement Outcomes to get the most out of your analytics.
Alternatively, you can use a template previously used by yourself or your organization, or create your own survey questions.
As you create the survey, use the Survey Quality Check to ensure the survey follows best practice guidelines and robust post-survey analytics. Learn more about the Survey Quality Check.
Survey Details
On the Survey Details page, configure the following details for the Engagement survey:

- Survey Name: Provide the survey name as it should appear on the survey, invitations, and reminders
- About this Survey: Optionally, provide a brief description or context for the survey participants
- Additional Languages: Specify if the Engagement survey should be included in the survey, additional languages require translations submitted in a later step of the survey creator
- Action Planning: Enabled by default, Action Planning allows teams to create actionable solutions around a survey's most impactful questions, learn more about Action Planning
- My Engagement Report: Optionally, enable the ME Report for survey participants, learn more about the My Engagement Report
- If Enable My Engagement Report is enabled, choose to include if the What Happens Next is included in the ME Report
Note: Surveys using the Annual Engagement template are defaulted to the Engagement Survey Type and can not be edited.
Click Next to continue.
Confidentiality
On the Confidentiality page, configure the confidentiality settings appropriate for the survey:

- Survey Confidentiality: Select the confidentiality setting for the survey
- Confidentiality Follow-Up: Each confidentiality setting has a different follow-up action
- Not Confidential: Enter the user(s) to notify each time the survey is completed
- Mixed: Specify the number of responses required to show survey results in Analytics, and enter an email address for survey participants to contact should they have any confidentiality-related questions
- Confidential: Specify the number of responses required to show survey results in Analytics
- Anonymous: Specify the number of responses required to show survey results in Analytics
Learn more about survey confidentiality and best practices.
Learn more about the minimum number of survey responses.
Click Next to continue.
Questions
On the Questions page add, rearrange, and edit your questions.
If you selected a template at the beginning of the survey creation process, those questions will be listed on this page. If you selected Create Your Own Survey, this is where you will add questions for your survey.

- Questions: Under the Question menu to the left of the question list, you have several options to modify your survey's questions:
- Add from Library: Add a question from Quantum Workplace's Best Practice library or from past surveys
- Add Custom Question: Create a custom question, learn more
- Add Section: Create a section to visually organize survey questions
- Survey Question Export: Export your current list of questions in detail
- Logic: Configure questions to ask follow-up questions based on responses or limit who can see a question, learn more about Survey Logic
- Styling: Customize the survey color and logo, learn more about Survey Styling
- Preview Survey: Click View to preview a finalized version of the survey, and click Share to copy the URL of the preview to your web browser's clipboard
- Note: When previewing a survey, the questions honor answer-based logic, but not demographic-based logic
- Preferred Metric: Set the preferred metric for use in post-survey analytics, learn more
- Questions: View and edit the questions currently included in the survey
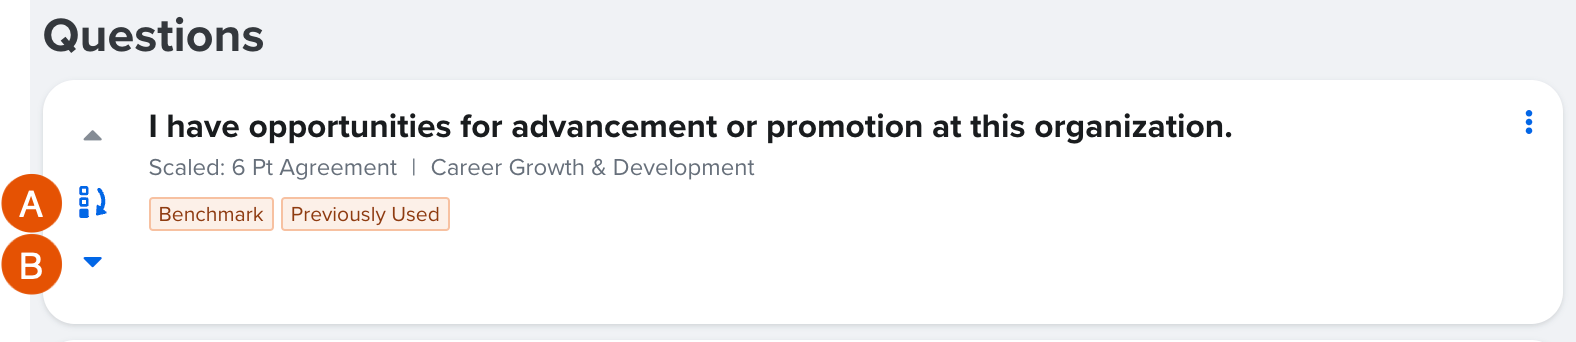
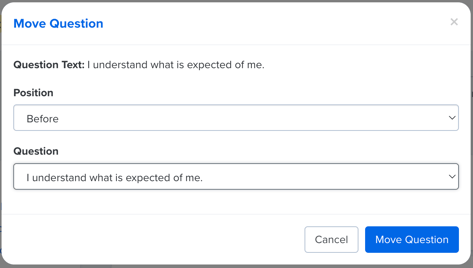
- Click the Move Question icon (Figure A) to open a modal and specify the question's position before or after a specified question/ section
- Click the up and down arrows (Figure B) to rearrange the question one place earlier or later, respectively
- Click the Move Question icon (Figure A) to open a modal and specify the question's position before or after a specified question/ section
Learn more about Quantum Workplace-recommended questions and High-Impact items.
Click Next to continue.
Participants
On the Participants page, customize how survey participants are chosen and invited.
You are not restricted to one invitation method, you can select any combination of the three methods.
As you add survey participants, click View to see who is currently set to receive a survey invitation.

Invite Manually
Manually add the individuals or upload a CSV file with employee information for all who should be invited.
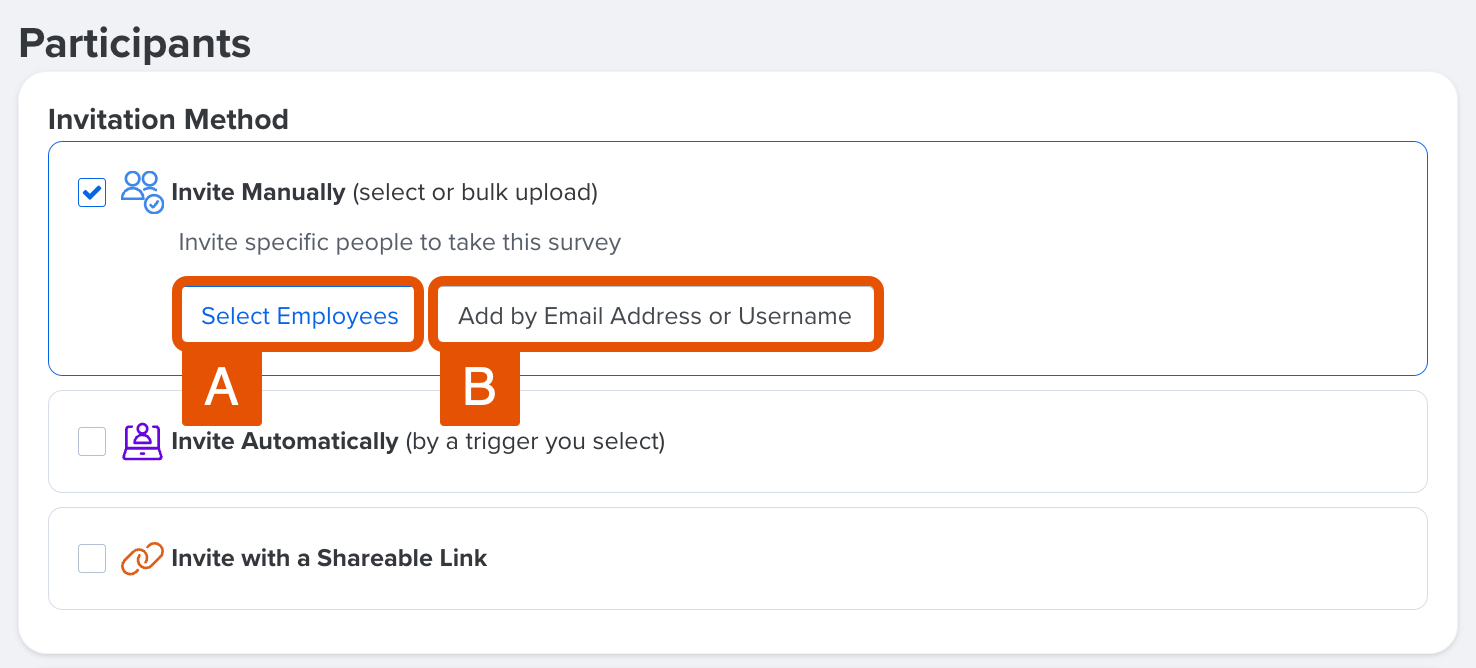
You have two options for selecting your survey participants:
A. Select Employees:
Use the Add Participants modal to search and select survey participants. You can focus your search by using the Filter, Hire Date, and Active Employees drop-down menus to categorically search through your organization.
Select the ☐ icon for the corresponding employee to add them as a survey participant. Click Add Selected to add the selected employees and exit the modal.
B. Add by Email Address or Username:
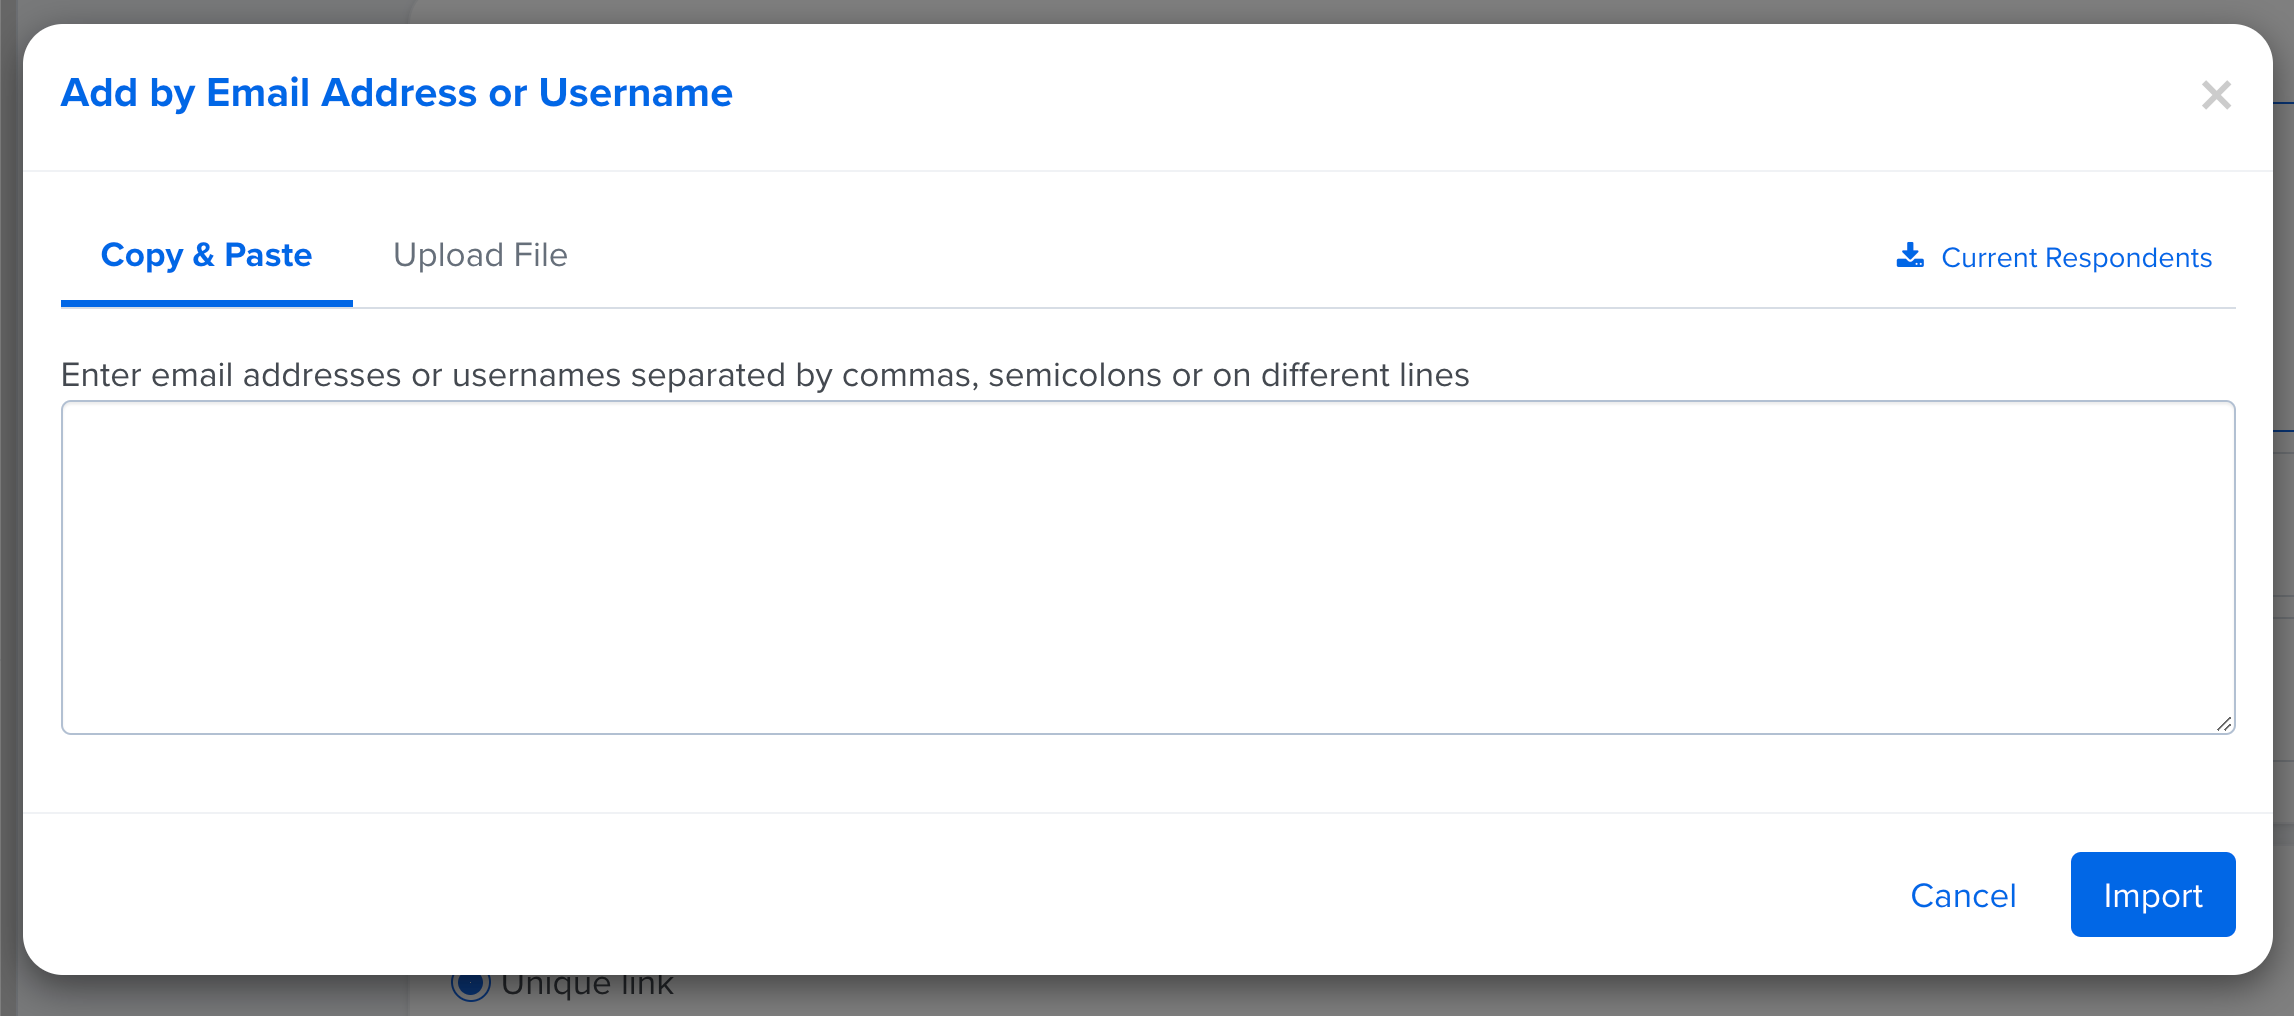
Alternatively, use the Add by Email Address or Username modal to search and select survey participants.
On the Copy & Paste tab, select employees by entering their email address or Quantum Workplace username. Enter multiple employees by separating each entry with a comma or semicolon. You can also enter the separate each entry by using the Return/Enter key so each entry has its own line.
On the Upload File tab, upload a CSV file with participant information to add to the survey. If you already have participants added, click Current Respondents to download a CSV file of the current participants.
Click Import to add the selected participants.
Note: After creating a survey, you can add additional participants from the Surveys list page.
- Click the⋮ icon for the survey to view the options menu
- Click Add Participants
- Add the new survey participant(s) and click Add Selected
Select another method or click Next to continue creating your survey.
Invite Automatically
Specify the requirements to determine what event triggers the invitation and whether this invite is sent to all employees or has an additional filter via employee demographics.
Focused Admins do not have the ability to create or edit automated surveys.
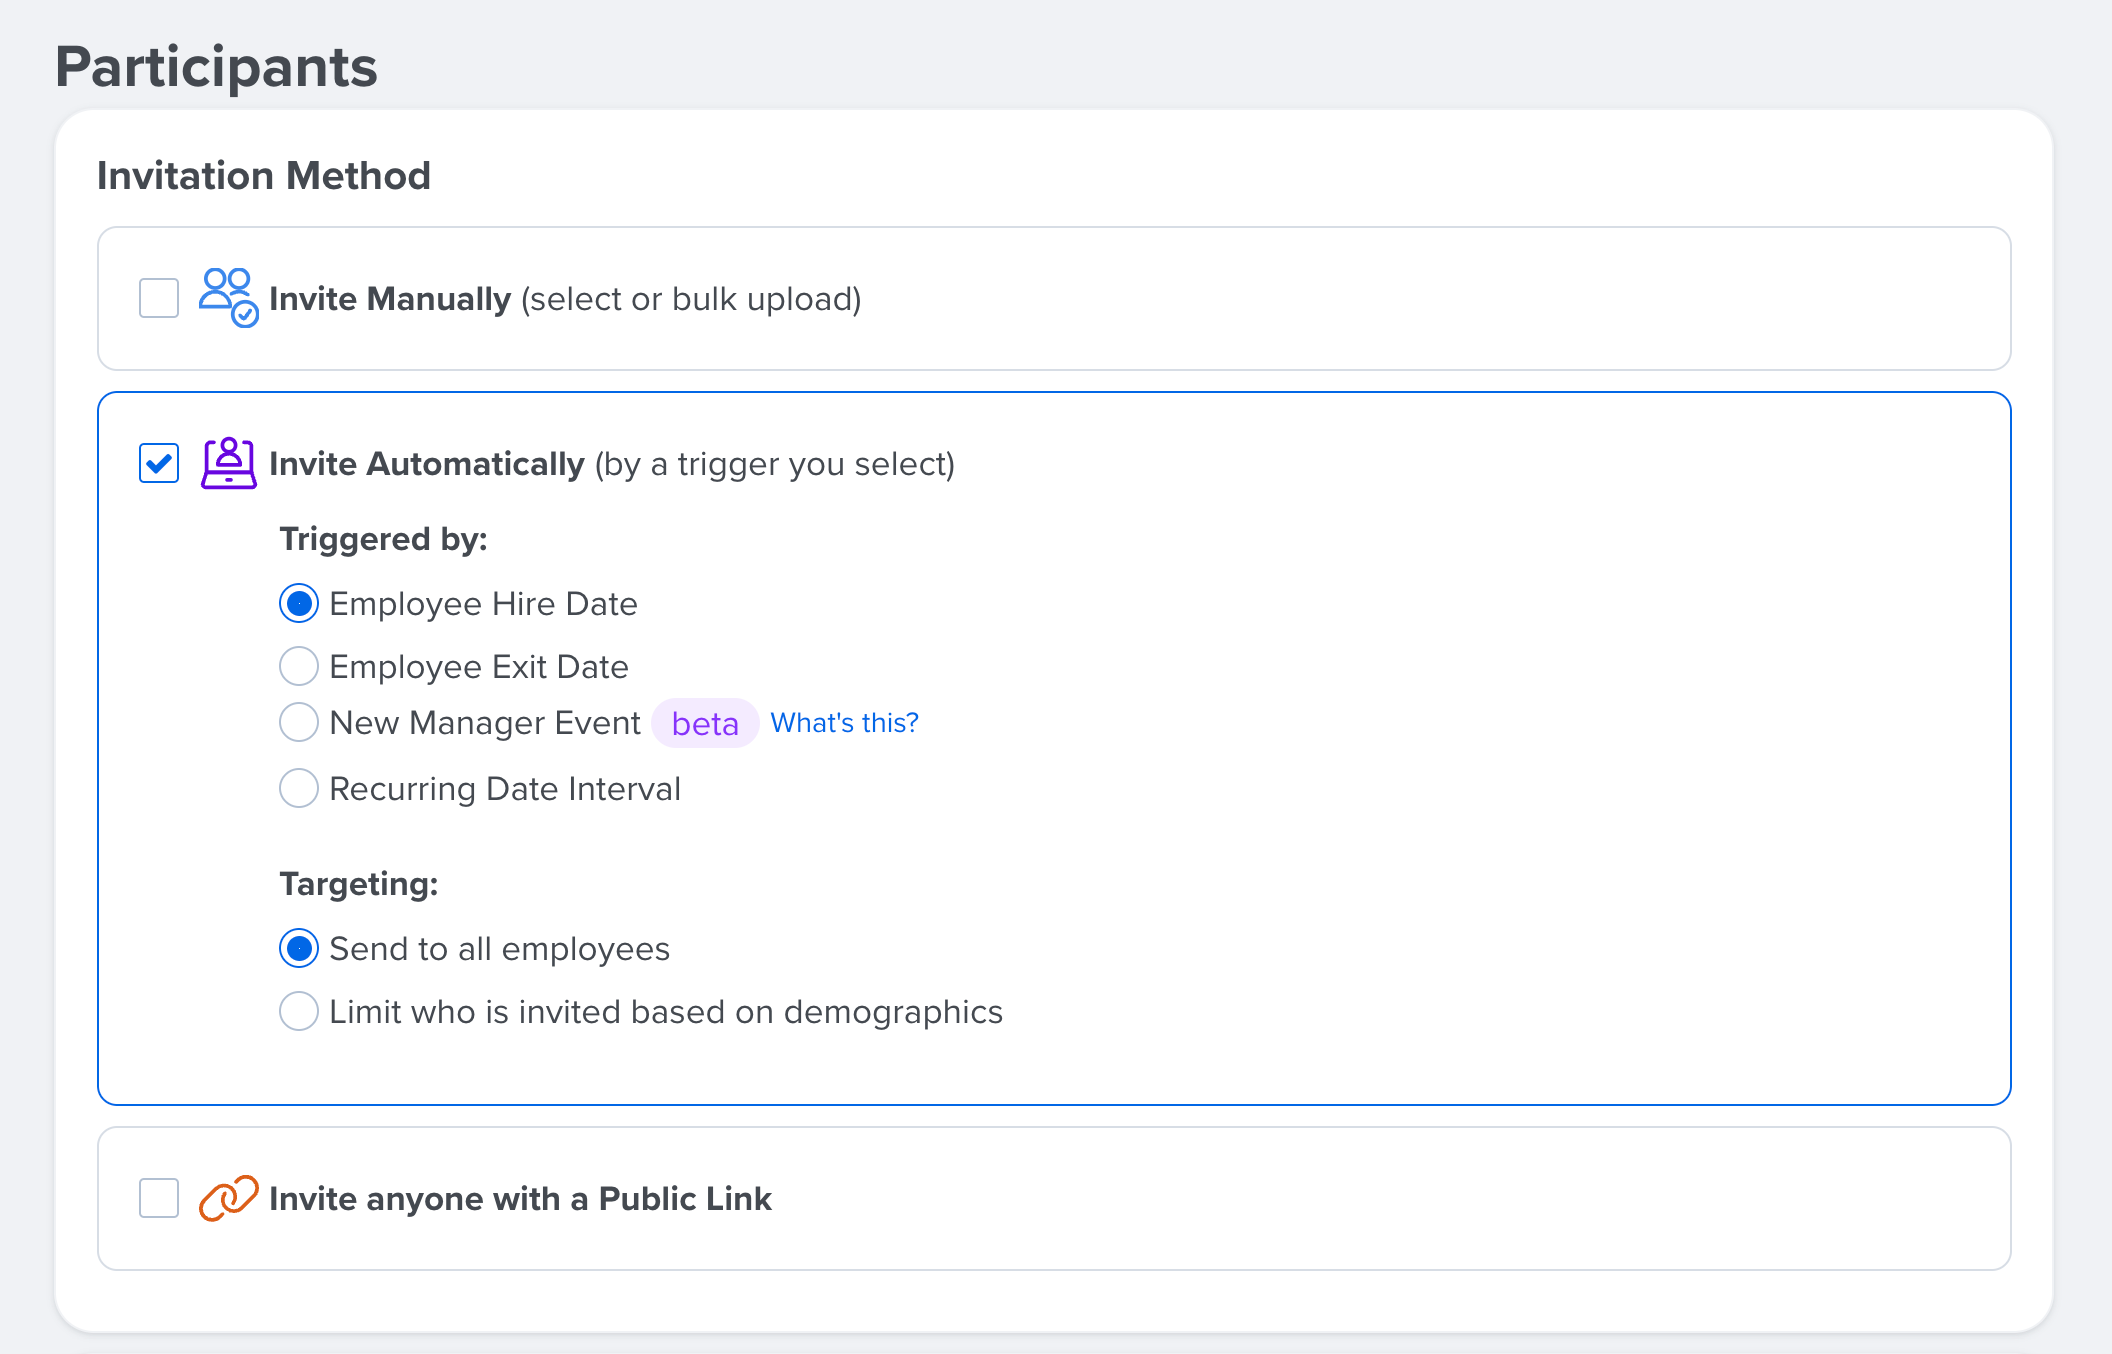
Under Triggered By, select the event to trigger an automatic survey invitation
- Employee Hire Date: Useful for New Hire surveys,
- Employee Exit Date: Useful for Exit Surveys
- Manually entering an employee's exit date under Administration > Users will also add the employee to an exit survey
- New Manager Event: Support and prepare newly promoted managers
- Recurring Date Interval: Useful for collecting consistent data on a regular basis
Under Targeting, determine who is sent survey invites after the selected trigger occurs:
- Send to all employees will invite all employees who qualify for the trigger
- Limit who is invited based on demographics allows you to control what demographics are included and excluded as an additional rule for survey invitations.
For example, if a New Manager Event survey is meant for offices in Boston and San Diego, but shouldn't include HR employees in either office, the fields can look like this:
Include: Location: Boston, Location: San Diego
Exclude: Department: HR
Select another method or click Next to continue creating your survey.
Invite with a Shareable Link
Restrict survey access to only those with a link to the survey. The link will be available on the final Test and Review page of the survey creator. Learn more about shareable links.
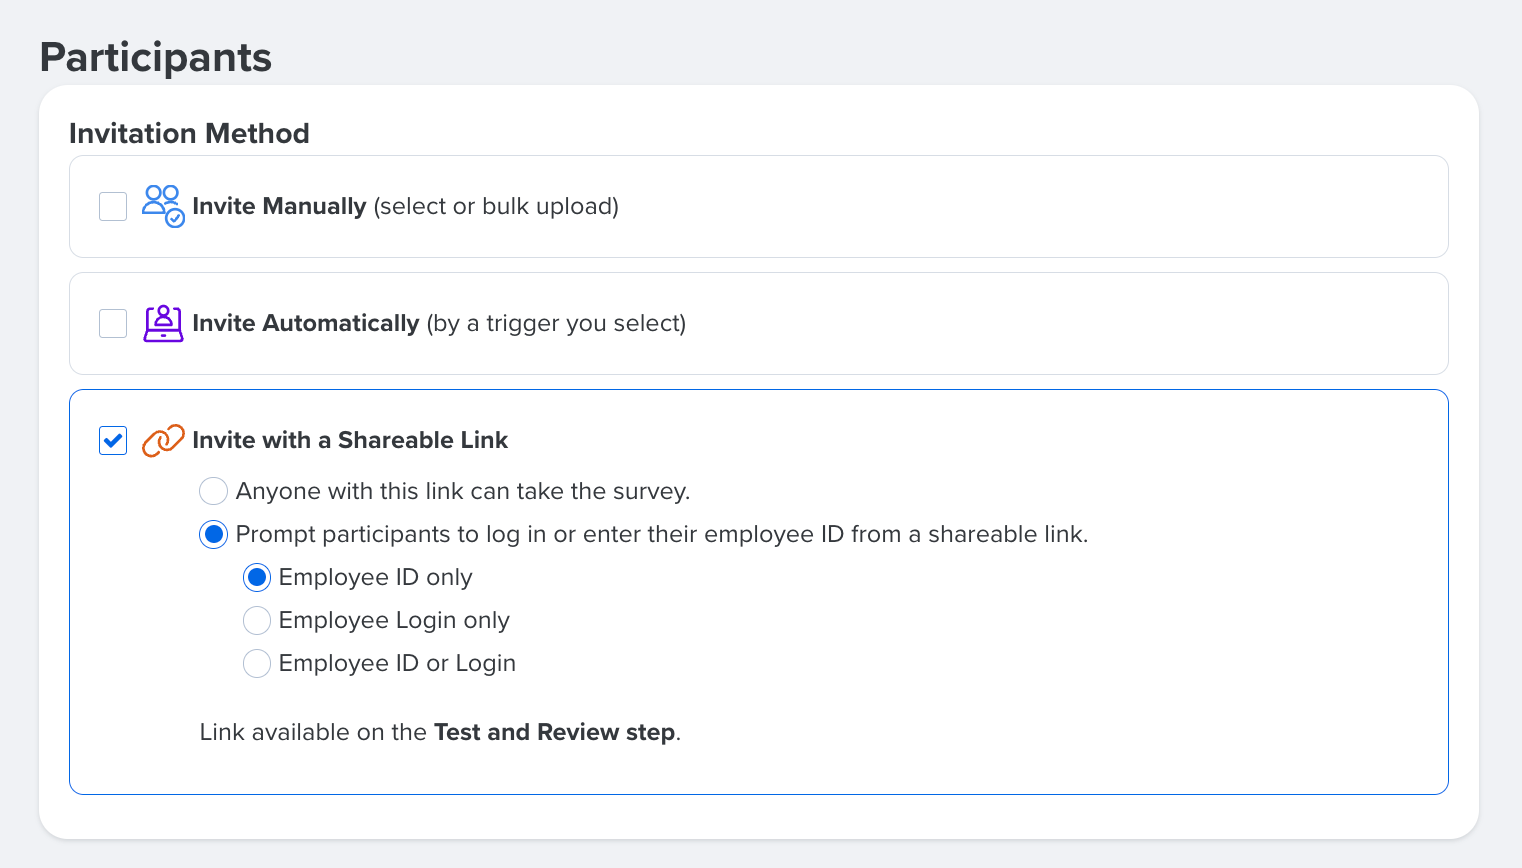
Select one of the options:
- Anyone with this link can take the survey: Allows any users with the link to access the survey
- This option does not capture demographic data for survey participants
- Prompt participants: Select how participants can provide credentials, either via Employee ID and/or Employee Login to complete the survey
- By self-identifying, demographic information can be captured in the survey's analytics
If you only selected, Invite with a Shareable Link, click Next to continue to the Schedule page.
Survey Access Method
If you selected either Invite Manually or Invite Automatically as the invitation method for your survey, specify how your survey participants will securely access the survey.
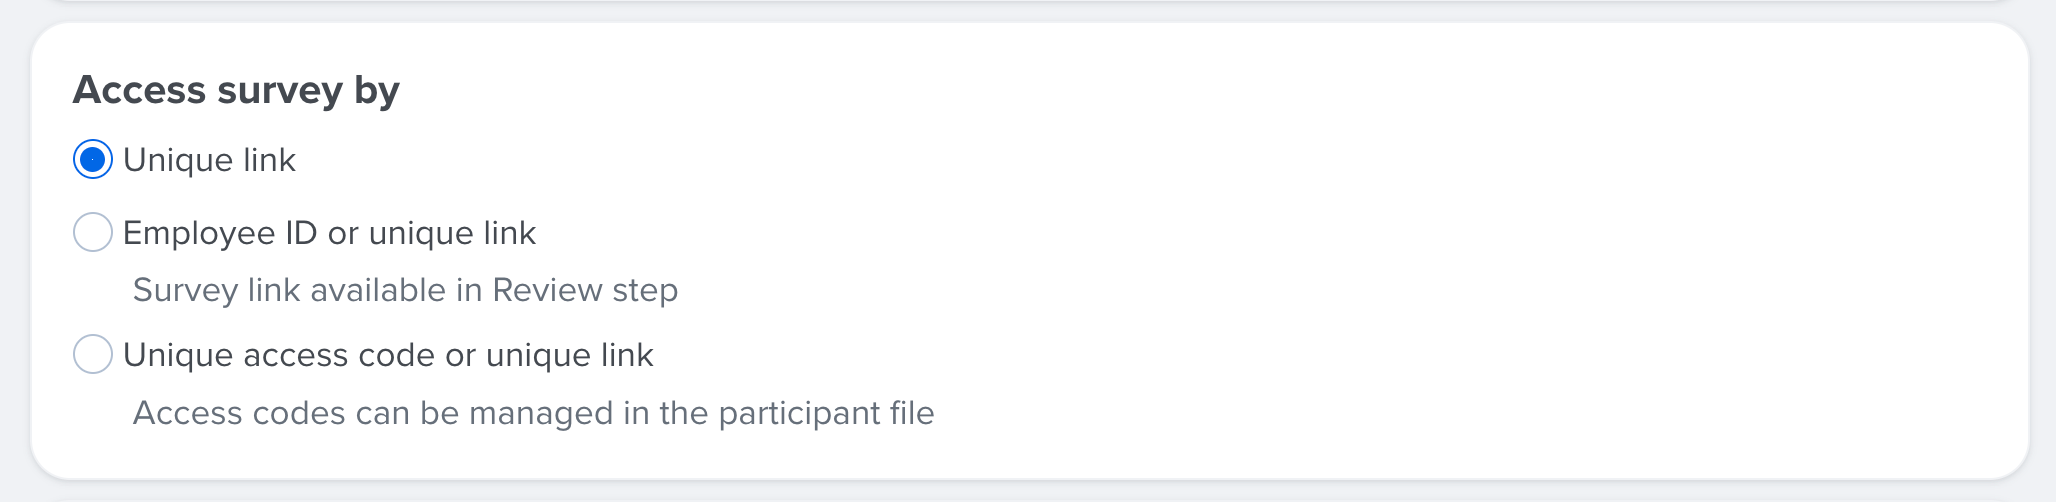
Select one of the following options:
- Unique Link: Participants receive a unique link in their email inbox that opens their survey
- Employee ID or Unique Link:
- Employee ID: A generic participant URL and accompanying QR Code is created for this survey which you can distribute internally. It requires participants to enter their employee ID to open their survey
- Unique Link: Participants receive a unique invitation link in their email inbox that opens their survey
- Unique Access Code or Unique Link
- Unique Access Code: A generic participant URL and accompanying QR Code is created for this survey which you can distribute internally. It requires participants to enter an access code to open their survey learn more. We assign a randomly generated code by default; optionally, you can assign codes for users as long as they are unique
- Unique Link: Participants receive a unique link in their email inbox that opens their survey
Click Next to continue.
Schedule
On the Schedule page, determine when invitations are delivered, how long surveys are open for, and when reminders, if any, are sent to participants.
Depending on the invitation method(s) selected in the previous step, the options displayed on the Schedule step will vary.
Use the following links to see what the Schedule page looks like based on the invitation method(s) selected:
Invite Manually

- Time Zone: Click Change Time Zone to update the time zone reflected in the survey setup
- Invitations: Determine if invitations should be sent immediately after launch or on a specific date, view a sample Invitation & Reminder message
- Optionally, customize the text in the Email Subject Line and/or Invitation Message to add context or instructions for participants
- Survey Deadline:
- Close on a Specific Date: The survey has a close date, at which point surveys can not be submitted (recommended)
- Remain Open: The survey itself does not close and will continually capture information as surveys are submitted, however, invited participants will have a specified amount of days to complete their survey before they're no longer able to submit their responses
- Invitation & Deadline Preview: Expand the card to view a live preview of the survey's email invite
- Reminders: Optionally, configure when reminders are sent to participants and their messaging
- Optionally, customize the text in the Reminder Subject Line and/or Reminder Message field to add context or instructions for participants
- Click + Add Reminder to add an additional reminder
Click Next to continue.
Invite Automatically

- Time Zone: Click Change Time Zone to update the time zone reflected in the survey setup
- Invitations: Determine if invitations should be sent immediately after launch or on a specific date, view a sample Invitation & Reminder message
- Optionally, customize the text in the Email Subject Line and/or Invitation Message to add context or instructions for participants
- Survey Deadline: Determine how many days survey participants have to complete their survey
- Invitation & Deadline Preview: Expand the card to view a live preview of the survey's email invite
- Reminders: Optionally, configure when reminders are sent to participants and their messaging
- Optionally, customize the text in the Reminder Subject Line and/or Reminder Message field to add context or instructions for participants
- Click + Add Reminder to add an additional reminder
Click Next to continue.
Anyone with a Shareable Link

Select whether the survey should remain open and capture responses as they're submitted, or if the survey should have a close date, at which point surveys can no longer be submitted.
Click Next to continue.
Languages
If you specified that a survey is offered in another language, besides English, you will see the Languages page following the Schedule page where you're prompted to add translations.
If your survey is only in English, you will see the Test and Review page instead.
On the Languages page, enter translations for the survey title, description, reminders, and each question. Learn how to add translations individually or in bulk.
Test and Review
On the Test and Review page, review key details and dates for your survey before finalizing and launching the survey.
Learn more about testing and previewing surveys prior to launch.
The information displayed on this page should reflect and confirm your survey design decisions.

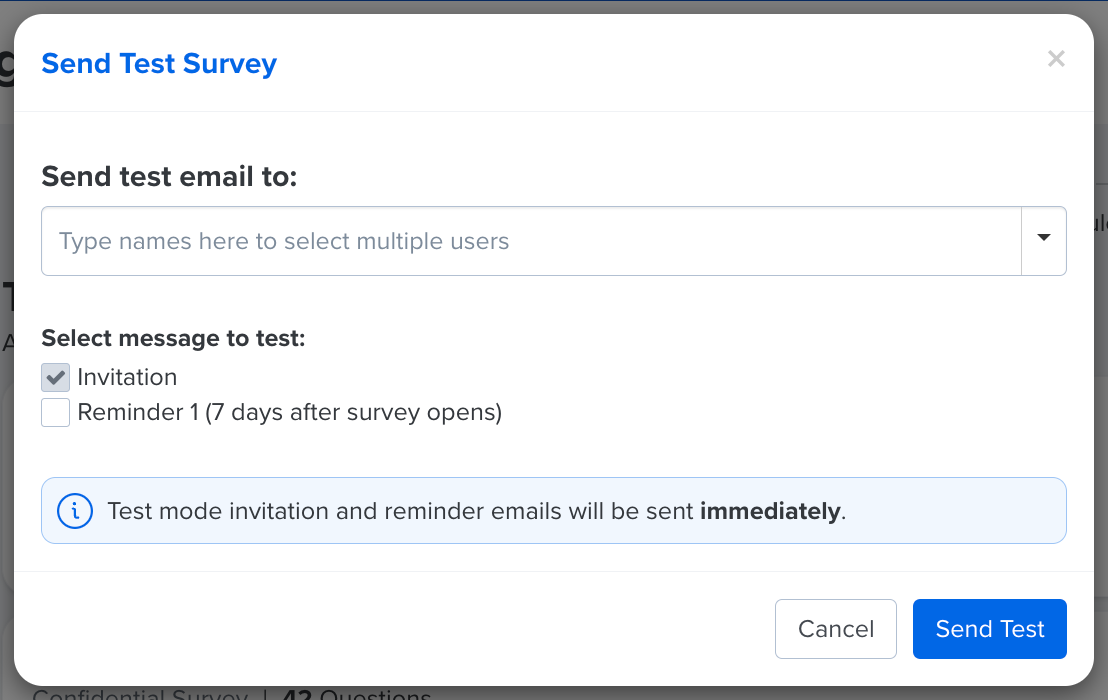
- Test Mode: Optionally, click Send Test Survey to send a survey sample to select users as well as which message to be included
- When previewing a survey, the questions honor answer-based logic, but not demographic-based logic
- When previewing a survey, the questions honor answer-based logic, but not demographic-based logic
- Survey Details: This card details the survey name, confidentiality, and the specified survey timeline
- Participants: See the number of participants currently queued to be invited to participate, click View the participants in detail
- Survey Distribution: This section reflects your selections on the Participants page and allows you to perform any follow-up actions, i.e. adding users manually or copying the shareable link/QR code, as you could on the Participants page
Click Schedule Launch to complete the survey. If you schedule the survey to launch at a future date, it will automatically launch at the specified time.
Note: When users are deactivated, they’re automatically removed from draft or live surveys (except Exit Surveys). ➡️ Learn more here.