In this article:
- Overview
- Requirements
- Access the User Import
- First-Time Bulk Upload
- Import a User File
- Update an Existing User File
- Common Errors
- Export a User File
Overview
Use User Management to add and manage user information individually and in bulk via User File CSV files.
Make large updates to employee information reliably by bulk-uploading User Files.
Additional Resources:
- User Data File and Required/Supplemental Demographics
- Guide to User Management
- Admin General Settings
- Product Training: User Management
Requirements
- Available to full admin users
Access the User Import
To access the User Import feature:
- Click and expand Global Settings in the left-hand navigation menu
- Click Users
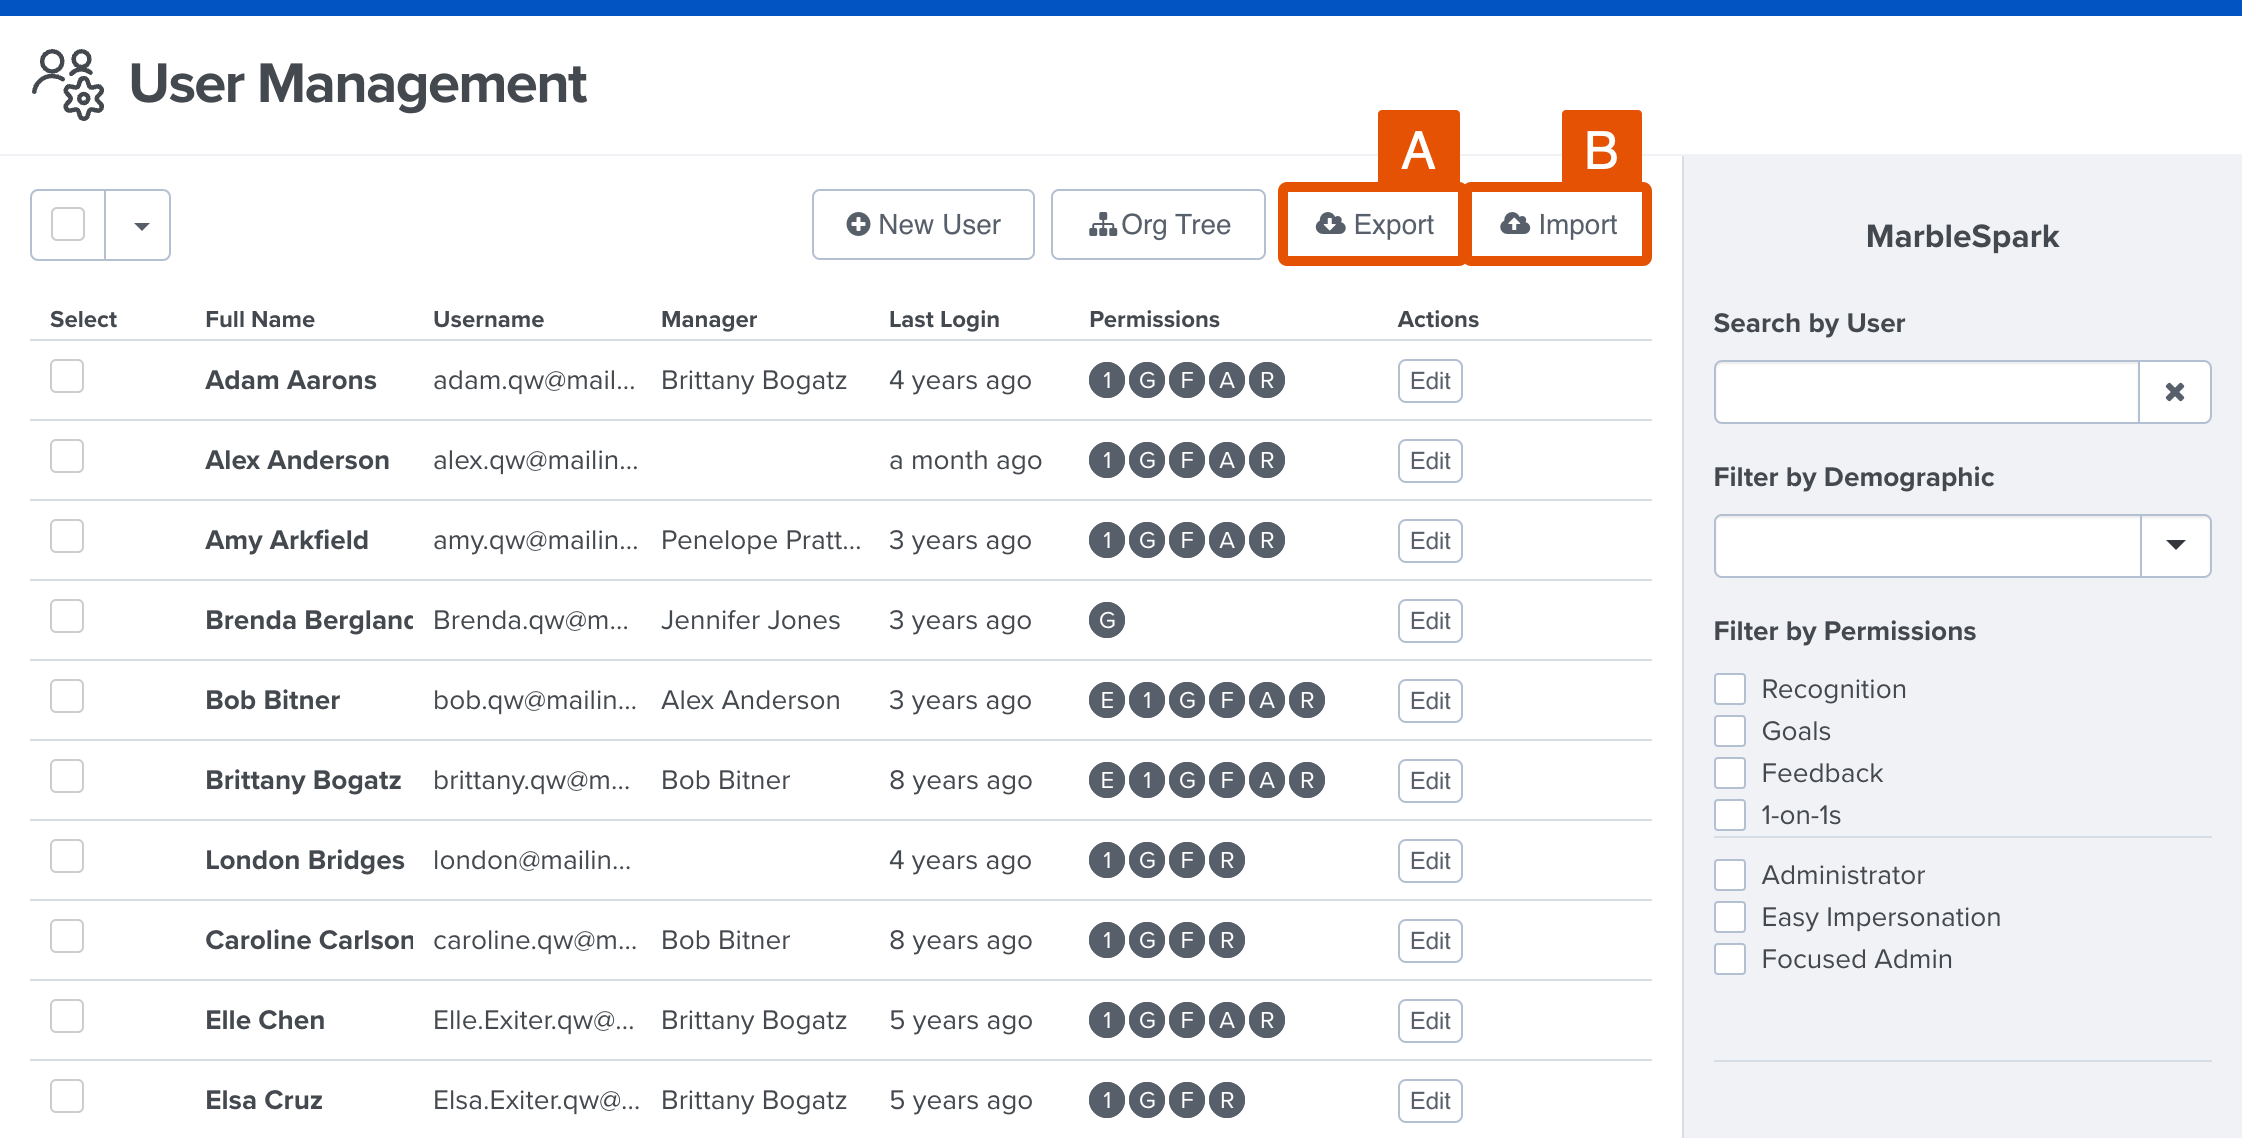
From the User Management page, you can perform several actions:
- A. Export: Click to export your organization’s current User File
- B. Import: Click to upload your User File and view Import History
First-Time Bulk Upload
As a new user, to bulk upload your user file, first determine if additional demographics should exist alongside the default demographic attributes.
Second, once your user file is uploaded, map the demographics to ensure the demographic attributes between the user file and Quantum Workplace are properly matched, learn how to import a User File.
Learn more about Quantum Workplace-recommended demographic attributes to include in your user file.
Create a New Demographic
To create a new demographic:
- Click and expand Global Settings in the left-hand navigation menu
- Click General Settings
- Click the Demographics tab
- Click + New Demographic in the top-right
- Enter the demographic name, and click Create Demographic
Once the demographics have been added, configure permissions for each attribute:

- A. Show on Profile Card: Specify which group to have the associated attribute displayed on their profile card
- B. Filtering & Team Goals: Specify which group has the ability to filter when viewing analytics and be included in Team Goals based on attributes
- C. Slicing: Specify which group has the ability to slice when viewing analytics
Once demographics are created, you are ready to import the user file and map the demographics as covered in the following sections in this article.
Import a User File
To import a User File:
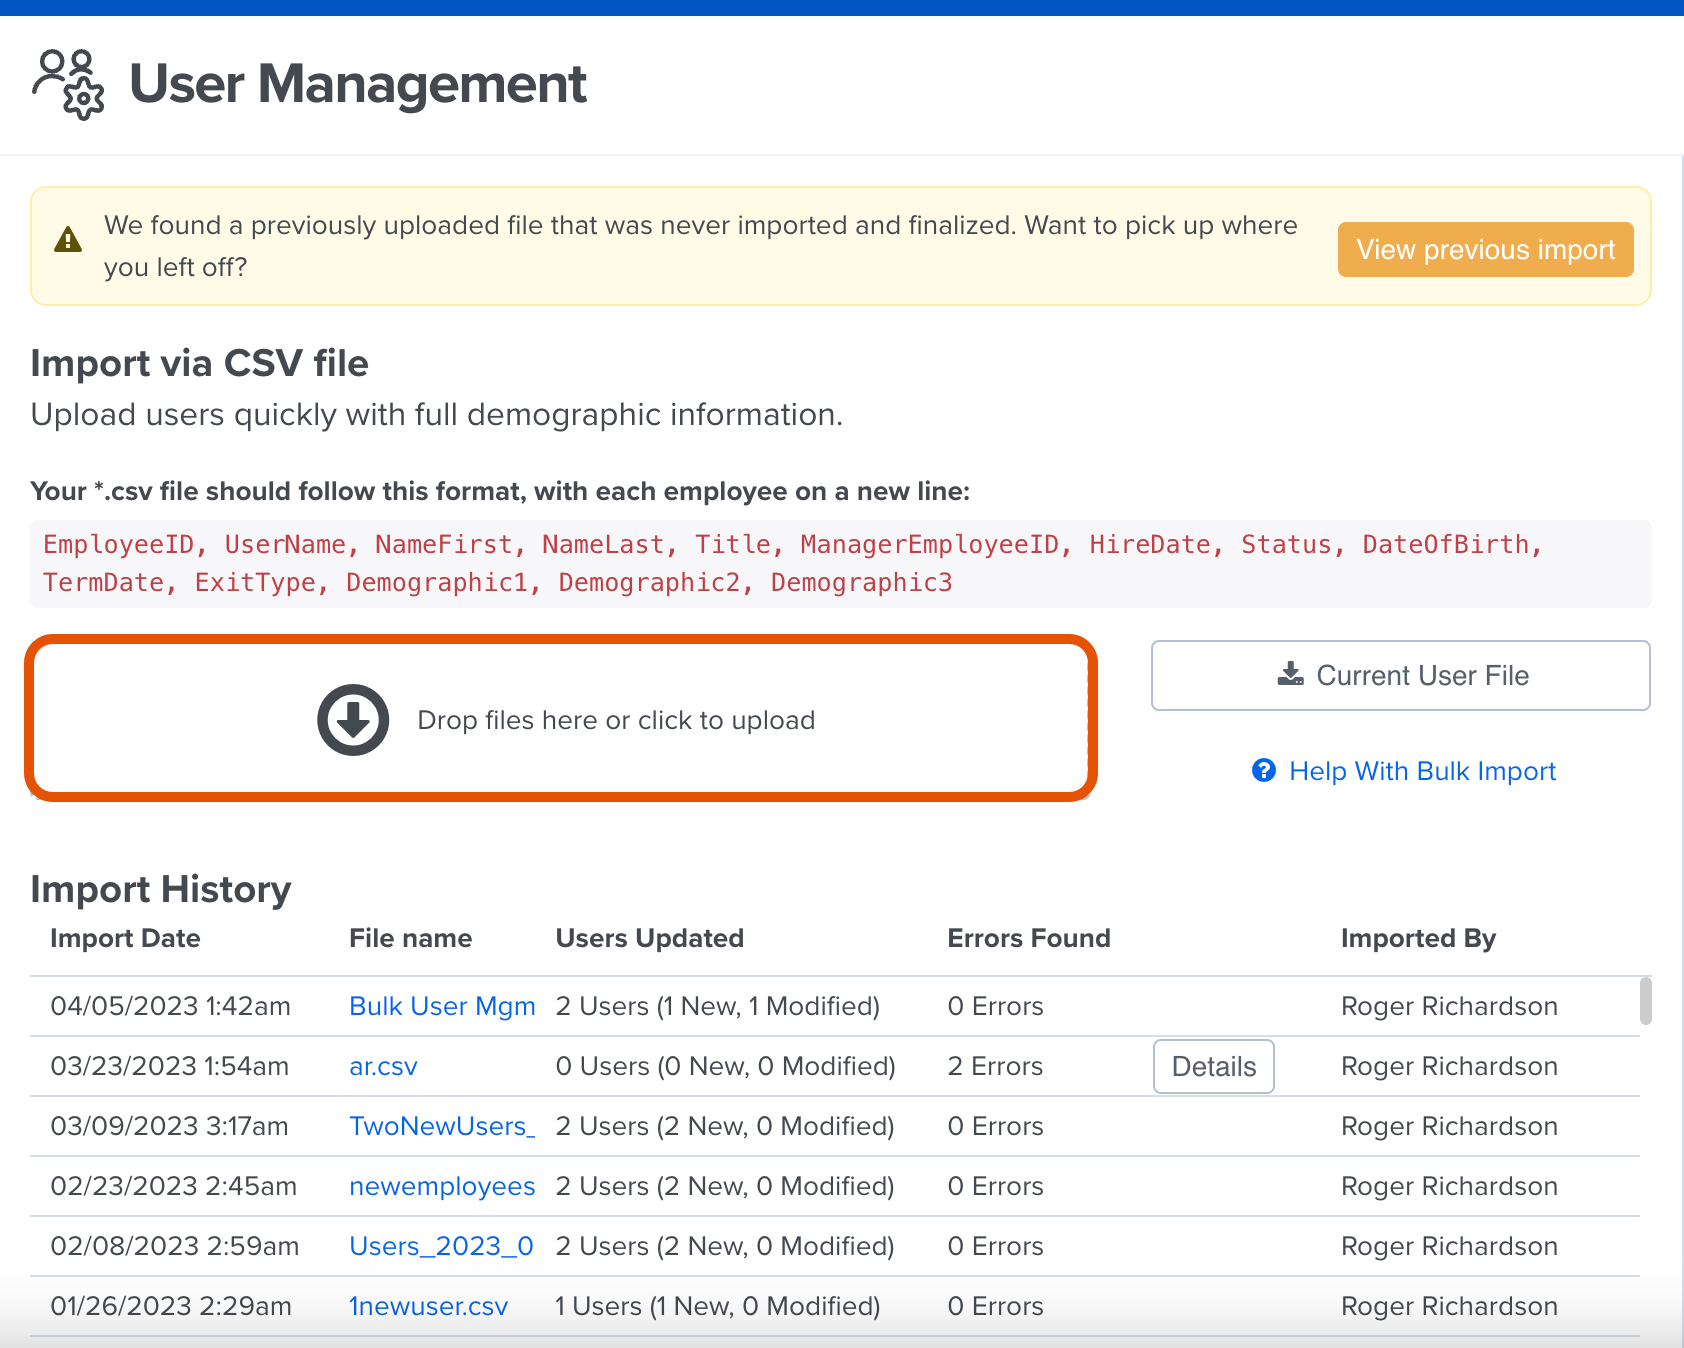
- From the User Management page, click Import
- Click the upload window to upload a file or drag and drop the file into the window
- Click Current User File to download the current User File
- Continue on to the Demographic Mapping section to complete the import process
Discover even more ways to support your team and grow with Quantum Workplace. Explore what's possible.
Demographic Mapping
Once the User File is uploaded, you are directed to the Demographic Mapping page to verify that demographics were accurately carried over.
When managing user data within Quantum Workplace, consider the impact that updating demographic data can have on your ability to see trends in survey analytics.
To complete the Demographic Mapping step:

- Toggle demographic mapping settings (Figure A)
- Map the file's demographics (Figure B)
- Specify the null value for dates & active status fields (Figure C)
- Click Review & Confirm Import to continue the import process
- Click Save Draft Mapping to exit and resume later
Demographic Mapping Settings
Configure the following settings:
- First row contains column headings: Enabled by default, specifies if the first row of the User File should contain column headings, i.e. FirstName, LastName, UserName, etc.
- Send welcome email to newly created users: Specifies if new users, added by a new User File, should have an automatic welcome email delivered to the new user's email address
- Allow duplicate user email address: Specifies if more than one user can share the same email address, e.g. if enabled, two employees can share the same email address without causing the import to fail
Continue to the next section, Demographic Mapping.
Demographic Mapping
Use the vertically/horizontally scrolling table to verify and confirm that the demographics in the header match the demographics for each corresponding column.
To map the file's demographics:

- For one column at a time, confirm that the demographic in the header matches the first row of the table
- If a column's demographic does not match, use the header's drop-down menu to select the closest matching demographic
- Repeat for each column of the User File
An example of correctly matched and mismatched demographics:

Date & Active Status Format
Enter the null format for dates and the values associated with an active employee for consistent and reliable updates.
The null format reflects the organization's default date format and is to be followed for future updates.
To enter the formats for dates and active statuses:
- For the Date of Birth, Hire Date, and Term Date cards, enter the null format for the date
- For example, the format, MM/DD/YYYY is entered as 00/00/0000
- For the Active Status card, enter all of the values your organization uses to represent an active employee
- For example, common values include True, Active, OnLeave, etc.
Confirm Changes
Once the User File is imported, verify and confirm the changes.
To confirm the changes:

- If any, address the Data Quality Warnings as needed
- Confirm that the number of new and total users is correct
- Click Yes, Confirm Changes to complete the import process
Update an Existing User File
To update an existing User File:

- Click and expand Global Settings in the left-hand navigation menu
- Click Users
- Click Import in the top-right
- Click Current User File to download the current User File as a CSV file
- Make the necessary edits in the CSV file and import the User File, learn how
Tips for User File Updates
- New Demographics for Existing Users: When adding new demographics for existing users, follow the format listed on the Import page:
EmployeeID, Username, NameFirst, NameList, Title, ManagerEmployeeID, HireDate, Status, DateOfBirth, TermDate, ExitType, Demographic1, Demographic2, Demographic3... [New Demographic], etc.
- Updating Demographics for Existing Users: When updating demographics for existing users, the updated file must include the Employee ID and Username, in addition to the updated demographic fields.
Common Errors
The following are common errors that occur when trying to upload a user file, refer to this list to correct and successfully update the user file.
- The User File is missing one or more required fields, i.e. FirstName, LastName, UserName, etc. Click for a complete list of required and supplemental demographics.
- More than one user is mapped to the same existing user name
Export a User File
To export a User File:

- Click and expand Global Settings in the left-hand navigation menu
- Click Users
- Click Export to start the export process
- Once the export file is complete, click Download Export to download the file to your device
One HR platform for connected talent insights. See how Quantum Workplace brings your data together across 1-on-1s, talent reviews, performance reviews, and more—so you can spot trends, act fast, and make more informed people decisions. Explore the interactive product tour or request a personalized demo with your Customer Success Manager.