In this article:
- Overview
- Requirements
- Understanding Action Plan Assignments
- Enable Action Planning Permissions for a Role
- Assign Users to an Action Plan
Overview
As an admin, assign a user to an Action Plan as an Owner, Contributor, or Viewer according to specific branches of the Manager Org Tree or an existing custom org tree to give them visibility into the Action Plan.
Additional Resources:
Requirements
- Available to full admins and survey-admin users
- Users must have the Action Planning permission enabled, learn more
Understanding Action Plan Assignments
Action Plan Owners and Contributors share the same abilities in completing and managing Action Plans. The Action Plan Owner is ultimately accountable for the progress and completion of an Action Plan.
Action Plan Viewers have visibility into an Action Plan but can not make any changes.
Enable Action Planning Permission for a Role
For a user to be assigned to an Action Plan, their role must have Action Planning enabled.
As an admin, to enable Action Planning for a role:
- From the survey's analytics, click Access Settings
- Click and navigate to the Access Roles tab
- Click an existing Role or click + Add Role
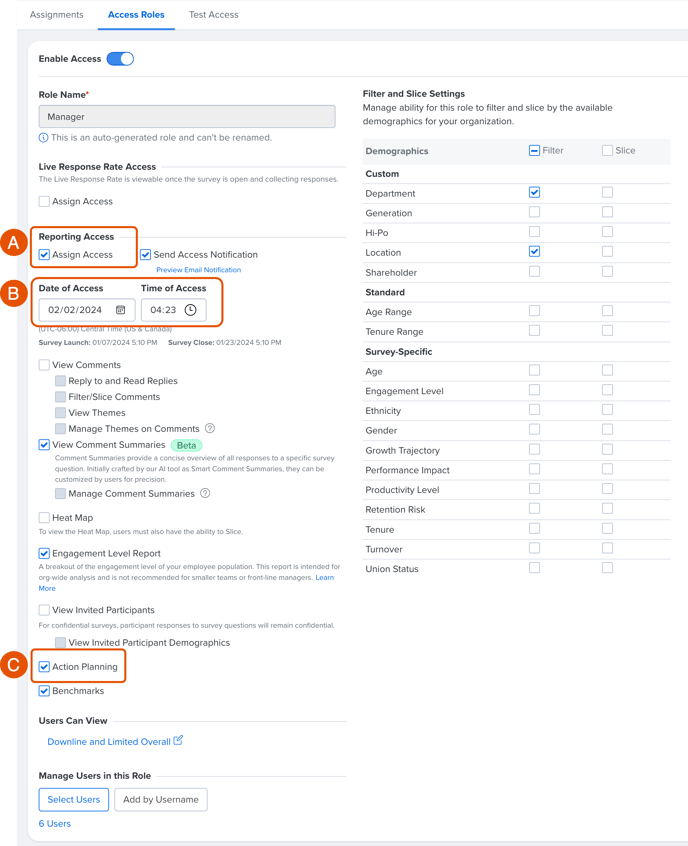
- Click and enable Assign Access for Reporting Access to expand a menu (Figure A)
- Verify or configure the role's Date of Access and Time of Access if you're verifying or creating a new role, respectively (Figure B)
- Verify or click Action Planning (Figure C)
- Click Save
Assign a User to an Action Plan
As an admin, to assign a user to an Action Plan:

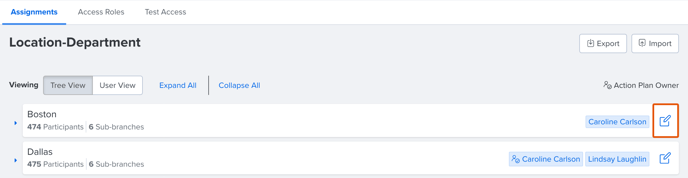
- From the survey's Action Plan tab, click Access Settings (Figure A) or Manage Plan Users (Figure B) to navigate to the Access Settings menu
- Click on the Manager Org Tree or custom org tree you'd like to use
- Identify the branch where the user should be assigned and click the branch's corresponding Edit icon
- In the Manage Access to [Branch] modal, enter and click the user's name in the search bar (Figure A) then specify the user's assignment via the drop-down menu (Figure B)
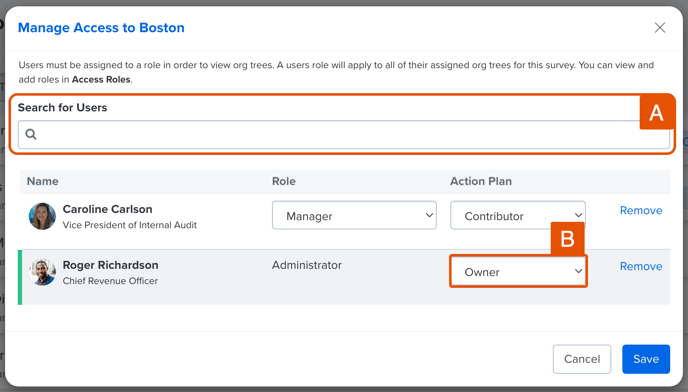
- The selected Role for a user must have Action Planning enabled, learn more
- Click Save
All Results
All Results refer to an action plan at the organizational level.
The action plan at this level is managed by the Action Plan Owner of the All Respondents assignment.