In this article:
Overview
As an admin, create a Feedback cycle to facilitate Feedback requests on behalf of your employees.
This article is a guide for launching single or automated Open Feedback cycles. Learn how to launch a Focused Feedback cycle.
Requirements
- Available to admin users
How to Launch a Feedback Cycle
To launch a Feedback cycle:
- Click and expand Administration in the left-hand navigation menu
- Click Feedback
- Click either Single Cycles or Automated Cycles
- Learn how to launch an automated Feedback cycle
- Click New Cycle
- Click Select for an Open Feedback Cycle (recommended) or a Focused Feedback Cycle, learn how to launch a Focused Feedback cycle
Cycle Setup
To navigate and complete the Cycle Setup step:
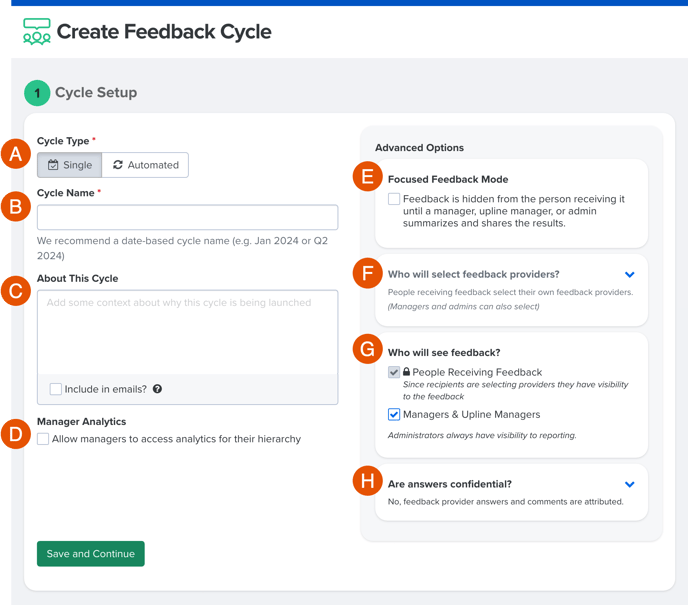
- A. Cycle Type: Verify that Single is selected
- B. Cycle Name: Enter the name of the Feedback cycle
- C. About: Enter the background or context for the cycle
- Check the Include in emails? box if the About information should appear in email notifications
- D. Manager Analytics: If enabled, managers can view the cycle analytics for their downline in aggregate
- E. Focused Feedback Mode: Automatically enabled/disabled depending on your earlier selections, learn more about Focused Feedback cycles
- F. Select Feedback Providers: Click and expand this card to specify who can select Feedback Providers
- G. Feedback Visibility: Click and expand this card to specify who has visibility into the received feedback
- Admin users always have visibility into the resulting reporting
- H. Answer Confidentiality: Click and expand this card to specify the confidentiality settings for received feedback
- After the first response, the confidentiality settings can not be changed
- The Confidential option requires specifying the minimum number of responses required to reveal feedback, learn more about min-n
- Regardless of the confidentiality option selected, responses from the groups, Manager and Self are always attributed
Click Save and Continue to proceed.
Feedback Recipients & Providers
On the Feedback Recipients step, you will specify the employees who should receive feedback. You can also import Feedback Providers for each employee on this step.
Add Feedback Recipients
To add Feedback recipients:
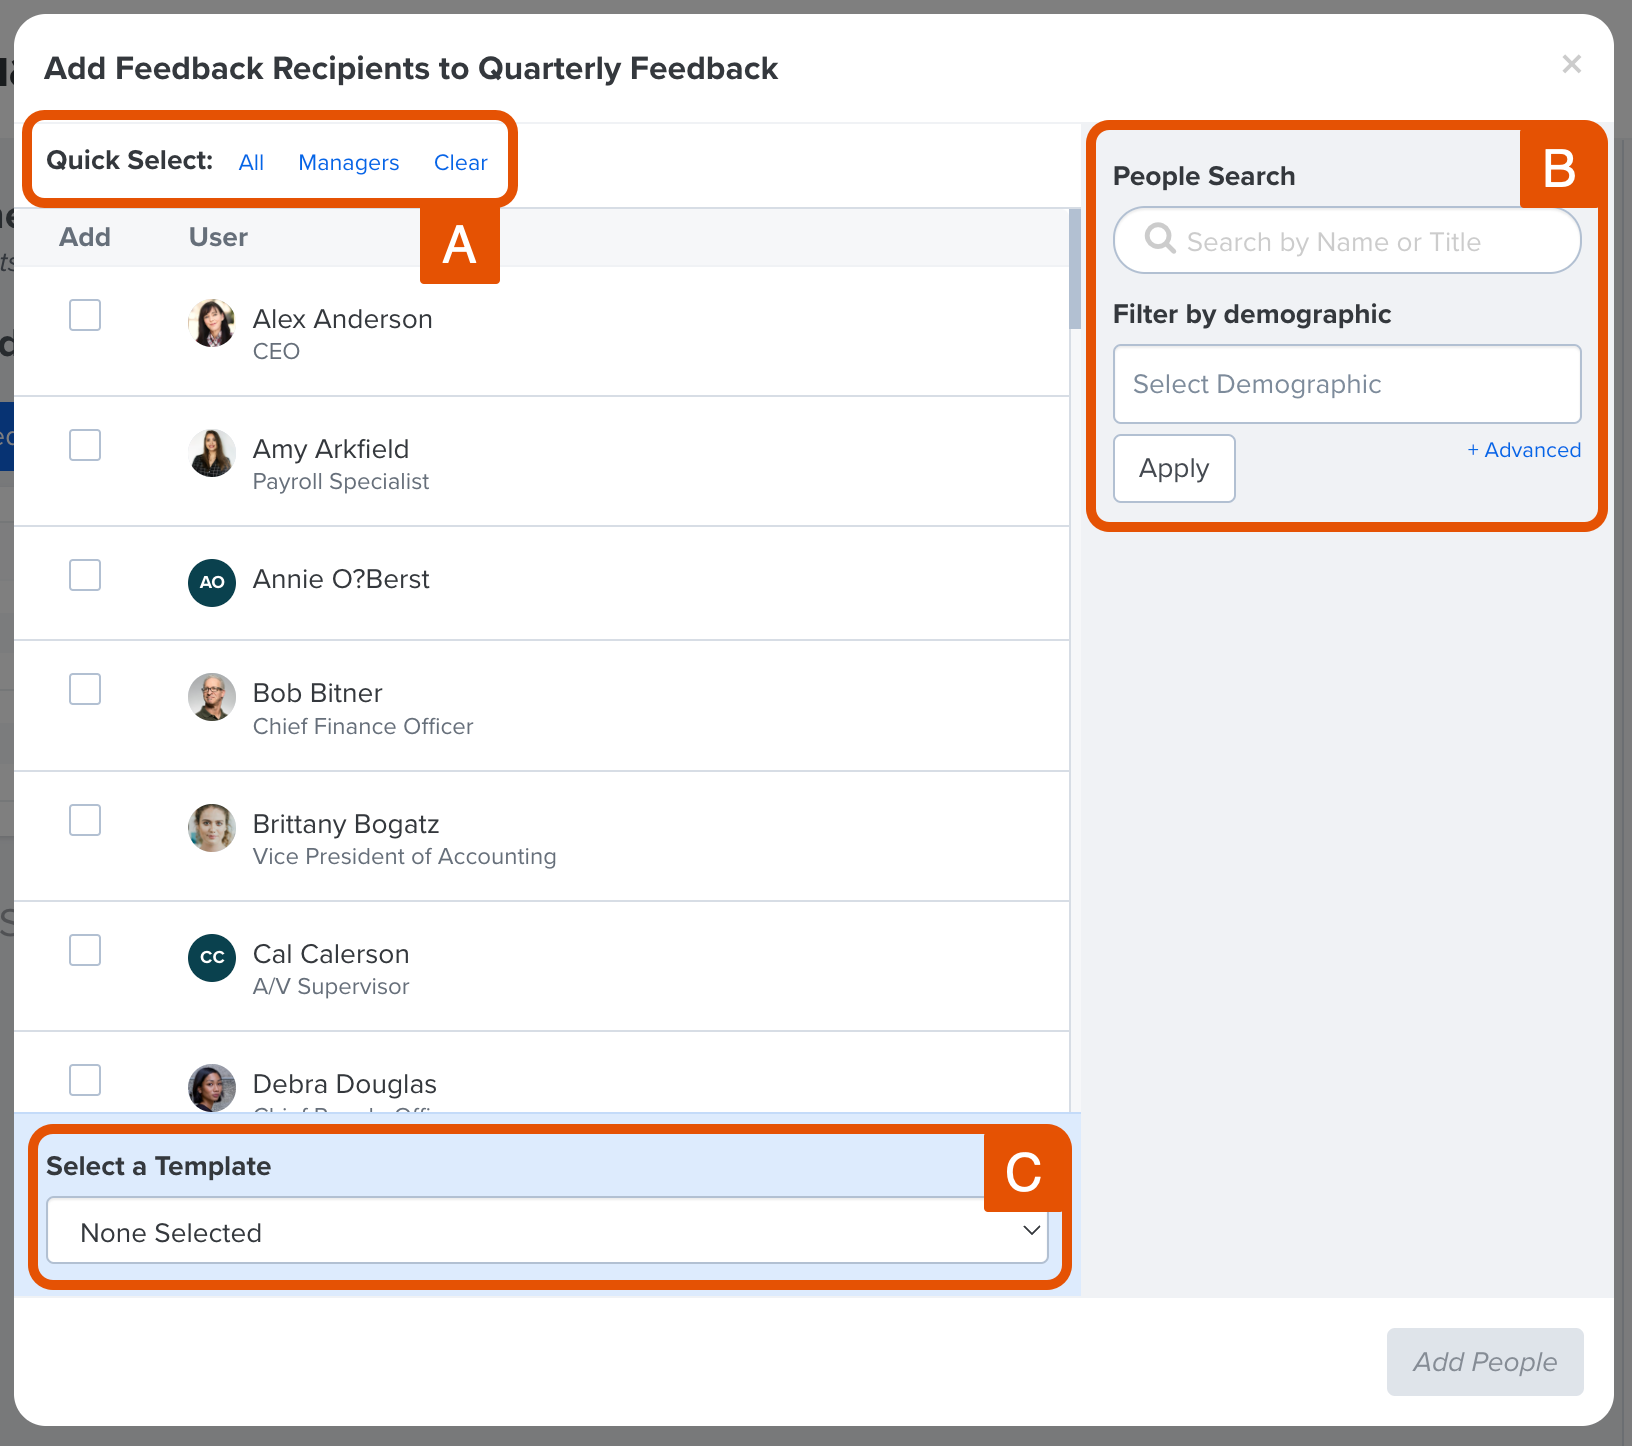
- Click Select Feedback Recipients to open the Add Feedback Recipients modal
- Identify the recipients and check the user's corresponding checkbox
- Use Quick Select to quickly select all users and/or all managers
- Use the User/Demographic Search (Figure B) to narrow the users
- In Figure B, click + Advanced to filter the users by usernames/emails
- Select the template for the selected users (Figure C)
- Click Add People
- Repeat until all recipients are added with the appropriate template
- Click All Done to finalize the selections
Add Feedback Providers
To add Feedback Providers to the Feedback Cycle:
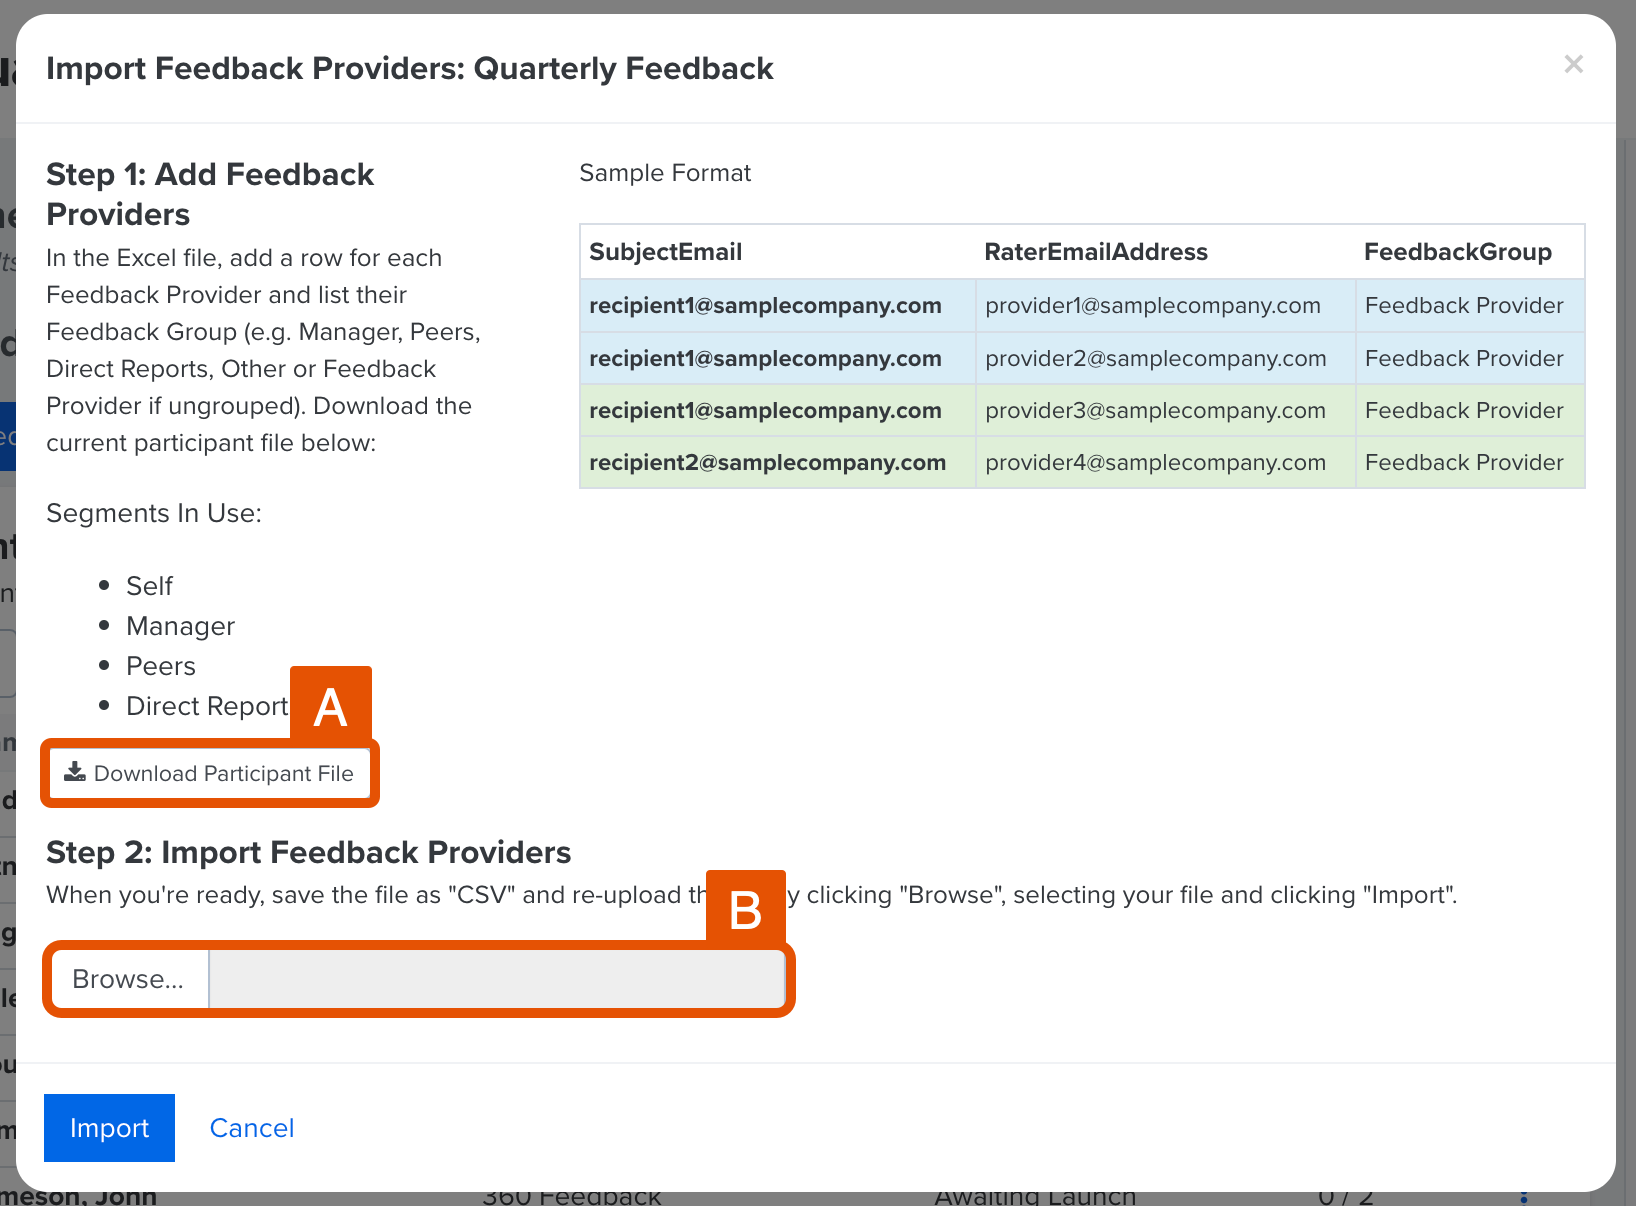
- Click Import Feedback Providers which appears once recipients are added
- Click Download Participant File to access a file with all of the selected Feedback Recipients
- In the downloaded file, add a row for each Provider and enter their Feedback Groups, i.e. Manager, Peers, etc.
- Refer to the listed Feedback Groups in the Segments In Use for eligible entries when entering Feedback Groups
- After configuring the Participant file, save the CSV file and use the upload window (Figure B) to add the Feedback Providers
- Click Import to finalize the Feedback Providers
Learn more about selecting Feedback Providers.
Once Feedback Recipients and Providers are added to the cycle, click Save and Continue to proceed to the next step.
Set Schedule & Milestone
On the Set Schedule & Milestone step, configure the date and time for each event in the Feedback cycle, i.e. Launch Date, Reminder Date, Due Date, Visibility Date, etc.
To update the date and time for the corresponding milestone:
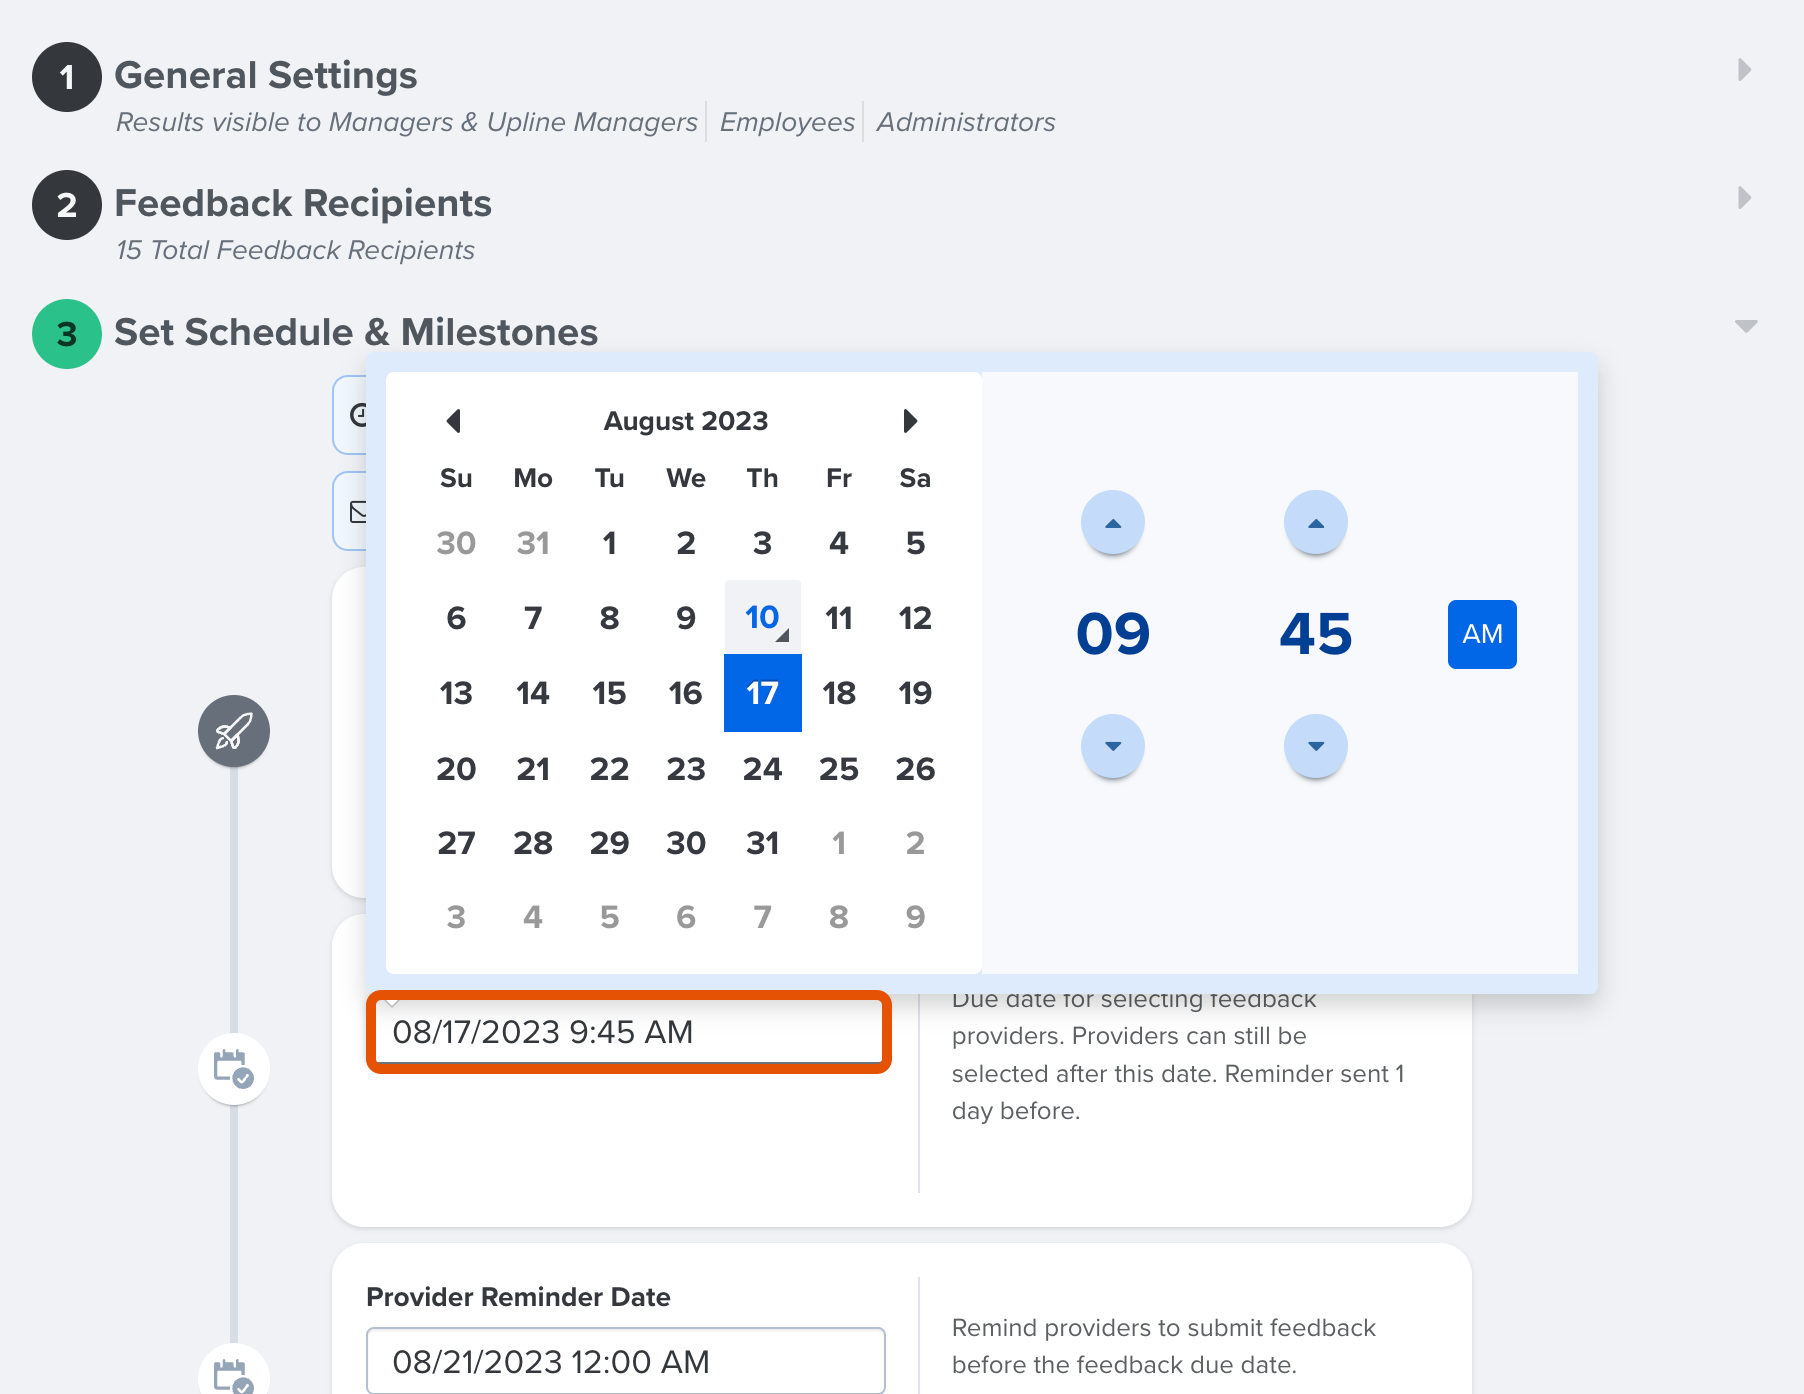
- Click the field with the date and time
- Use the calendar and time selector to update the date and/or time
- Keep in mind the timezone applied to the cycle's schedule- this can be found at the beginning of the schedule
Other key options to be aware of include:
- Click Add Reminder or Delete Reminder to manage the number of cycle reminders
- On the final milestone, Feedback Visible date, the Immediately? option can be enabled if Feedback should be visible as they are received- otherwise, all Feedback is not visible until the Feedback Visible date
- For confidential Feedback, the minimum response threshold must be met to view when Feedback is immediately visible
Once the dates and times are configured for the cycle, click Save and Continue to open the launch modal.
Review & Launch
To launch the Feedback Cycle:
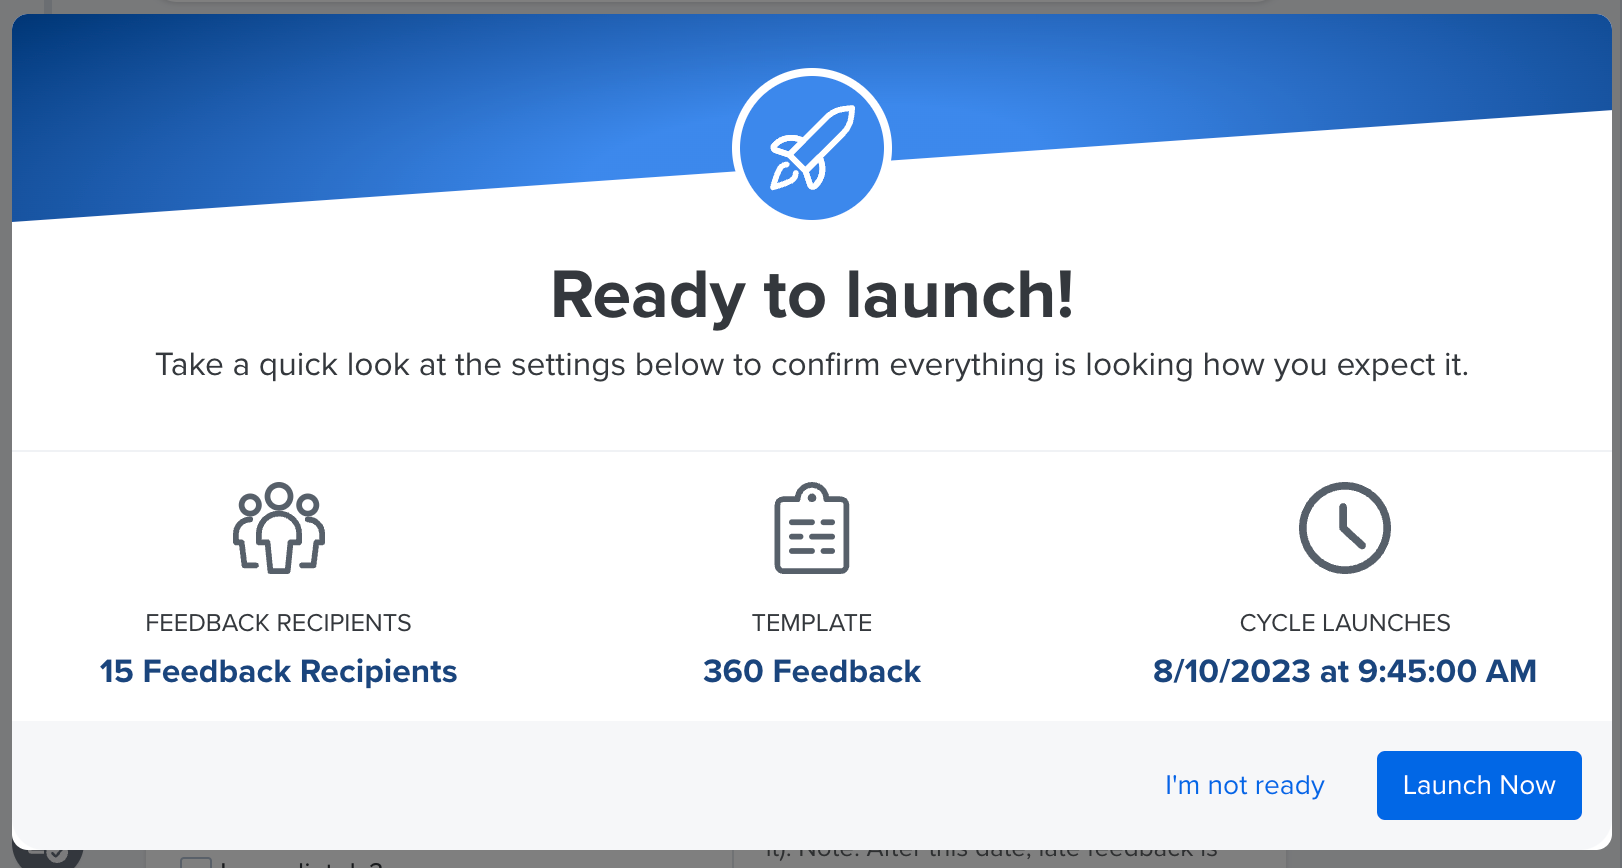
- Click Save & Continue in the Schedule & Milestone step
- Review the cycle details and click Launch Now
Once launched, the cycle will launch and proceed according to the specified schedule.